


Custom Kafka Connect Connectors
In this document we will look at how to configure and provide custom connectors for your Instaclustr managed Kafka Connect cluster.
- Using an AWS S3 bucket as your custom connector storage
- Using Azure storage as your custom connector storage
- Using GCP storage as your custom connector storage
Using an AWS S3 bucket as your custom connector storage
In this example we will be utilizing an AWS CloudFormation template to provision the required S3 bucket, Access Policy, User and User Access Keys required to configure the S3 custom connector storage.
- Create a CloudFormation template file instaclustr_custom_connectors with the below content.123456789101112131415161718192021222324252627282930313233343536373839404142434445464748495051525354555657585960616263646566676869707172737475767778798081828384858687888990919293949596979899100101102103104105106107108109110111112113114115116117118119120121122123124125126127128129130131132133134135136137138139140141142143144145146147148149150151152153154155156157158159160161162163164165166167168169170171172173174175176177178179180181182183184185186187188189190191192193194195196197198199200201202203204205206207208209210211212{"AWSTemplateFormatVersion": "2010-09-09","Metadata": {"AWS::CloudFormation::Designer": {"640c4a44-ac96-4b5d-b51a-3ec830b9a0d2": {"size": {"width": 60,"height": 60},"position": {"x": 60,"y": 90},"z": 1,"embeds": []},"22a0401a-766a-463f-ab7f-f620425fb671": {"size": {"width": 60,"height": 60},"position": {"x": 60,"y": 190},"z": 1,"embeds": [],"dependson": ["640c4a44-ac96-4b5d-b51a-3ec830b9a0d2"]},"3d6c0caa-7928-47aa-af65-a46ab2fd91c0": {"size": {"width": 60,"height": 60},"position": {"x": -30,"y": 280},"z": 1,"embeds": []},"22035e3c-4fbb-4a3d-a4e3-f5d48632651f": {"size": {"width": 60,"height": 60},"position": {"x": 140,"y": 280},"z": 1,"embeds": [],"dependson": ["22a0401a-766a-463f-ab7f-f620425fb671"]}}},"Parameters": {"ResourceNamePrefixParameter": {"Type": "String","Default": "instaclustr-custom-connector-storage","AllowedPattern": "[a-z0-9\\-]+","Description": "Custom connector AWS storage resources name prefix"}},"Outputs": {"AccessKey": {"Value": {"Ref": "InstaclustrCustomConnectorPullUserKey"},"Description": "AWSAccessKeyId of new user"},"SecretKey": {"Value": {"Fn::GetAtt": ["InstaclustrCustomConnectorPullUserKey","SecretAccessKey"]},"Description": "AWSSecretKey of new user"},"S3BucketName": {"Value": {"Ref": "InstaclustrKafkaConnectCustomConnectorsBucket"},"Description": "Name of S3 bucket to hold connector content"}},"Resources": {"InstaclustrKafkaConnectCustomConnectorsBucket": {"Type": "AWS::S3::Bucket","Properties": {"BucketName": {"Fn::Join": ["",[{"Ref": "ResourceNamePrefixParameter"},"-bucket"]]}},"Metadata": {"AWS::CloudFormation::Designer": {"id": "640c4a44-ac96-4b5d-b51a-3ec830b9a0d2"}}},"InstaclustrCustomConnectorPullUser": {"Type": "AWS::IAM::User","Properties": {"UserName": {"Fn::Join": ["",[{"Ref": "ResourceNamePrefixParameter"},"-user"]]}},"Metadata": {"AWS::CloudFormation::Designer": {"id": "22a0401a-766a-463f-ab7f-f620425fb671"}},"DependsOn": ["InstaclustrKafkaConnectCustomConnectorsBucket"]},"InstaclustrCustomConnectorPullUserKey": {"Type": "AWS::IAM::AccessKey","Properties": {"UserName": {"Ref": "InstaclustrCustomConnectorPullUser"},"Status": "Active"},"Metadata": {"AWS::CloudFormation::Designer": {"id": "3d6c0caa-7928-47aa-af65-a46ab2fd91c0"}},"DependsOn": ["InstaclustrCustomConnectorPullUser"]},"InstaclustrCustomConnectorUserAccessPolicy": {"Type": "AWS::IAM::Policy","Properties": {"PolicyName": {"Fn::Join": ["",[{"Ref": "ResourceNamePrefixParameter"},"-policy"]]},"PolicyDocument": {"Statement": [{"Effect": "Allow","Action": ["s3:ListBucket"],"Resource": {"Fn::Join": [ "", [ "arn:aws:s3:::",{ "Ref": "ResourceNamePrefixParameter" }, "-bucket" ] ]}},{"Effect": "Allow","Action": ["s3:GetObject"],"Resource": { "Fn::Join": [ "", [ "arn:aws:s3:::",{ "Ref": "ResourceNamePrefixParameter" }, "-bucket/*" ] ] }},{"Effect": "Allow","Action": ["s3:GetBucketLocation"],"Resource": { "Fn::Join": [ "", [ "arn:aws:s3:::",{ "Ref": "ResourceNamePrefixParameter" }, "-bucket" ] ] }}]},"Users": [{"Ref": "InstaclustrCustomConnectorPullUser"}]},"Metadata": {"AWS::CloudFormation::Designer": {"id": "22035e3c-4fbb-4a3d-a4e3-f5d48632651f"}},"DependsOn": ["InstaclustrCustomConnectorPullUser"]}}}
- Please log into your AWS console and access https://console.aws.amazon.com/cloudformation
- Click on the Create Stack dropdown and select With new resources option

- In the create stack view select Template is Ready for the Prerequisite – Prepare template section
- In the create stack view select Upload a template file for the Specify template section
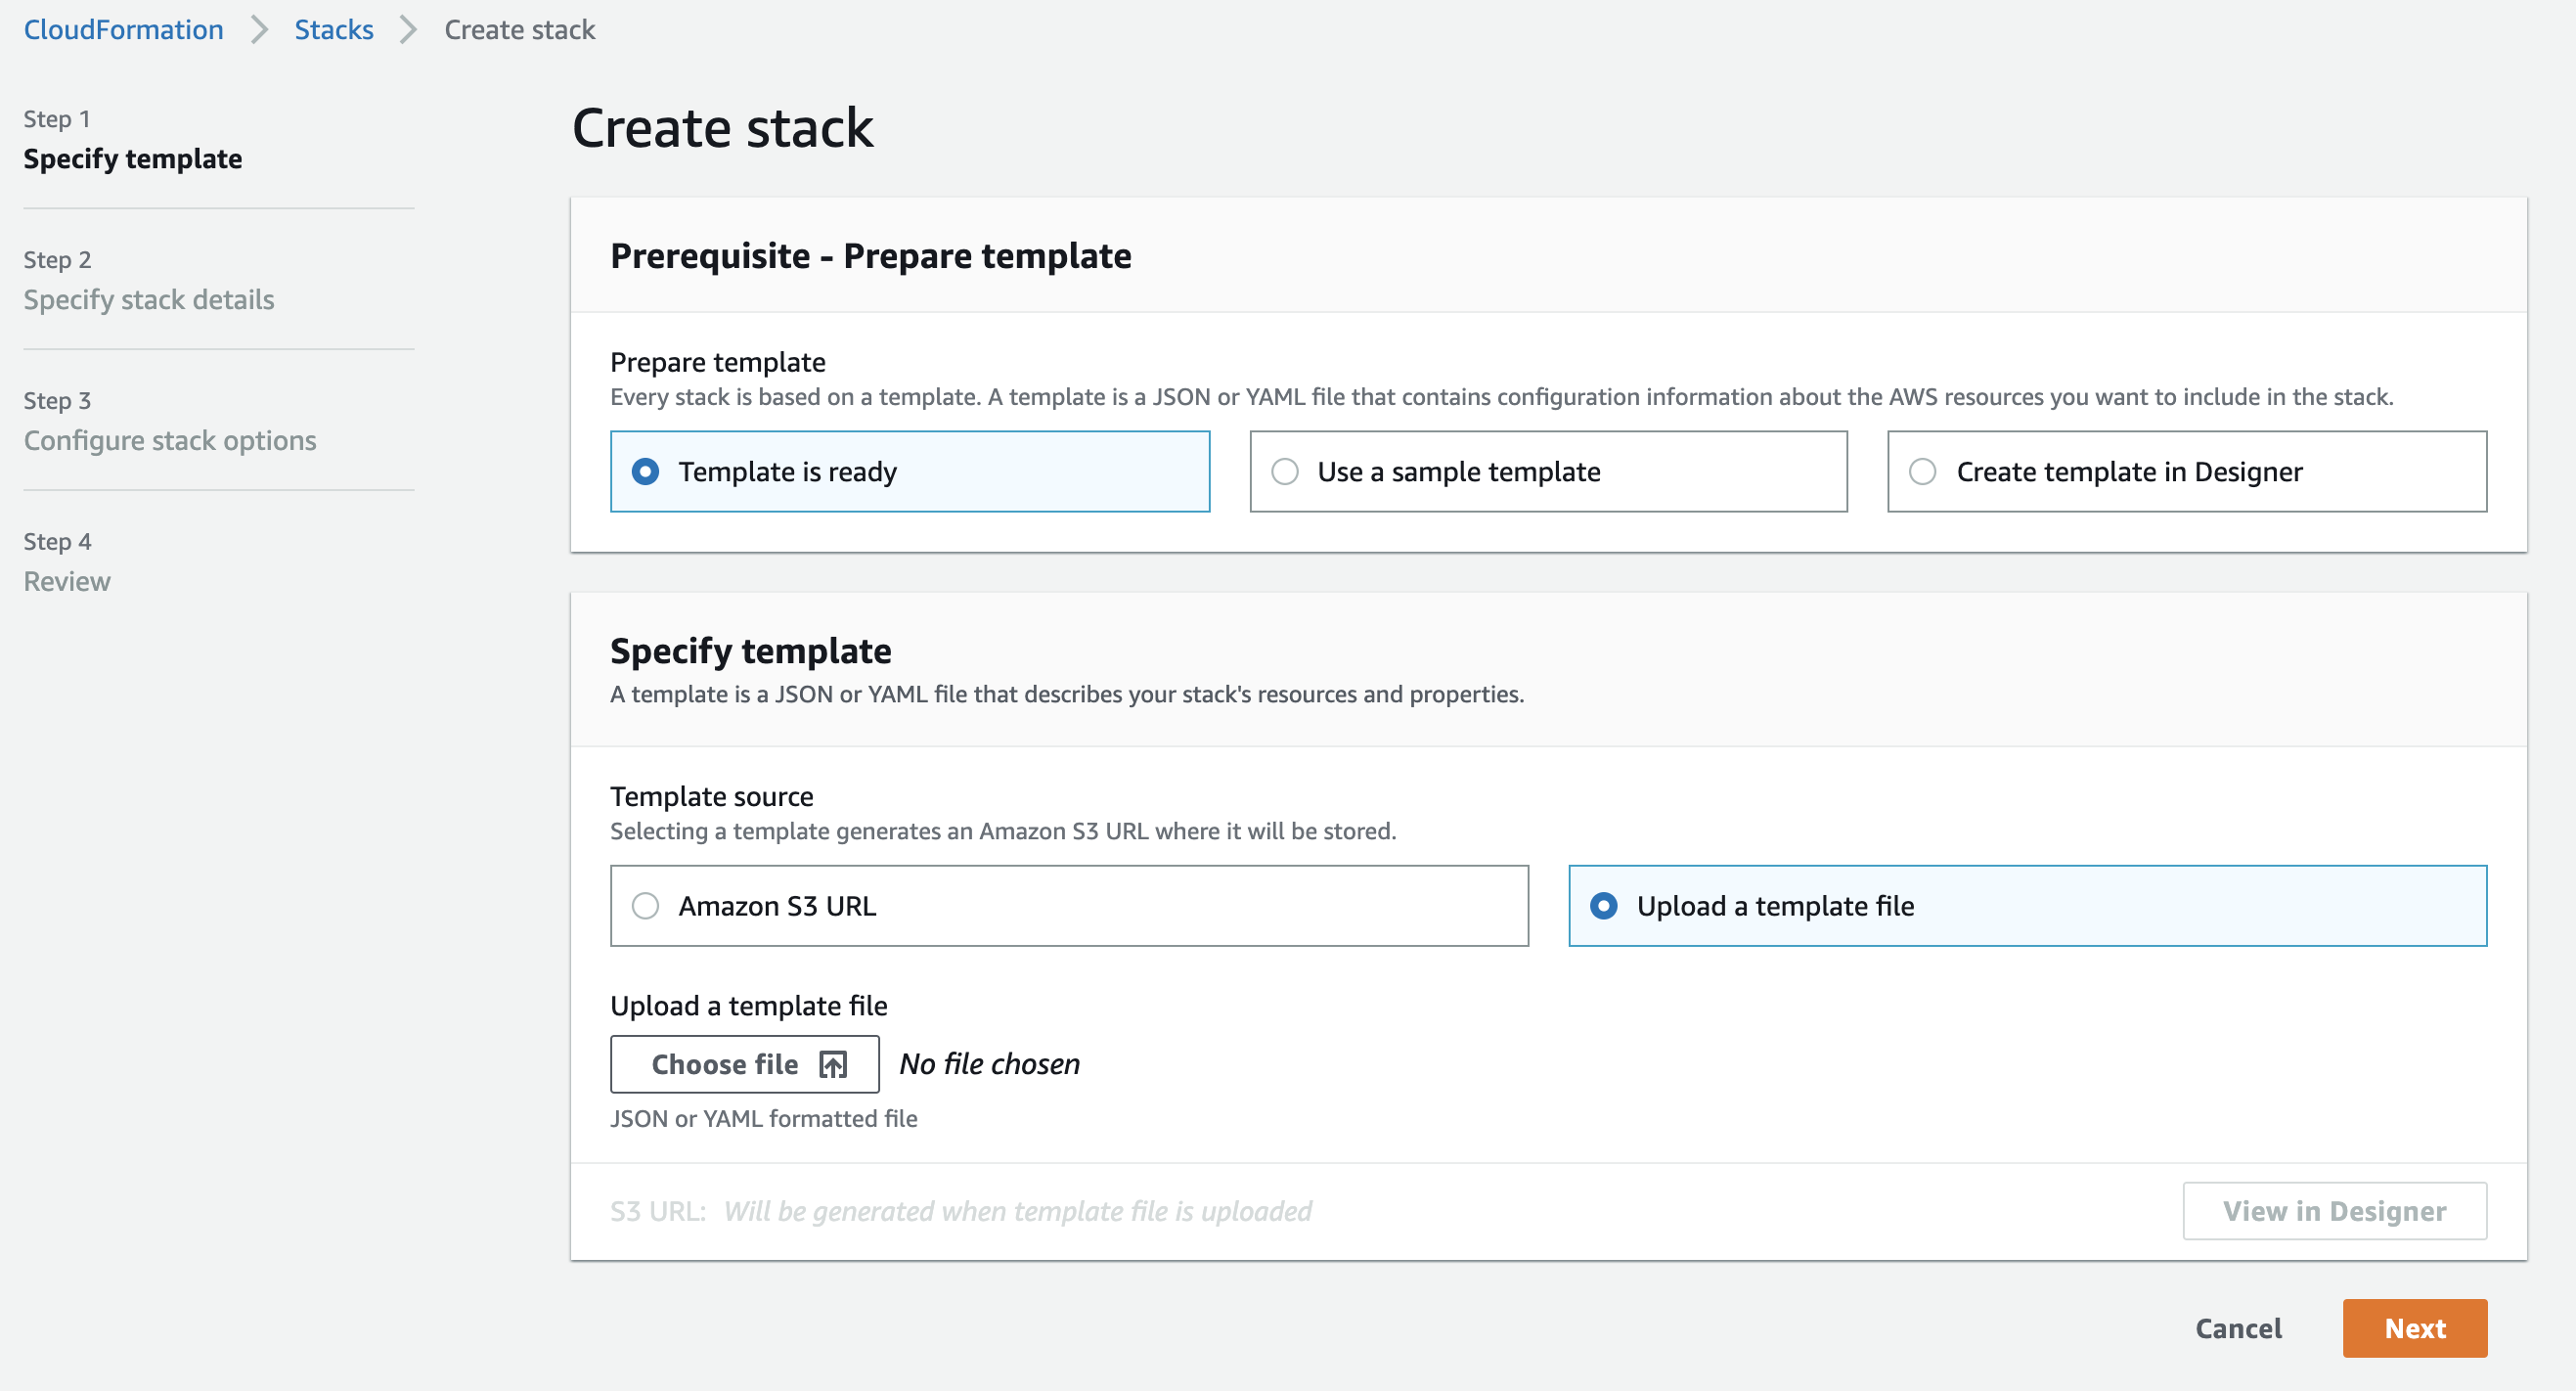

- Upload the previously created instaclustr_custom_connectors CloudFormation template file and enter the resource prefix that would be used for naming the resources created.
- Follow the rest of the create stack wizard according to the requirements of your account.
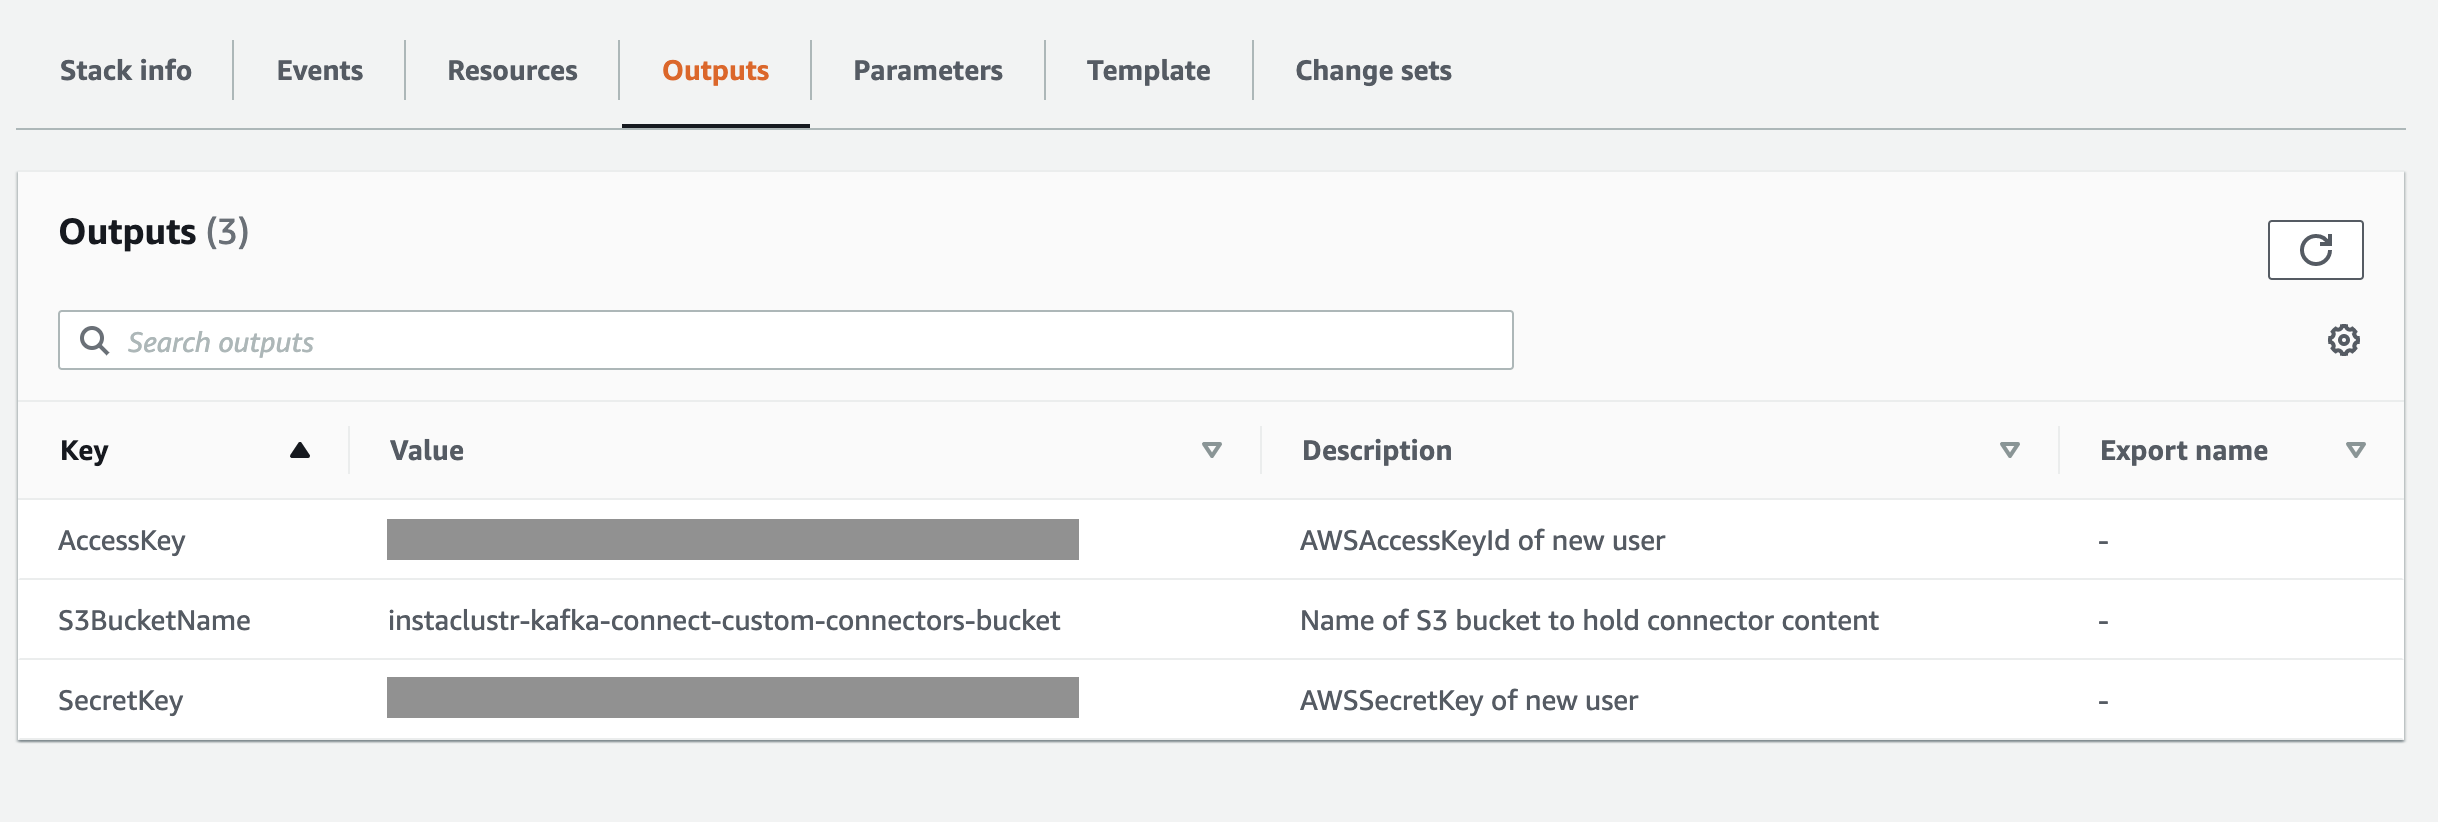
- Once the stack creation is complete you will be able to access the S3 bucket name, the created user access key, and the secret key required to configure the custom connectors with Instaclustr. This will be in the CloudFormation stack output view.

- If you’re using the Instaclustr Console to create a Kafka Connect cluster:
- In the Kafka Connect Setup section, tick the Use Custom Connectors checkbox
- In the Custom Connector Configuration section below the checkbox, choose AWS S3 as your Storage Provider
- Input your S3 bucket name into respective fields
- Choose your preferred access method
- If you want to use access keys to provide access to the Kafka connect cluster, please choose Use AWS access key and provide AWS access key ID, AWS secret access key into respective fields
- If you want to use the IAM role of the instance to provide access, please see Use IAM role and policies to provide the Kafka Connect cluster with access to AWS S3 bucket for further instructions
Alternatively, if you are creating a Kafka Connect cluster using the Provisioning API, you need to add AWS S3 bucket details to the bundle options in the JSON body of the POST request. Below is an example of a request to provision a Kafka Connect cluster and use AWS access key to access the S3 bucket. For IAM role based access, please see Use IAM role and policies to provide the Kafka Connect cluster with access to AWS S3 bucket.
12345678910111213141516171819202122232425262728{"clusterName": "","bundles": [{"bundle": "KAFKA_CONNECT","version": "2.4.1","options": {"targetKafkaClusterId": "","vpcType": "KAFKA_VPC","aws.access.key.id": "","aws.secret.access.key": "","s3.bucket.name": ""}}],"provider": {"name": "AWS_VPC","accountName": null},"nodeSize": "n1-standard-2-10","dataCentre": "us-central1","clusterNetwork": "10.225.0.0/16","privateNetworkCluster": "false","rackAllocation": {"numberOfRacks": "3","nodesPerRack": "1"} ]} - Once you’ve set up a Kafka Connect cluster and an S3 bucket, you will be able to upload connectors to your bucket, see Updating custom connectors for more details.
Using Azure storage as your custom connector storage
In order to use Azure storage for your custom connectors, you will need to create a storage account and container to hold your connectors. You can configure your Instaclustr Kafka Connect cluster when creating it to download these connectors and make them available for use on the cluster. We recommend you create a storage account specifically for this purpose as accessing it will be done via the storage account key.
- Go to the Azure portal and navigate to the “Storage Accounts” section
- Click the ‘Add’ button


- Go through the storage account creation screens. The default options will be sufficient
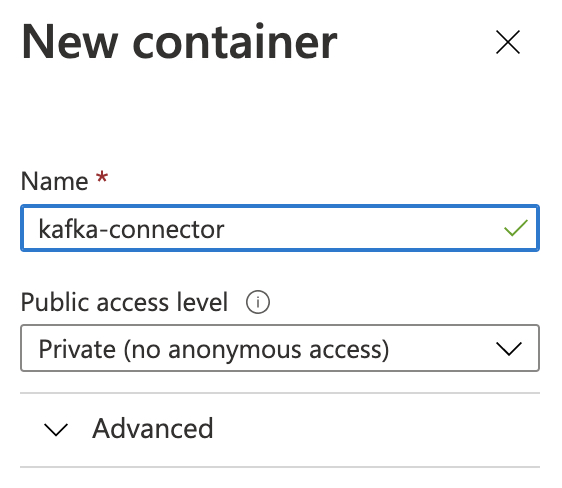
- Navigate to your new storage account, then go to the containers section of your storage account
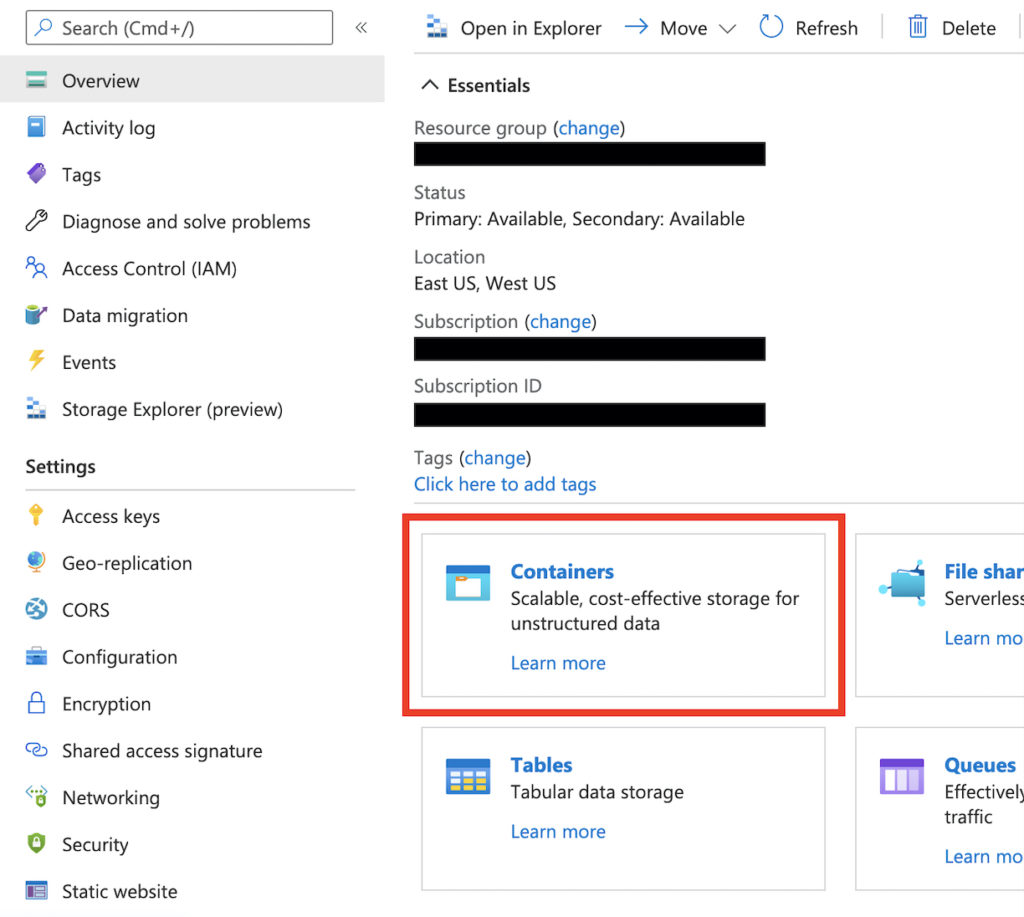

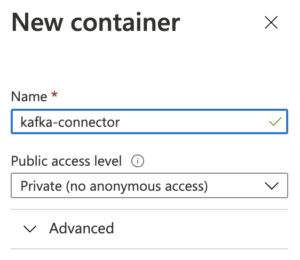
- Create a new container with the default private access

- Upload your connectors


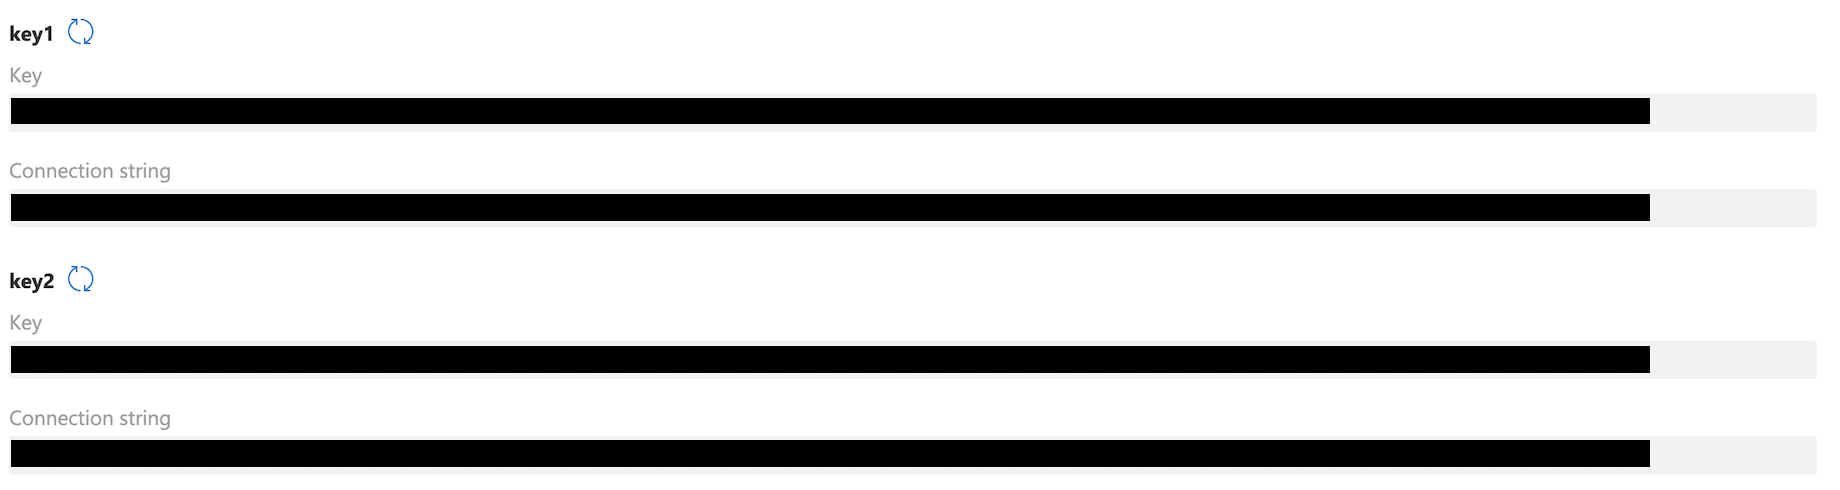
- Navigate back to your storage account, and take a note of the storage account access key
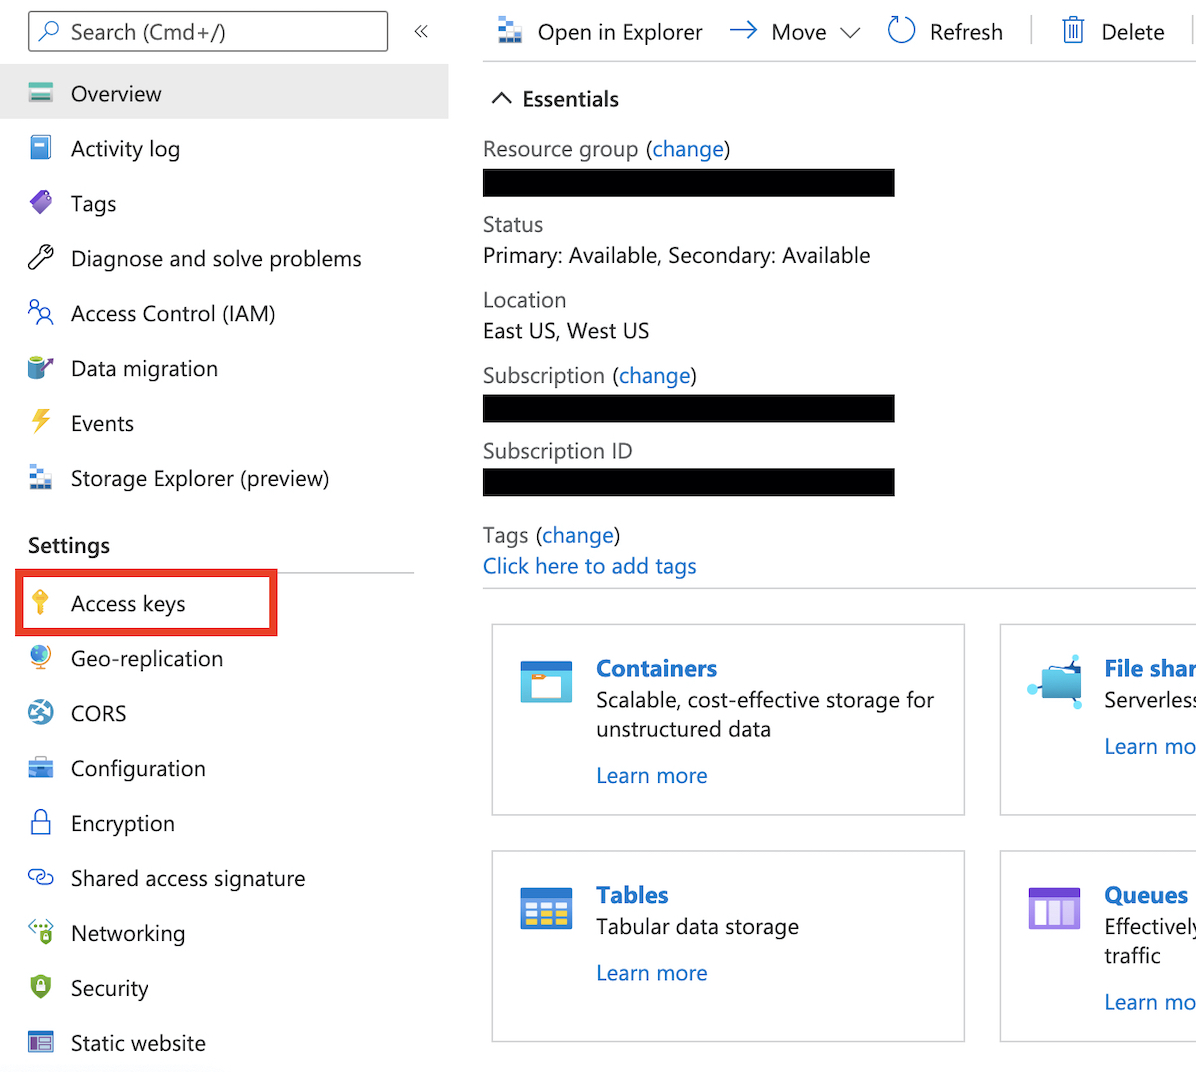


- When creating your Instaclustr Kafka Connect cluster, you will need your storage account name, your container name, and your storage account access key.If you are using the Instaclustr Console:
- In the Kafka Connect Setup section, tick the Use Custom Connectors checkbox
- In the Custom Connector Configuration section below the checkbox, choose Azure storage as your Storage Provider
- Then input Azure storage account name, Azure storage account key, and Azure storage container name into respective fields
If you are using the Provisioning API, you have to add Azure storage details with keys azure.storage.account.name, azure.storage.account.key, and azure.storage.container.name to the Kafka Connect bundle options in the JSON body of the POST request. Example:
12345678910111213141516171819202122232425262728{"clusterName": "","bundles": [{"bundle": "KAFKA_CONNECT","version": "2.4.1","options": {"targetKafkaClusterId": "","vpcType": "KAFKA_VPC","azure.storage.account.name": "","azure.storage.account.key": "","azure.storage.container.name": ""}}],"provider": {"name": "AWS_VPC","accountName": null},"nodeSize": "n1-standard-2-10","dataCentre": "us-central1","clusterNetwork": "10.225.0.0/16","privateNetworkCluster": "false","rackAllocation": {"numberOfRacks": "3","nodesPerRack": "1"} ]} - You can update your custom connectors later, see Updating custom connectors for more details.
Using GCP storage as your custom connector storage
In order to use GCP Storage for your custom connectors, you will need to create a service account and a storage bucket to hold your connectors.
You can then configure your Instaclustr Kafka Connect cluster in the creation page or in your provisioning api request, to download these connectors stored in the defined bucket and make them available for use on the cluster. We recommend you create a service account specifically for this purpose as accessing it will be done via the service account key.
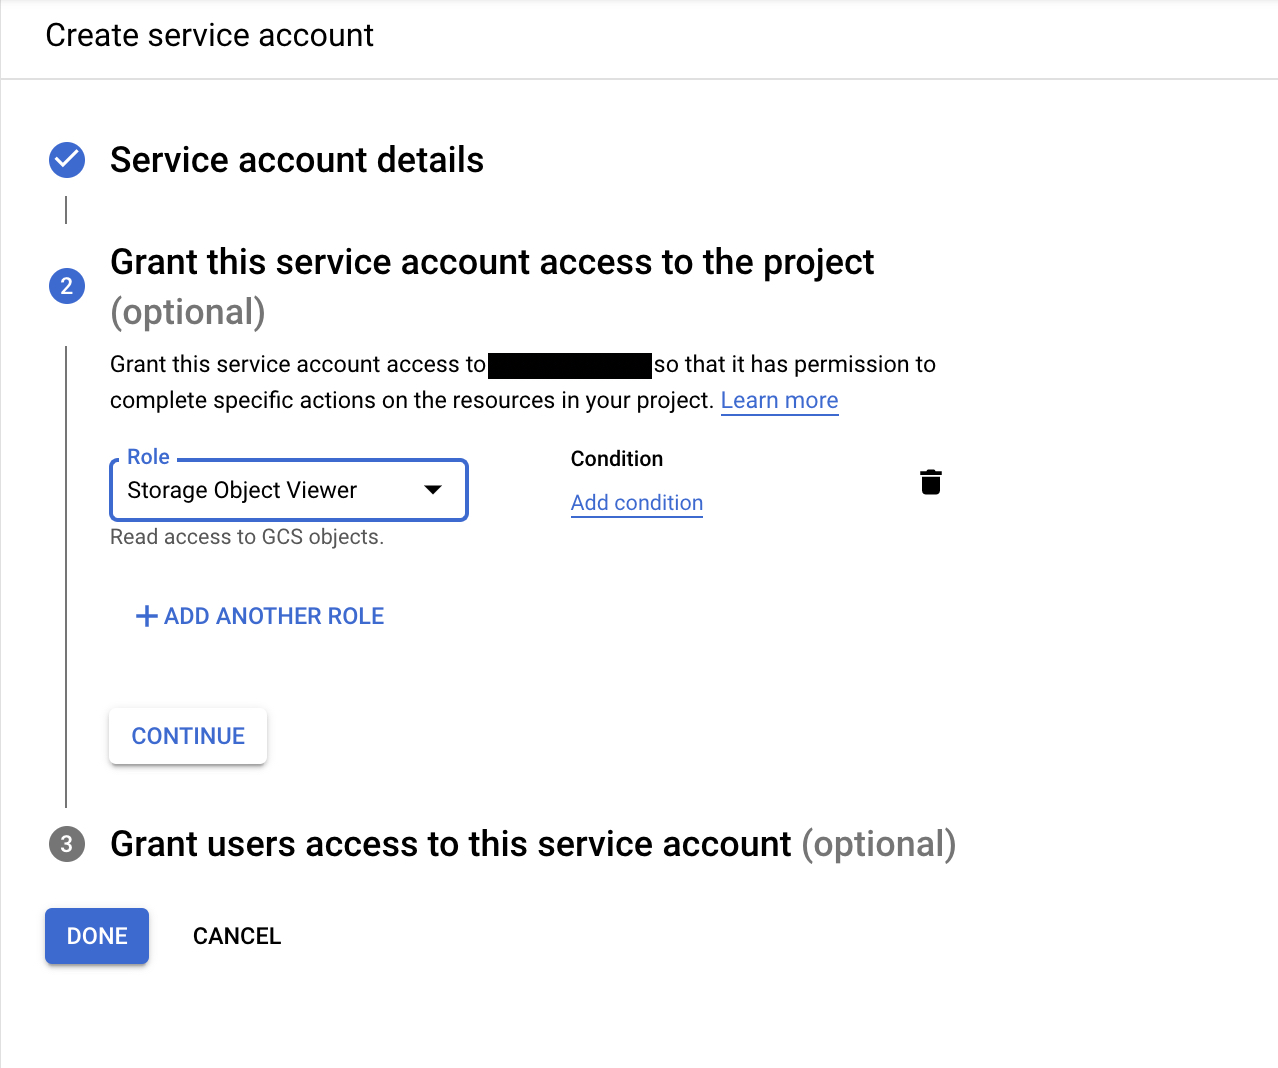
- Go to the IAM page in your GCP Console, and click into the Service Accounts section.
- Create a service account by clicking the add button.
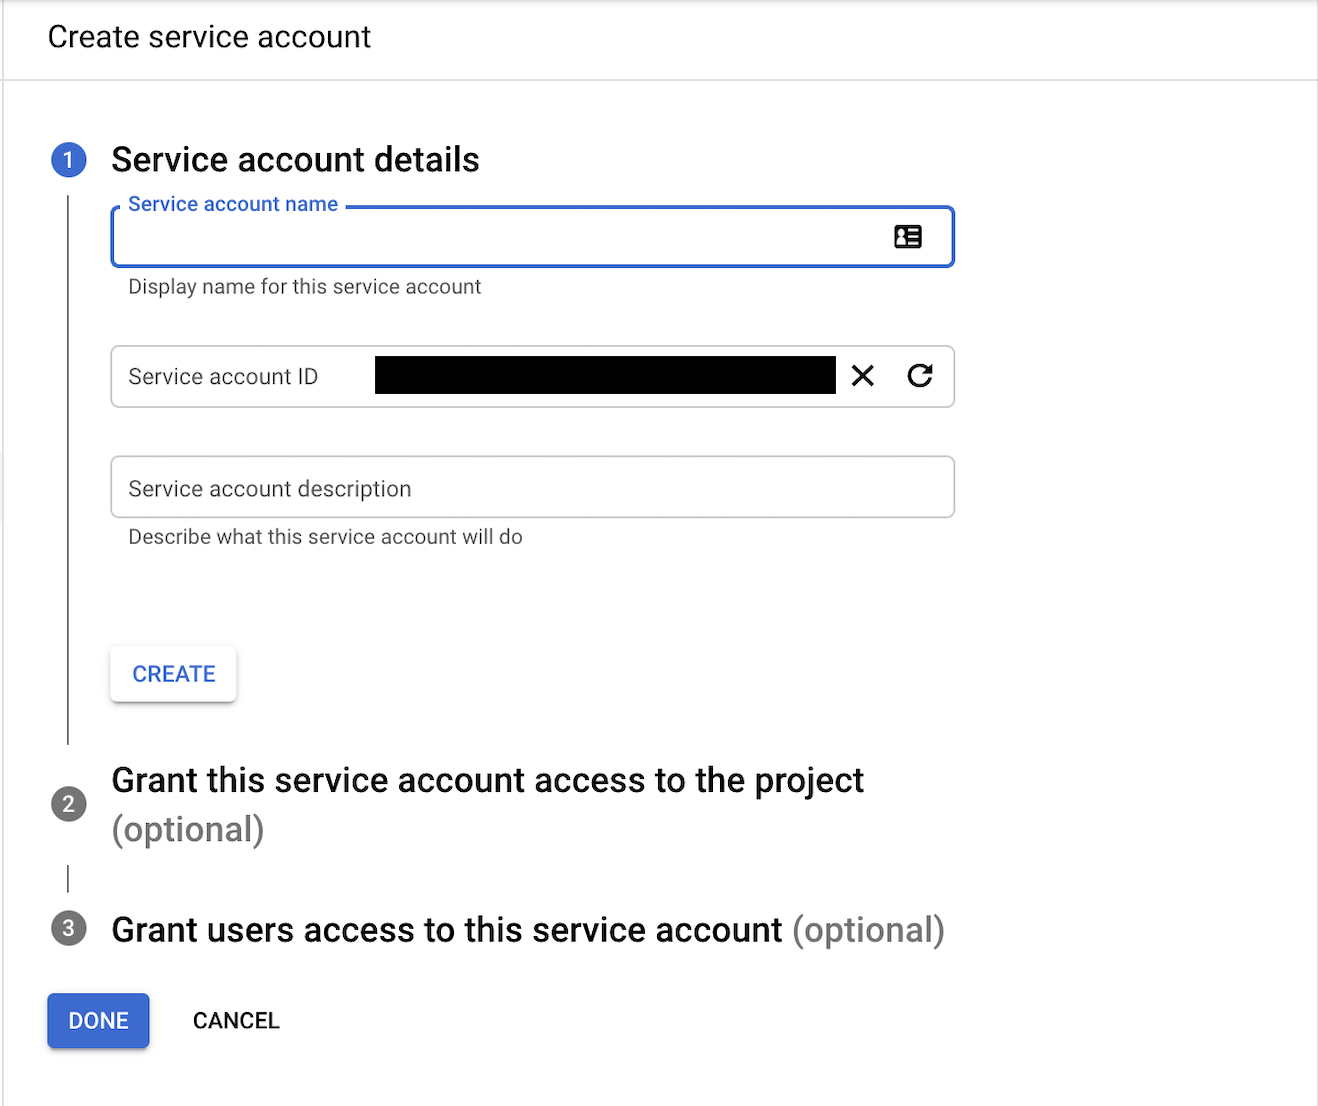

- In the permission section, assign this service account Storage Object Viewer role.

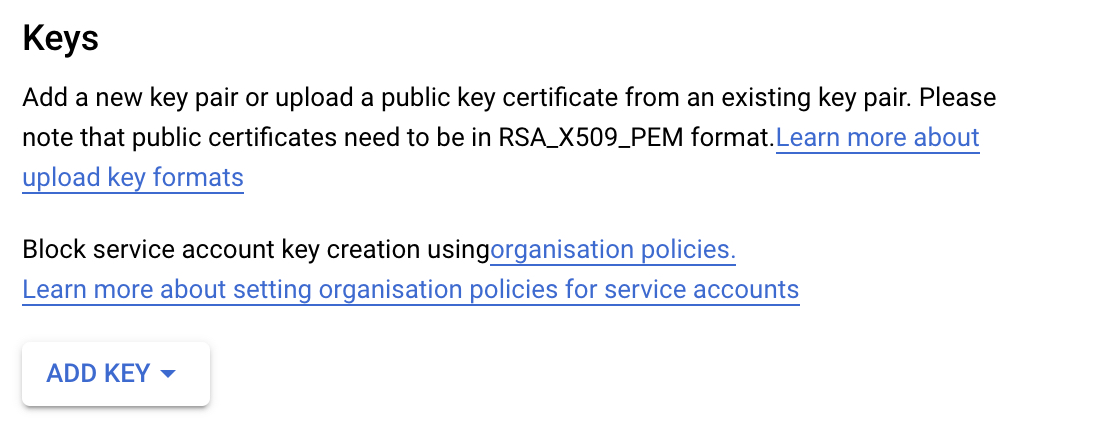
- Once the service account is created, you need to add a key to authenticate with it. This can be done in the Edit page of that service account, you need to create a new key in JSON format. This will trigger a download of a JSON file to your local computer. This file is needed during the cluster creation process.

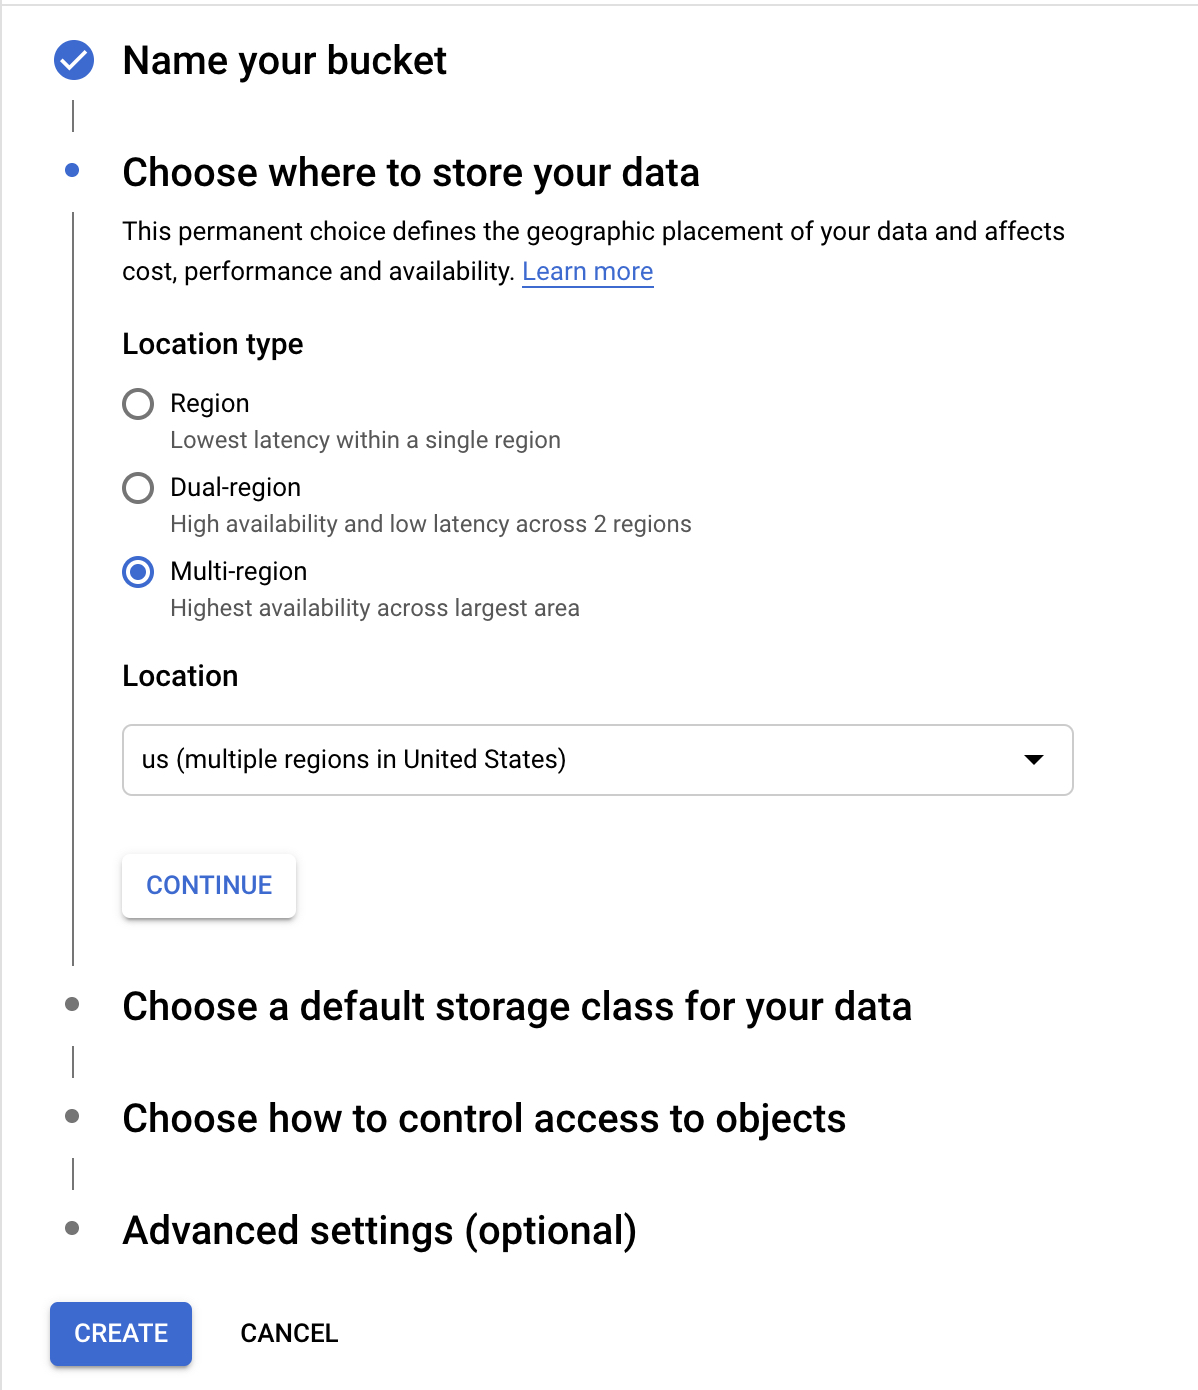
- Next is to create a storage bucket to put your custom connectors in if you haven’t got one yet, you can do this in the Storage page.

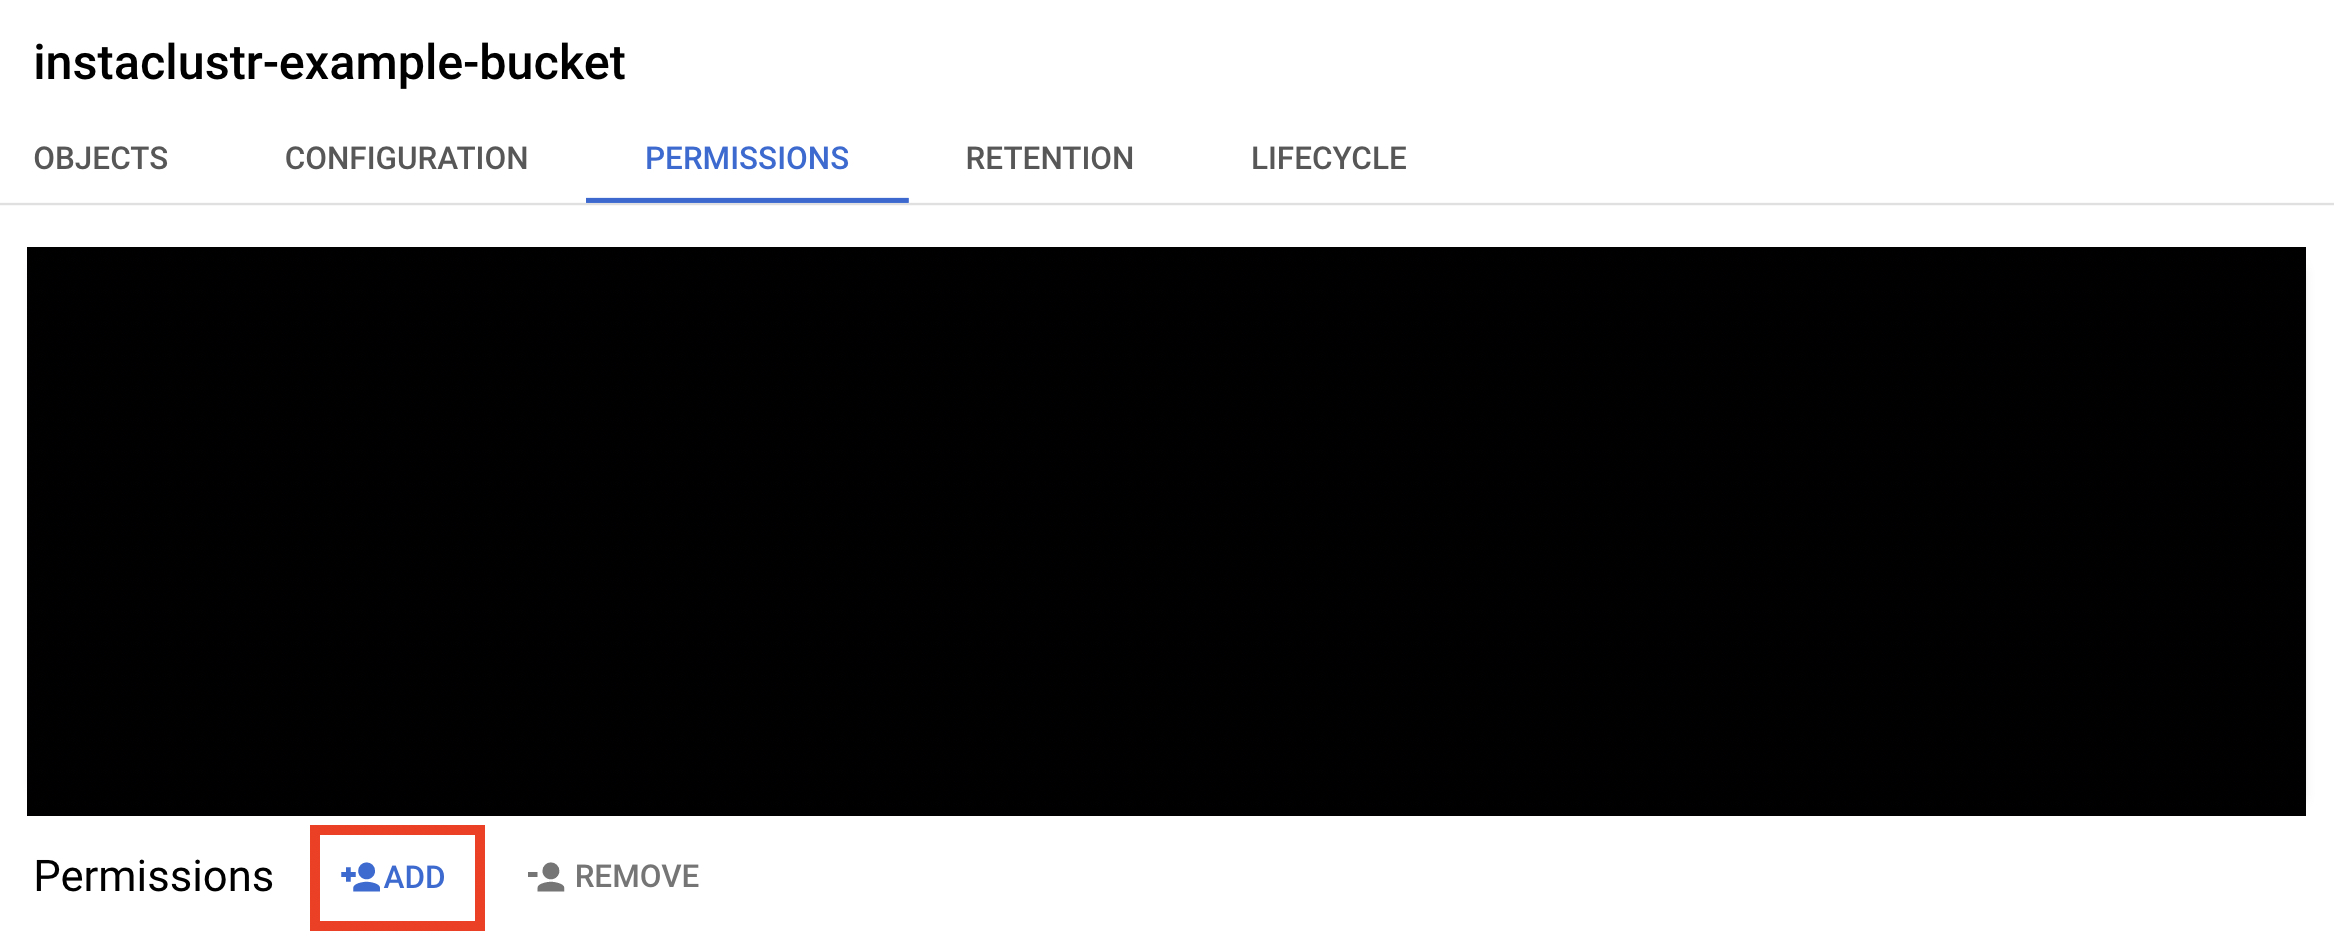
- The service account you just created needs to be added to this bucket so that the service account can read from it.

- During the cluster creation process, you will need the project_id, private_key_id, private_key, client_email, client_id from the JSON file of the key you downloaded and the bucket name.
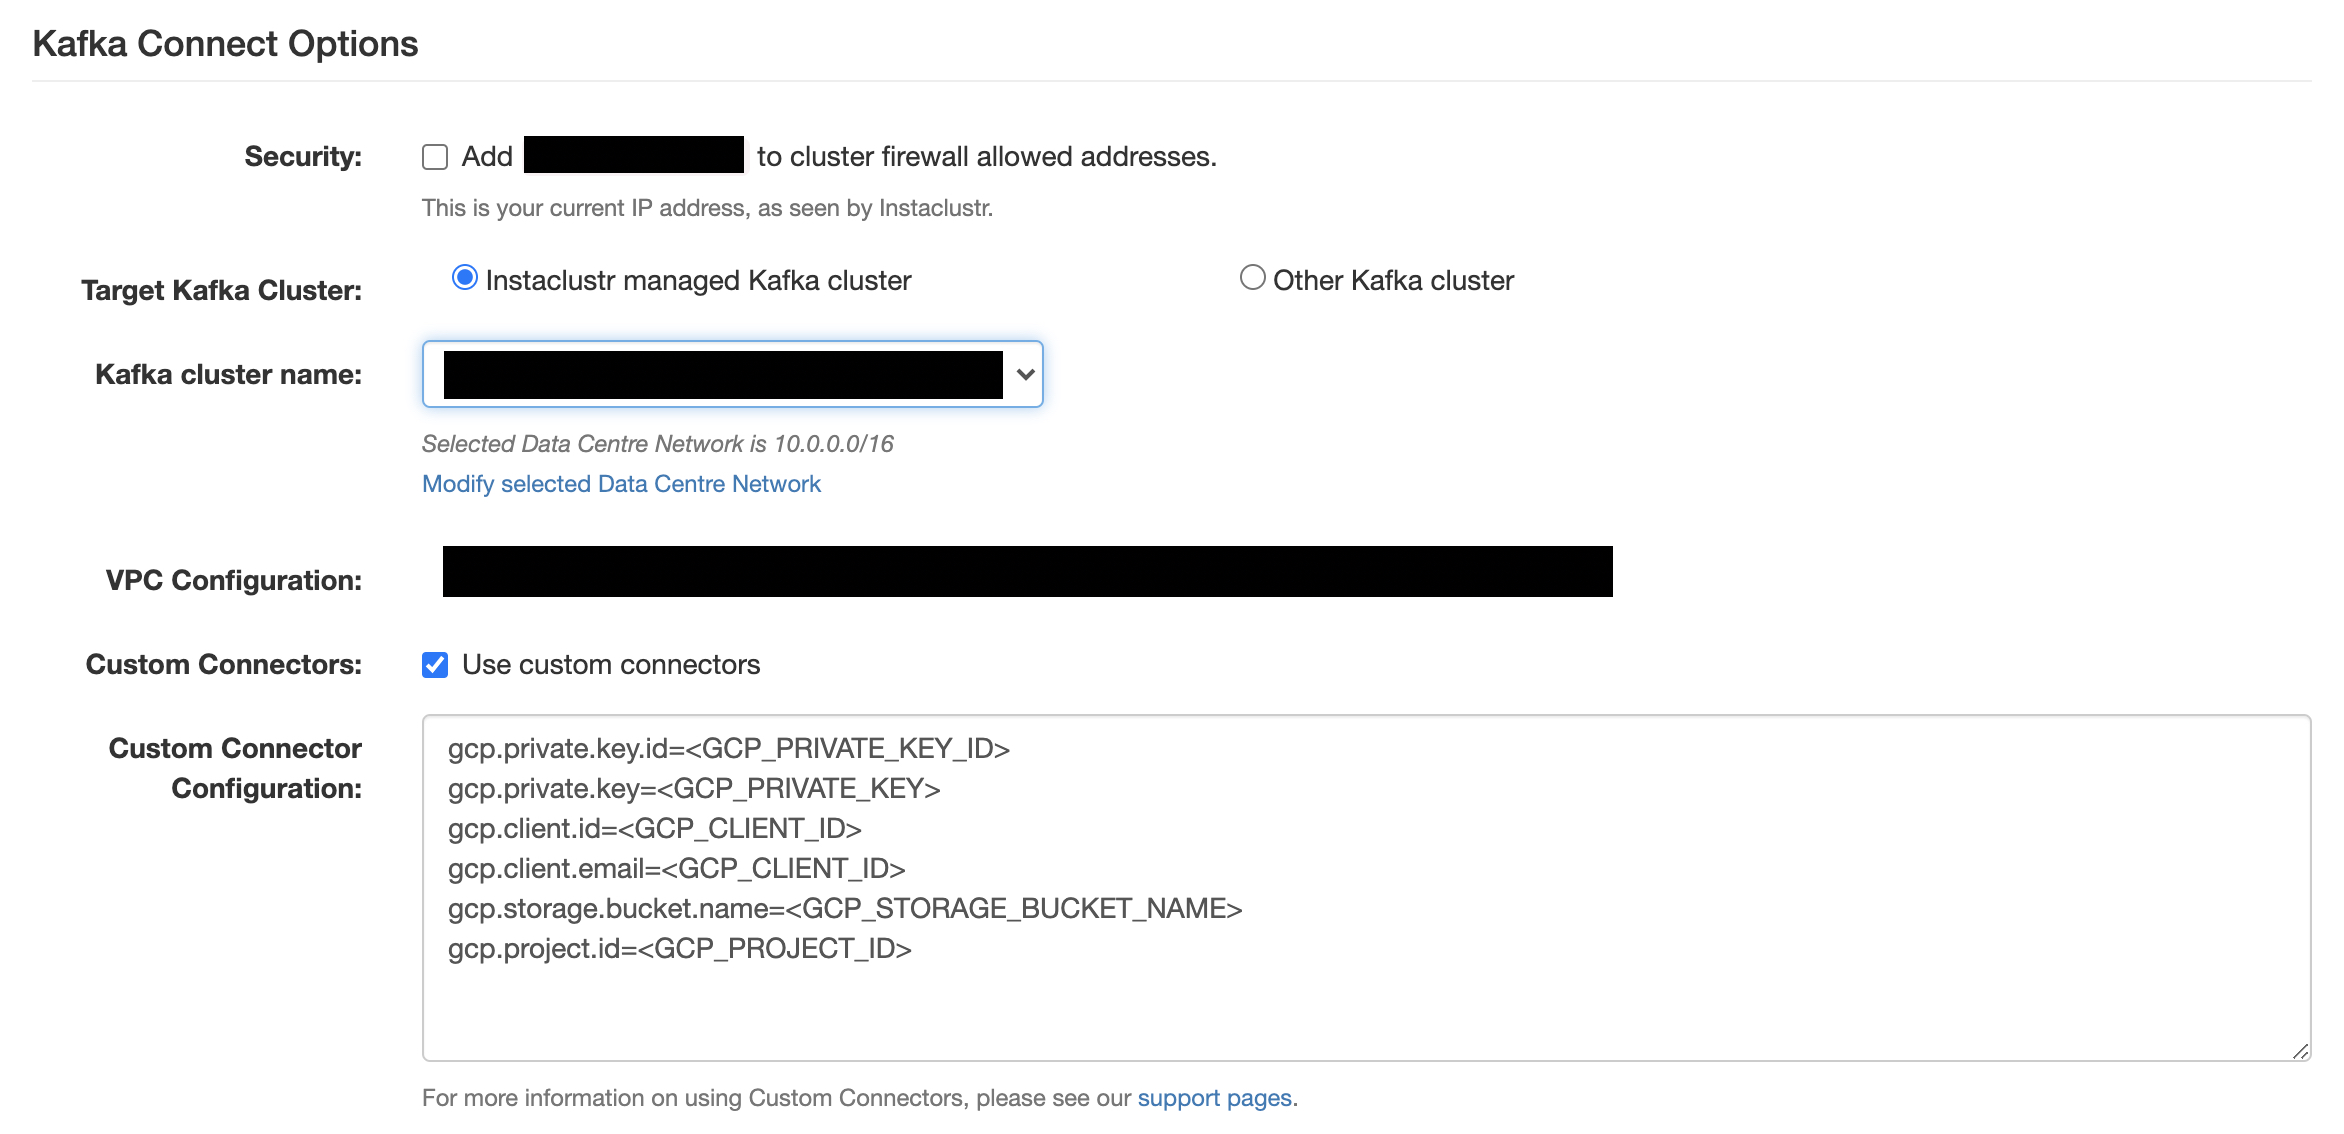

- If you are using the Instaclustr Console:
- in the Kafka Connect Setup section, tick the Use Custom Connectors checkbox
- In the Custom Connector Configuration section below the checkbox, choose GCP storage as your Storage Provider
- Then click Select a GCP key file and select the JSON key file you downloaded. The details from the JSON file will be automatically input to the respective fields.
Alternatively, you can manually input those details to the fields.
If you are using the Provisioning API, you need to add the GCP storage details with keys gcp.private.key.id, gcp.private.key, gcp.client.email, gcp.client.id, gcp.storage.bucket.name, and gcp.project.id in the options object for the Kafka Connect bundle. Below is a sample Kafka Connect cluster creation request body with the GCP storage options included:
12345678910111213141516171819202122232425262728293031{"clusterName": "","bundles": [{"bundle": "KAFKA_CONNECT","version": "2.4.1","options": {"targetKafkaClusterId": "","vpcType": "KAFKA_VPC","gcp.private.key.id": "","gcp.private.key": "","gcp.client.email": "","gcp.client.id": "","gcp.storage.bucket.name": "","gcp.project.id": ""}}],"provider": {"name": "GCP","accountName": null},"nodeSize": "n1-standard-2-10","dataCentre": "us-central1","clusterNetwork": "10.225.0.0/16","privateNetworkCluster": "false","rackAllocation": {"numberOfRacks": "3","nodesPerRack": "1"} ]} - You can add more connectors to the bucket later, please refer to Updating custom connectors for more details.