Why this series exists
Every year, teams spend countless hours clicking through cloud consoles, manually provisioning infrastructure, and hoping they remember the exact configuration when it’s time to rebuild. Then something breaks at 2 a.m. and nobody remembers which checkbox was checked six months ago.
There’s a better way.
This series walks you through building a complete streaming analytics pipeline: Apache Kafka, Apache Kafka Connect, and ClickHouse—entirely through Terraform. No clicking. No guessing. Just code that you can version, review, and reproduce.
By the end of the three parts, you’ll have infrastructure that deploys in minutes and can be recreated identically in any environment.
What we’re building
The full pipeline looks like this:
- Part 1 (this article): Deploy a managed Kafka cluster
- Part 2: Add ClickHouse for analytics and Kafka Connect to bridge them
- Part 3: Integrate with AWS VPC for private networking
Today, we start simple: a production-ready Kafka cluster deployed with a single Terraform apply.
Who uses this pattern?
This isn’t theoretical. Companies processing millions of events daily rely on Kafka pipelines backed by infrastructure-as-code:
- LinkedIn created Kafka to handle 1.4 trillion messages per day across their platform
- Uber uses Kafka for real-time pricing, dispatch, and trip tracking
- Netflix processes billions of events through Kafka for personalization and monitoring
What these companies have in common: they don’t provision infrastructure by hand. Everything is automated, versioned, and repeatable.
Prerequisites
Before we begin
We’re about to write a Terraform configuration that talks to the Instaclustr API, provisions a Kafka cluster on AWS, and opens a firewall rule so that you can connect to it. To do that, you’ll need four things:
- Terraform installed (version 1.0+)
- An Instaclustr account—sign up for free
- An API key from Instaclustr Console -> Account -> API Keys
- Your public IP address—run curl ifconfig.me from a terminal, or visit ipchicken.com in your browser
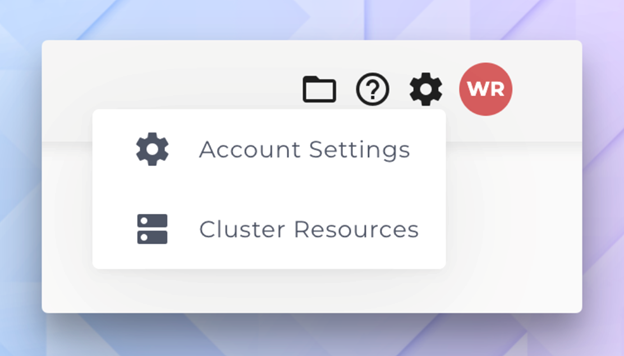
Account settings—gear icon dropdown reveals the account settings page

API Keys management page—create your Provisioning API key
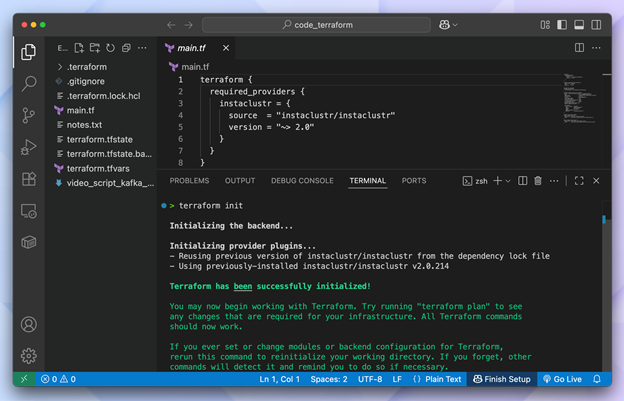
The complete Terraform configuration
Create a new directory and add two files:
Terraform reads all .tf files in a directory as a single configuration, so we need to keep everything organized in its own folder. The main.tf file defines what infrastructure to create and terraform.tfvars holds your credentials and personal settings, which are kept separate so that you never accidentally commit secrets to version control. So those are the two files that we’ll create right now to get started:
main.tf
|
1 2 3 4 5 6 7 8 9 10 11 12 13 14 15 16 17 18 19 20 21 22 23 24 25 26 27 28 29 30 31 32 33 34 35 36 37 38 39 40 41 42 43 44 45 46 47 48 49 50 51 52 53 54 55 56 57 58 59 60 61 62 63 64 65 66 67 68 69 70 71 72 73 74 75 76 77 78 79 80 81 82 83 84 85 86 87 88 89 90 |
terraform { required_providers { instaclustr = { source = "instaclustr/instaclustr" version = "~> 2.0" } } } # ================================================================= # Variables # ================================================================= variable "instaclustr_terraform_key" { description = "Instaclustr API key (get from Console -> Account -> API Keys)" type = string sensitive = true } variable "my_ip_address" { description = "Your IP address for firewall rules (CIDR format, e.g., 203.0.113.10/32)" type = string } # ================================================================= # Provider # ================================================================= provider "instaclustr" { terraform_key = var.instaclustr_terraform_key } # ================================================================= # Kafka Cluster # ================================================================= resource "instaclustr_kafka_cluster_v3" "kafka" { name = "streaming-kafka-cluster" description = "Kafka cluster created with Terraform" kafka_version = "4.1.1" sla_tier = "NON_PRODUCTION" auto_create_topics = true allow_delete_topics = true client_to_cluster_encryption = false private_network_cluster = false pci_compliance_mode = false default_number_of_partitions = 3 default_replication_factor = 3 data_centre { cloud_provider = "AWS_VPC" name = "AWS_VPC_US_EAST_1" network = "10.0.0.0/16" region = "US_EAST_1" number_of_nodes = 3 node_size = "KFK-DEV-t4g.small-5" } } # ================================================================= # Firewall Rules # ================================================================= resource "instaclustr_cluster_network_firewall_rules_v2" "kafka_firewall" { cluster_id = instaclustr_kafka_cluster_v3.kafka.id firewall_rule { network = var.my_ip_address type = "KAFKA" } } # ================================================================= # Outputs # ================================================================= output "kafka_cluster_id" { description = "Kafka cluster ID" value = instaclustr_kafka_cluster_v3.kafka.id } output "kafka_cluster_status" { description = "Kafka cluster status" value = instaclustr_kafka_cluster_v3.kafka.status } output "kafka_bootstrap_servers" { description = "Kafka bootstrap servers - use these to connect" value = join(",", [for node in instaclustr_kafka_cluster_v3.kafka.data_centre[0].nodes : "${node.public_address}:9092"]) } |
terraform.tfvars
NOTE: Terraform automatically loads variables from this file, so you don’t need to pass them in the command line every time. Keep this file out of version control because it contains your API key.
|
1 2 |
instaclustr_terraform_key = "your-api-key-here" my_ip_address = "YOUR.IP.ADDRESS.HERE/32" |
Replace the values with your actual API key and IP address from the pre-req section above (remember to add /32 at the end of your IP).
Understanding the configuration
Let’s break down what each section does—because copying code without understanding it is how technical debt is born.
The cluster resource
|
1 2 3 4 5 6 |
resource "instaclustr_kafka_cluster_v3" "kafka" { name = "streaming-kafka-cluster" kafka_version = "4.1.1" sla_tier = "NON_PRODUCTION" ... } |
The instaclustr_kafka_cluster_v3 resource is the core of our deployment. A few key decisions here:
kafka_version = "4.1.1": We’re using Kafka 4.1.1, which includes KRaft mode (https://kafka.apache.org/40/getting-started/upgrade/”>no more ZooKeeper dependency).This simplifies operations significantly.sla_tier = "NON_PRODUCTION": For learning and development. Production workloads should use"PRODUCTION"for higher availability guarantees.auto_create_topics = true: Topics are created automatically when a producer first writes to them. Convenient for development; you may want to disable this in production for tighter control.
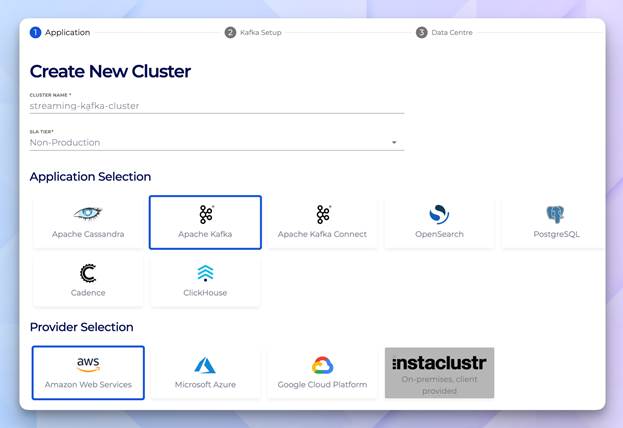
Create New Cluster—this is what you would see if you were doing this in Instaclustr’s Management Console. However, with Terraform you skip this entirely because the code handles it for you.
The data centre block
|
1 2 3 4 5 6 7 8 |
data_centre { cloud_provider = "AWS_VPC" name = "AWS_VPC_US_EAST_1" network = "10.0.0.0/16" region = "US_EAST_1" number_of_nodes = 3 node_size = "KFK-DEV-t4g.small-5" } |
This is where Terraform’s declarative approach shines. You’re saying what you want, not how to build it:
network = "10.0.0.0/16": The CIDR block for the cluster’s VPC. Each Instaclustr cluster gets its own isolated network.number_of_nodes = 3: Three brokers for fault tolerance. Kafka’s replication ensures data survives node failures.node_size = "KFK-DEV-t4g.small-5": A development-sized instance. For production, you’d scale up based on throughput requirements.
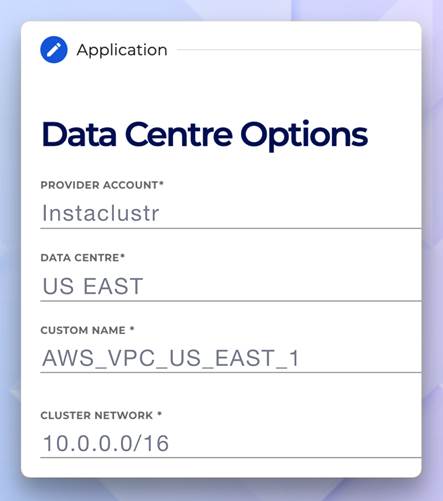
Data centre options—shows provider, data centre, custom name, cluster network
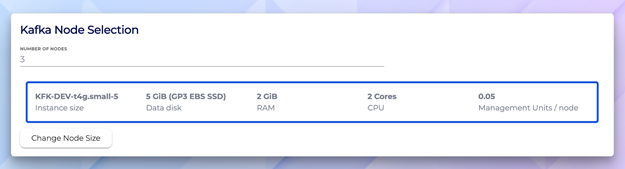
Kafka node selection—KFK-DEV-t4g.small-5 with 5 GiB disk, 2 GiB RAM, and 2 cores
Why firewall rules matter
|
1 2 3 4 5 6 7 8 |
resource "instaclustr_cluster_network_firewall_rules_v2" "kafka_firewall" { cluster_id = instaclustr_kafka_cluster_v3.kafka.id firewall_rule { network = var.my_ip_address type = "KAFKA" } } |
Instaclustr clusters are secure by default – nothing can connect until you explicitly allow it. The cluster_id reference uses Terraform’s dependency system: the firewall rule won’t be created until the cluster exists.
Notice the type = "KAFKA" – this opens the Kafka broker port (9092). Other types like "KAFKA_CONNECT" or "CLICKHOUSE" open different ports for different services.
Deploy the cluster
With your files in place, run:
|
1 2 3 |
terraform init terraform plan terraform apply |
Terraform apply—execution plan showing all config values:
Kafka 4.1.1, 3 partitions, 3 replication factor, and streaming-kafka-cluster
The plan output shows exactly what Terraform will create. Review it, then type yes to proceed.
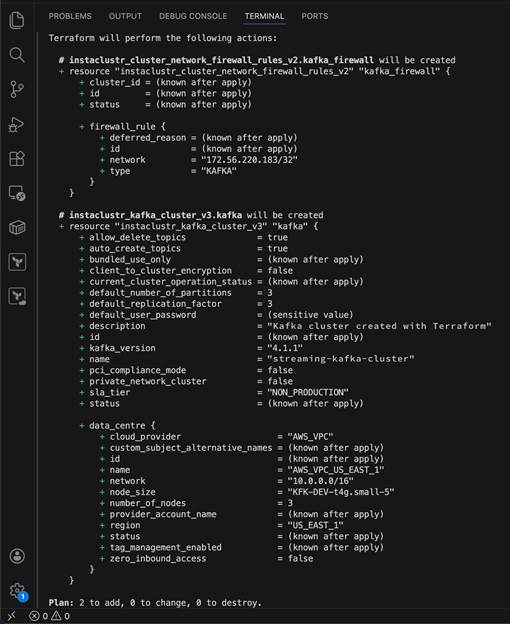
Each green + in the plan output means Terraform will create that attribute or resource. At this step you can review what’s about to be provisioned before anything happens. Values marked (known after apply) are generated by the Instaclustr API once the cluster exists (like the cluster ID and status).
The (sensitive value) next to default_user_password means Terraform is hiding it from the output to protect credentials. In this example, notice the bottom shows Plan: 2 to add, 0 to change, 0 to destroy. This just confirms exactly what will happen: 2 new resources (the Kafka cluster and the firewall rule), nothing will get modified, and nothing will get deleted.
Deployment takes 10-15 minutes. When that completes, then you’ll see outputs like:
|
1 2 |
kafka_bootstrap_servers = "100.29.129.26:9092,98.95.193.141:9092,100.51.10.12:9092" kafka_cluster_status = "RUNNING |
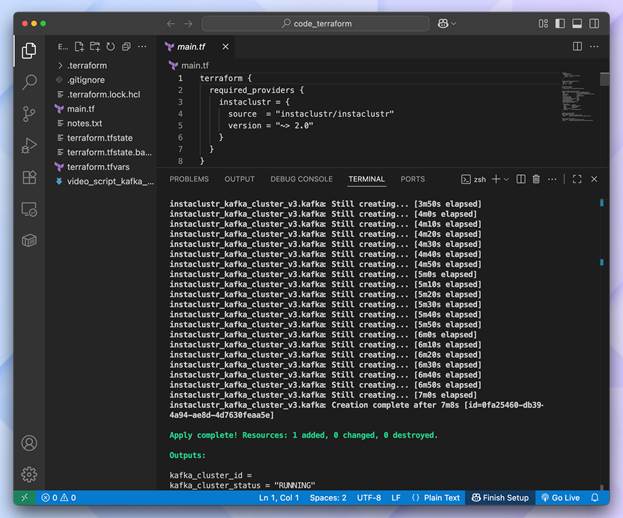
Creation complete — Apply is complete with cluster ID and RUNNING status
Explore your cluster
Once provisioning finishes, the cluster appears in your Instaclustr console dashboard with built-in monitoring—no set up required.
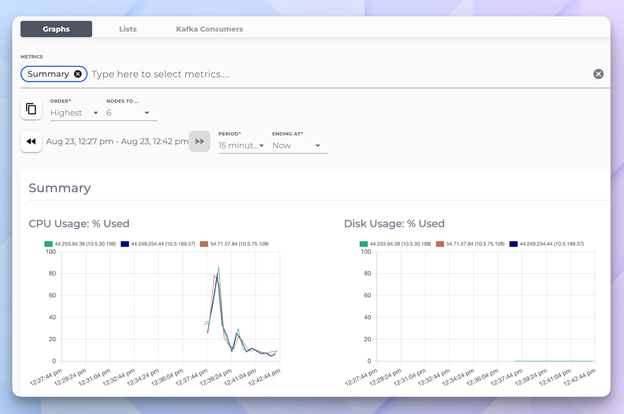
Monitoring dashboard—real time CPU usage and disk utilization graphs across all 3 nodes.
Test your cluster
With the cluster running, let’s verify it works. If you have the Kafka CLI tools installed:
|
1 2 3 4 5 6 |
# Create a test topic kafka-topics.sh --bootstrap-server <BOOTSTRAP_SERVERS> \ --create --topic test-topic --partitions 3 --replication-factor 3 # List topics kafka-topics.sh --bootstrap-server <BOOTSTRAP_SERVERS> --list |
Replace with the value from your Terraform output.
Clean up
When you’re done experimenting:
|
1 |
terraform destroy |
This removes everything Terraform created. No orphaned resources, no surprise bills.
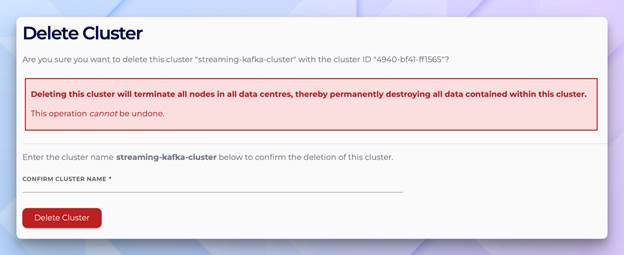
Delete Cluster confirmation—console equivalent of terraform destroy
A note on safety and peace of mind: Terraform doesn’t require you to type the cluster name to confirm, deletion the way that the Console does. As a result, it only asks you to type “yes”. If that makes you nervous for production clusters, then you can add a lifecycle {} block with prevent_destroy = true to your resource. Terraform will refuse to destroy it until you explicitly removed that setting from the code making deletion a deliberate reviewable change rather than an accidental one. It would look like this.
|
1 2 3 4 5 6 7 |
resource “instacluster_kafka_cluster_v3” “kafka” { name = “streaming-kafka-cluster" ... lifecycle { prevent_destroy = true } } |
What’s next
You now have a working Kafka cluster deployed entirely through code. In part 2, we’ll expand this into a full pipeline by adding:
- ClickHouse—a columnar database for real-time analytics
- Kafka Connect—to stream data from Kafka into ClickHouse
- Firewall rules—connecting all three systems securely
The goal: a complete streaming analytics stack where data flows from Kafka to ClickHouse automatically.
Key takeaways
- Infrastructure-as-code isn’t optional—it’s how serious teams manage cloud resources consistently.
- Terraform’s declarative model means you describe the end state, not the steps to get there.
- Instaclustr’s provider handles the complexity of managed services behind simple resource definitions.
- Firewall rules are explicit—security by default, access by intention.
See you in part 2 —