In this blog post, we look at how we use the profiling tools integrated to IntelliJ IDEA IDE at Instaclustr to improve the overall performance and optimize the memory usage of our Java applications. So, if you are a developer having trouble recently with decreased performance or an increased memory footprint of your application, this should give you some useful insights.
Why Do We Need Profiling?
If we are living in a utopian world of software development, every application we build would run smoothly with exactly the amount of CPU and the memory we think it would need, but the problem is we are not! Therefore, I am pretty sure that many of you have wondered at least once in your career why your application is suddenly performing like it’s running on a Pentium, or why your application is consuming so much memory that you feel like you would need a mainframe to run it. In most cases (if not all), it drills down to some underlying problem in your application—be it a problem in the design, an error made during coding, or a configuration error. However, this problem might not be so obvious no matter how hard you look into it, and that’s where profiling tools come in. Profiling is a technique which allows you to drill down into your application to diagnose the CPU usage as well as the memory consumption. This lets you narrow down the parts of erroneous code which would not be easy to spot at a first glance and take corrective measures.
Profiling With IntelliJ IDEA
We do not need any additional profilers to be installed because IntelliJ IDEA comes integrated with Async Profiler and Java Flight Recorder. For the purpose of this blog post, we will focus on the Asyn Profiler even though the 2 profilers are much the same. We will now focus on how we can use this profiler to troubleshoot an actual problem in the program.
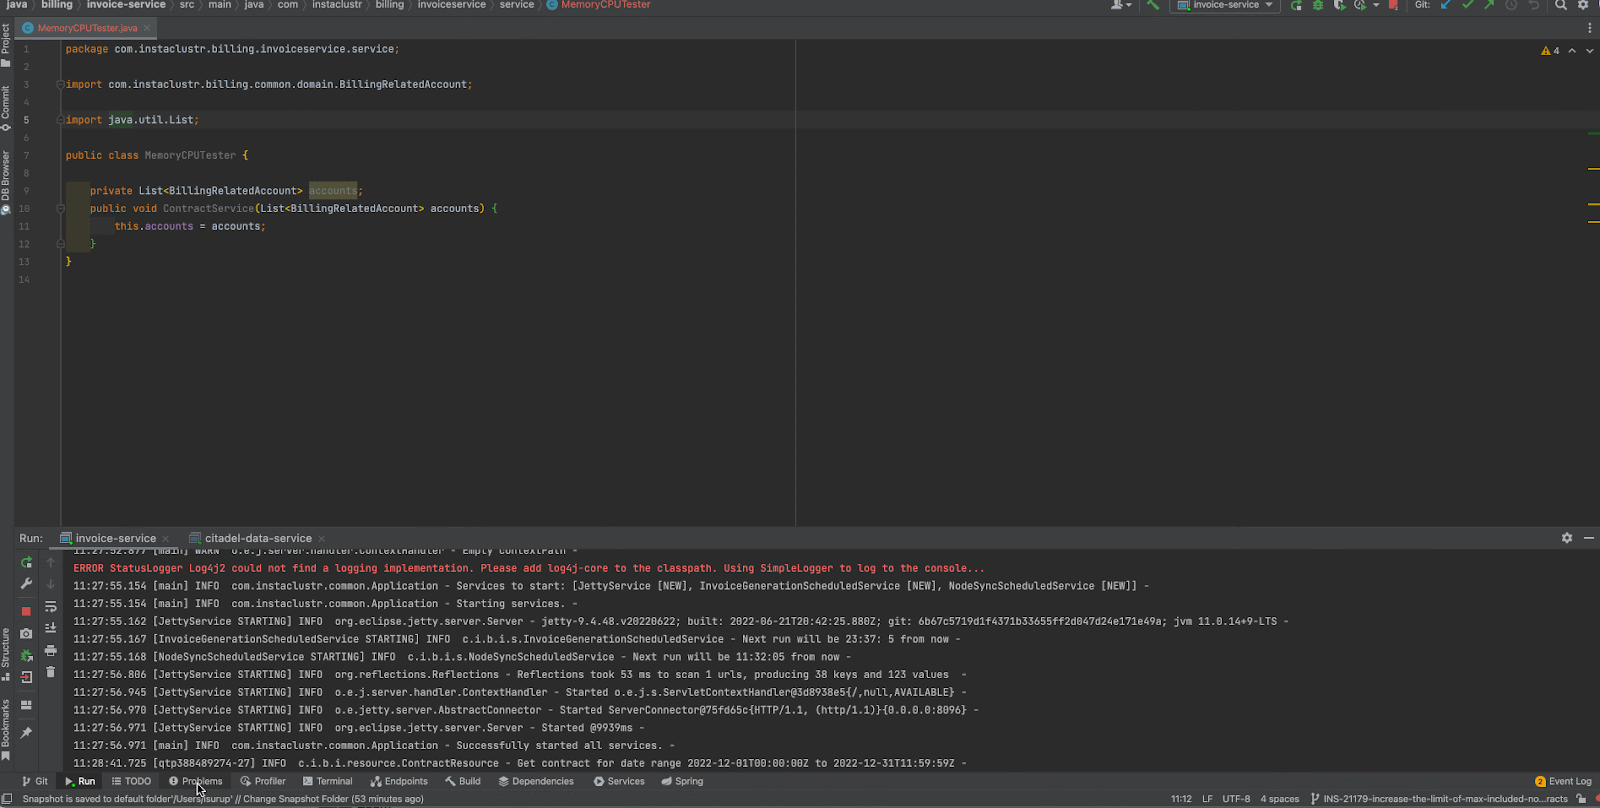
Attaching the Profiler to the Application
First of all, you can run your application in IntelliJ, and then go to the Profiler tab in the ToolBar and attach the profiler to your running application. It’s as simple as that!
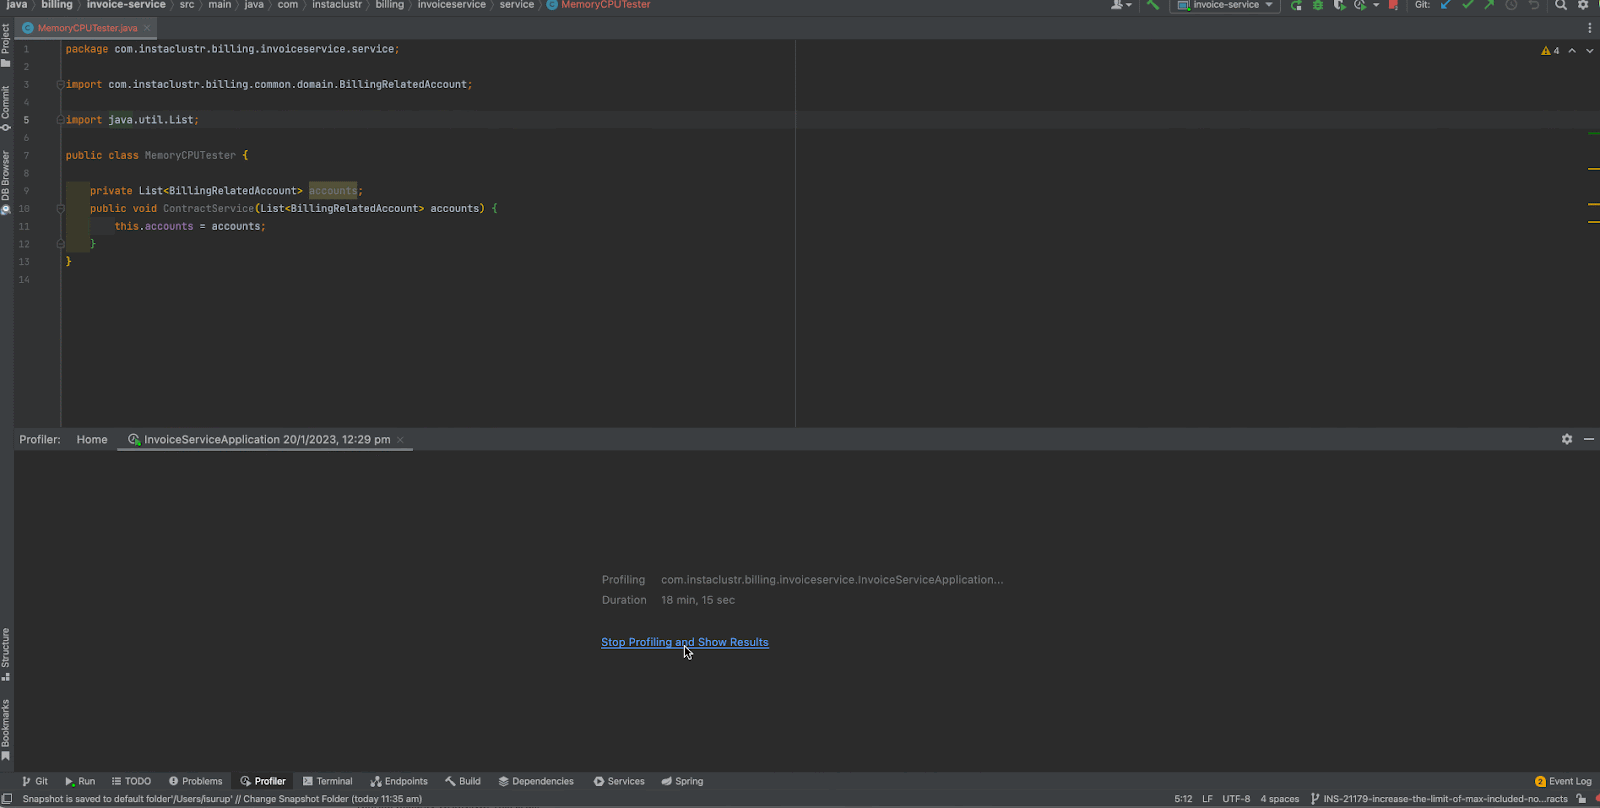
View the Profiler Results
The profiler starts profiling the applications immediately, and while the profiler is running in the background you can test out different aspects in your application, such as new feature additions or features which you think would cause high CPU/memory consumption. Once done, you can stop profiling and the results will be displayed immediately so that you can start analyzing the problems in the code.
Analyzing the Profiler Output
In order to illustrate how to analyze the profiler results, I have created a sample code where I create 10 million test objects inside a loop and store them in a List. The test object has some parameters in the constructor and I am passing a random generated UUID to 2 of the parameters. The code segment is as follows.
|
1 2 3 4 5 6 7 8 9 10 11 12 13 14 |
public class MemoryCPUTester { private List<BillingRelatedAccount> accounts; public MemoryCPUTester() { } public void createAccounts() { accounts = new ArrayList<>(); for (int i = 0; i < 1000000; ++i) { BillingRelatedAccount defaultAccount = new BillingRelatedAccount( "test", UUID.randomUUID(), "test", false, "", "", UUID.randomUUID(), "test"); accounts.add(defaultAccount); } } } |
Then I invoked the createAccounts() method inside a method called getContractsInPeriod of a ContractService class. I attached Asyn Profiler to my application and tested out the getContractsInPeriod method. Then I stopped the profiling and had a look at the results.
CPU Samples
First, let’s analyze it from the perspective of CPU usage.
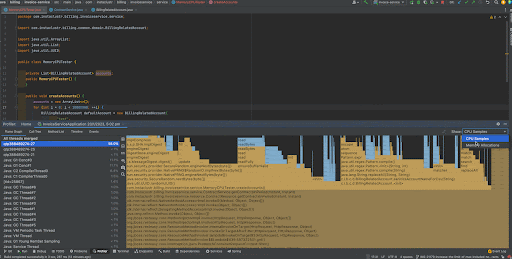
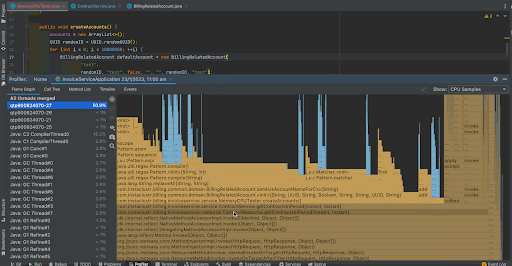
Let’s start by looking at the “CPU Samples” Flame Graph view. For those interested, Flame Graph is a visualization of call stacks shown as a stack of boxes where the width of each box represents the frequency at which the function was present in the stack traces. The y-axis of the flame graph represents the stack depth ordered from root at the bottom to the leaf at the top. The parent or the caller function is always listed at the bottom while the child or the callee function is on top of the parent. Flame Graph makes it really really easy for a user to get an idea on the behavior of the application very quickly.
Now that we know what a Flame Graph is, let’s closely look at the output. As you can see, we observe that when we scroll through to the top of the graph, we can narrow down most of the CPU usage to
createAccounts() in the MemoryCPU Tester method. And out of that, a considerable chunk of CPU time has been spent on the
UUID.randomUUID() method and a lesser chunk on BillingRepatedAccpunt.<init>. Therefore, we immediately see that we need improvements in the
createAccounts() method and the
UUID.randomUUID() instances.
You can right click a certain method and focus that method in the call tree. This will give you the exact percentage of CPU time spent on that method call. As we can see, 54.3% of total CPU time on the thread has been spent on UUID.randomUUID() method calls and 36.4% has been spent on creating new BillingRelatedAccount instances.
Right hand pane shows you the threads involved in the application and you can see that the thread on which our test method runs took up 58% of total CPU time.
Memory Allocations
Now, let’s focus a bit more on analyzing the memory and finding the memory issues in the application.
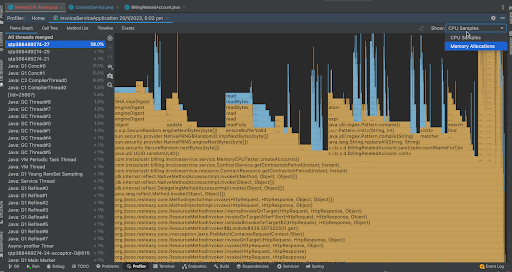
When we analyze the Flame Graph, we can see the same format we saw when we had a look at CPU Samples but in this case instead of frequency of method in the stack traces, we now see the memory allocations of that method as a percentage of total memory allocations. We can see that the createAccounts() method took most of the memory for this application. We can analyze the output in the call tree by right clicking a method and by focusing that method on the call tree. This time, creating the new BillingRelatedAccount instances took around 71.5% memory while creating a random UUID took 26.2% memory. We can see the actual memory allocated in bytes in the separate column Allocation Size and we can see that createAccounts() has taken around 10,106,165,248 bytes.
Improvements to CPU and Memory Utilization
Now, let’s see how we can make some improvements to the
createAccounts() method so that we can observe the improved results when we run the profiler again. Since this is a test method, we can make arbitrary “improvements” without worrying about the impact to the actual output of the application. But, when we are performing improvements on the actual application, you must keep in mind the impact it would have on your actual output.
Improvements on CPU Utilization
Earlier, we observed that creating random UUIDs has taken 54.3% of the total CPU time and only 36.4% is spent on creating new BillingRelatedAccount instances. So, what we can do to improve the performance would be to take UUID.randomUUID() methods out of the loop and assign it to a local variable. Then, we can pass that variable to BillingRelatedAccount inside the loop. To highlight the earlier point, this would have an impact on the actual output so when making improvements to the real world applications, you should make sure that your output is still valid after any performance improvements.
|
1 2 3 4 5 6 7 8 9 10 |
public void createAccounts() { accounts = new ArrayList<>(); UUID randomID = UUID.randomUUID(); for (int i = 0; i < 10000000; ++i) { BillingRelatedAccount defaultAccount = new BillingRelatedAccount( "test", randomID, "test", false, "", "", randomID, "test"); accounts.add(defaultAccount); } } |
Let’s run the profiler and see how it goes.
We can see that before the improvement, random UUID generation took 54.3% of the total CPU time whereas after the improvement, it has become negligible. Now, 76.3% of CPU time is taken by the BillingRelatedAccount instance creation.
The thread CPU allocation has been reduced from 58% percent to 50.9% after the improvement.
Improvements on Memory Utilization
Now, let’s focus on the analysis of memory utilization after the improvement.

We can observe that the memory allocation for the generation of random UUID has become negligible and createAccounts() has taken only around 6,460,865,496 bytes whereas earlier it took 10,106,165,248 bytes. A 36% reduction!
Conclusion
This blog post covered the basic steps in analyzing your CPU and memory footprint using Async Profiler integrated to your IntelliJ IDEA, with the use of some sample test code for the sake of clarity. This is just the tip of the iceberg—you can play with the profiler in IntelliJ IDEA and also check out the other profilers available in the software development world. Happy Profiling!
Get in touch for a completely managed solution, enterprise support or consulting services