Deploying pgvector with Docker
pgvector is an open source PostgreSQL extension to store, index, and search vector embeddings efficiently. It provides the necessary database features to handle high-dimensional vectors directly within PostgreSQL. pgvector supports common vector operations, such as distance measurement and similarity search, using built-in SQL functions.
Deploying pgvector with Docker typically involves either pulling a prebuilt Docker image that bundles PostgreSQL with the pgvector extension, or building a custom image using a Dockerfile that compiles the extension from source.
For retrieval-augmented generation (RAG) use cases, deploying PostgreSQL with pgvector in Docker provides a portable and reproducible environment for embedding storage and similarity search. By building a custom Docker image with the pgvector extension compiled in. Combined with OpenAI’s embedding APIs, this enables end-to-end RAG pipelines that can be spun up quickly in local or cloud environments.
This is part of a series of articles about vector database.
Benefits of using pgvector with Docker
Running pgvector in a Docker environment offers several practical advantages for development, testing, and deployment:
- Easy setup and isolation: Docker allows you to spin up a self-contained PostgreSQL instance with pgvector pre-installed, eliminating dependency issues and avoiding interference with local configurations.
- Reproducible environments: You can define your entire database setup, including pgvector, using Dockerfiles or docker-compose. This ensures consistent environments across teams and stages (dev, test, prod).
- Portability: Containerized pgvector instances can be deployed on any platform that supports Docker, enabling migration between machines or cloud providers.
- Faster testing and cleanup: Temporary containers make it easy to test new features or configurations without affecting your main database. Containers can be quickly started or removed without persistent side effects.
- Simplified CI/CD integration: Docker-based workflows are easily integrated into CI/CD pipelines, allowing automated tests against a known pgvector setup and reducing manual configuration.
- Resource control and scaling
Containers can be tuned with resource limits and orchestrated using tools like Kubernetes, allowing better control over resource usage and scaling of vector-based services.
Tutorial #1: Installing pgvector with Docker
Let’s review the steps involved in installing pgvector on a local machine with Docker. These instructions are adapted from the pgvector documentation.
1. Pull pgvector image
To get started with pgvector using Docker, you can pull a prebuilt image that includes both PostgreSQL and the pgvector extension. However, we will build a custom Postgres image with the pgvector extension compiled in. Create a Dockerfile with:
|
1 2 3 4 5 6 7 8 9 10 11 12 13 14 15 16 17 18 19 |
# Use the official PostgreSQL 16.4 image as the base FROM postgres:16.4 # Install build dependencies RUN apt-get update && apt-get install -y \ build-essential \ git \ postgresql-server-dev-16 # Clone and build pgvector RUN git clone https://github.com/pgvector/pgvector.git \ && cd pgvector \ && make \ && make install # Clean up RUN apt-get remove -y build-essential git postgresql-server-dev-16 \ && apt-get autoremove -y \ && rm -rf /var/lib/apt/lists/* |
This uses Postgres 16.4, installs build tools and server headers, compiles pgvector from source, then removes build dependencies to keep the image smaller.
Step 2: Build the Image
From the directory with the Dockerfile, build the image:
|
1 |
docker build -t postgres-pgvector . |
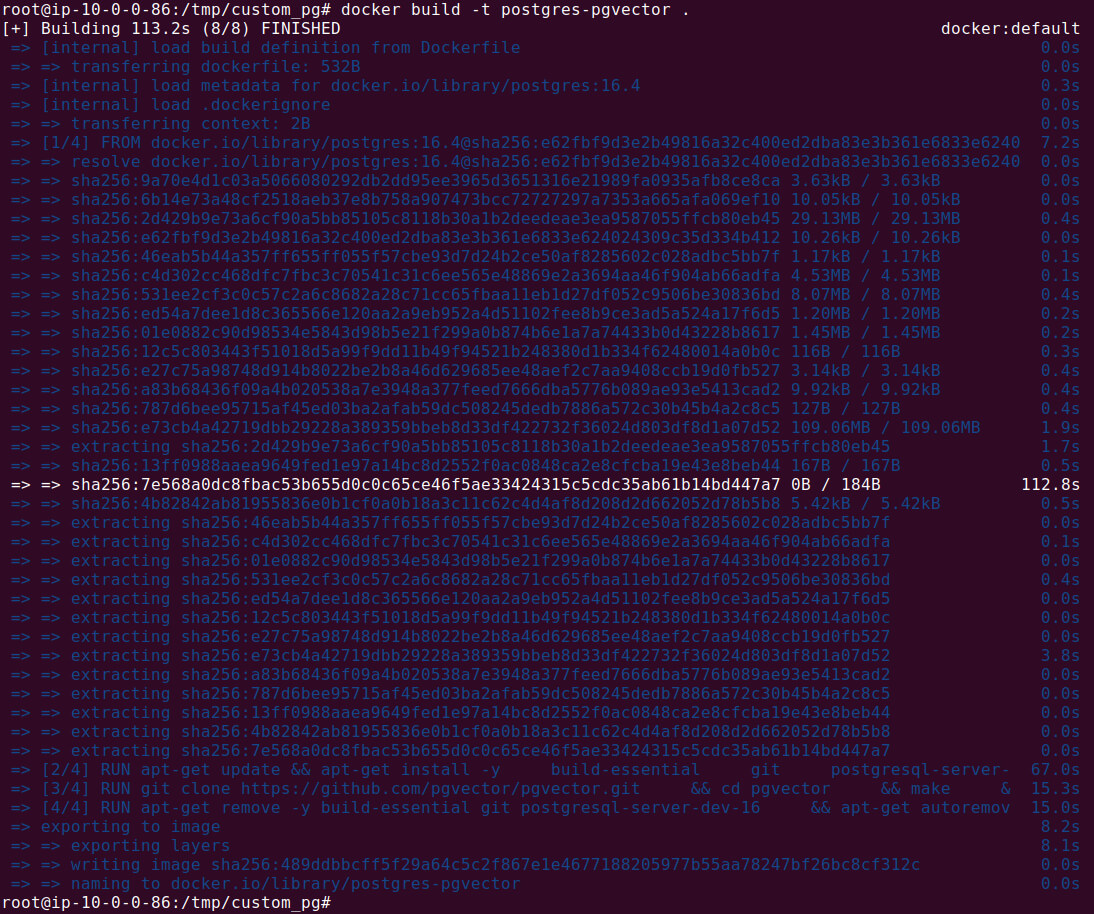
This tags the image as postgres-pgvector so you can reference it when running containers.
Step 3: Run the Container
Start Postgres with pgvector enabled and expose it on port 5432:
|
1 2 3 4 5 6 |
docker run \ --name postgres-vector \ -e POSTGRES_PASSWORD=mysecretpassword \ -d \ -p 5432:5432 \ postgres-pgvector |
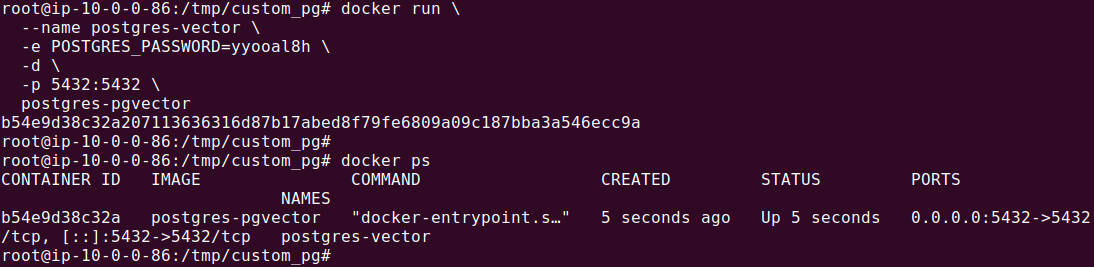
Use a strong password in POSTGRES_PASSWORD. The container runs detached and is reachable on localhost:5432.
Tips from the expert

Perry Clark
Professional Services Consultant
Perry Clark is a seasoned open source consultant with NetApp. Perry is passionate about delivering high-quality solutions and has a strong background in various open source technologies and methodologies, making him a valuable asset to any project.
In my experience, here are tips that can help you better apply and optimize pgvector in Docker environments:
- Use bind mounts for persistent storage between container runs: Avoid data loss by mounting a volume to
/var/lib/postgresql/data. This ensures your vectors and indexes persist across container restarts or rebuilds, critical for production-grade deployments. - Preinstall extensions in your Dockerfile for predictable startup: Instead of running
CREATE EXTENSION vectorat runtime, embed schema initialization into your Docker image or use a startup SQL script via Docker entrypoints. This reduces cold-start complexity and ensures idempotent environment setup. - Parallelize index creation during container builds: Use Docker’s
--shm-sizeflag andmaintenance_work_memtuning to support faster HNSW or IVFFlat builds at image creation time. This is particularly useful for pre-indexed datasets or staging environments with large volumes of embeddings. - Run multiple vector-enabled instances with
docker-composefor A/B testing: Spin up isolated pgvector services using docker-compose to compare different PostgreSQL versions, index settings, or embedding dimensions in parallel. Useful for performance benchmarking or testing model upgrades. - Auto-seed your pgvector database with synthetic embeddings: Include an entrypoint script that populates the database with random or example embeddings (e.g., via Python Faker or JS OpenAI API). This helps you test end-to-end vector search pipelines without requiring external API access every time.
Tutorial #2: Setting Up Postgres and pgvector with Docker for RAG Applications
This tutorial walks through creating a containerized PostgreSQL instance with pgvector, enabling you to store and search embeddings for retrieval-augmented generation (RAG) use cases. You’ll learn how to build a custom Docker image, connect to the database, store vector data, and run similarity queries using OpenAI-generated embeddings.
For this tutorial, we will use the Docker Image created in the previous section.
Step 1: Connect with psql
We will start with establishing a connection with Postgres database running in the Docker container (created in the previous section). Open an interactive shell inside the running container:
|
1 |
docker exec -it postgres-vector psql -U postgres |

You’ll connect as the postgres user and will be prompted for the password you set.
Step 2: Create a Database for RAG
Create and switch to a dedicated database:
|
1 2 |
CREATE DATABASE sample_vector_db; ; \c sample_vector_db; |

Keeping embeddings in their own database makes schema management and access control simpler.
Step 3: Enable the Extension
Install pgvector in the current database:
|
1 |
CREATE EXTENSION vector; |

This adds the vector type and similarity operators.
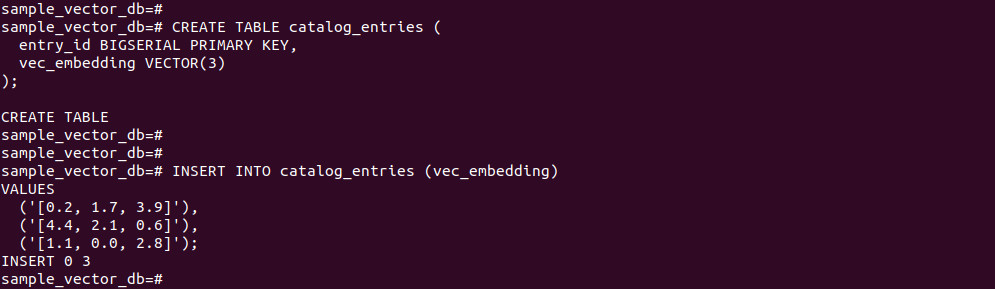
Step 4: Basic Vector Storage and Search
Create a table with a vector column, insert sample data, and run a nearest-neighbor query:
|
1 2 3 4 5 6 7 8 9 10 |
CREATE TABLE catalog_entries ( entry_id BIGSERIAL PRIMARY KEY, vec_embedding VECTOR(3) ); INSERT INTO catalog_entries (vec_embedding) VALUES ('[0.2, 1.7, 3.9]'), ('[4.4, 2.1, 0.6]'), ('[1.1, 0.0, 2.8]'); |
Run the following commands:
|
1 2 3 4 |
SELECT entry_id, vec_embedding FROM catalog_entries ORDER BY vec_embedding <-> '[2.5, 1.0, 3.2]' FETCH FIRST 5 ROWS ONLY; |
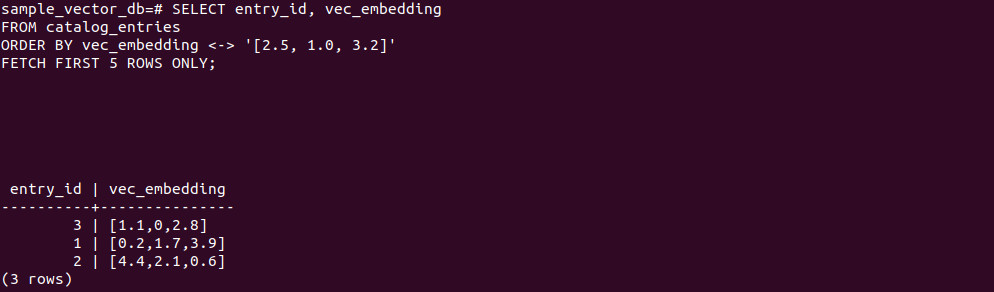
Note: The <-> operator computes distance and orders results by similarity.
Step 5: Generate Embeddings With OpenAI
Create embeddings for your content before storing them. Example using JavaScript and text-embedding-3-small:
|
1 2 3 4 5 6 7 8 9 10 11 |
import OpenAI from 'openai'; const openai = new OpenAI(); const embedding = await openai.embeddings.create({ model: 'text-embedding-3-small', input: 'Honeybees communicate using the waggle dance, a movement pattern that conveys direction and distance to food sources. Their navigation relies on the sun, landmarks, and an internal clock, helping the colony forage efficiently.', encoding_format: 'float' }); console.log(embedding); |
A typical response structure:
|
1 2 3 4 5 6 7 8 9 10 11 12 13 14 15 16 17 18 |
{ "object": "list", "data": [ { "object": "embedding", "index": 0, "embedding": [ -0.006929283495992422, -0.005336422007530928, -4.547132266452536e-5, -0.024047505110502243 ] } ], "model": "text-embedding-3-small", "usage": { "prompt_tokens": 5, "total_tokens": 5 } } |
By default, text-embedding-3-small returns vectors of length 1536. You can reduce dimensions via the dimensions parameter if needed.
Create a table sized to your embedding length and insert:
|
1 2 3 4 5 6 7 8 9 10 11 |
CREATE TABLE knowledge_chunks ( doc_id BIGSERIAL PRIMARY KEY, body TEXT NOT NULL, embed VECTOR(1536) ); INSERT INTO knowledge_chunks (body, embed) VALUES ( 'Honeybees communicate via the waggle dance and use sun position plus landmarks to navigate.', '[0.001284, -0.009771, 0.004102, -0.021550, ...]' ); |
Step 6: Retrieve the Most Relevant Documents
Embed the user’s query with the same model, then rank documents by vector distance:
|
1 2 3 4 5 6 7 8 9 10 11 |
import OpenAI from "openai"; const client = new OpenAI({ apiKey: process.env.OPENAI_API_KEY }); const result = await client.embeddings.create({ model: "text-embedding-3-small", input: "How large can an adult blue whale grow?", encoding_format: "float", }); console.log(result.data[0].embedding); |
Use the returned vector in your SQL:
|
1 2 3 4 |
SELECT chunk_id, text_body FROM document_chunks ORDER BY vector_embedding <-> '[0.010520, -0.003440, 0.001120, -0.017980, ...]' LIMIT 5; |
This query orders by Euclidean distance using <-> and returns the top matches to ground your generation step.
AI Potential: Using Instaclustr for PostgreSQL and pgvector
In the dynamic landscape of artificial intelligence and machine learning, the ability to work with high-dimensional vector data is a game-changer. This is where the power of pgvector shines. When combined with the robust, enterprise-ready platform of Instaclustr for PostgreSQL, pgvector transforms your trusted relational database into a powerful engine for advanced AI applications. We make it simple to unlock sophisticated capabilities like vector similarity search directly within your existing PostgreSQL environment.
The pgvector extension is expertly designed to store and query vector embeddings—numerical representations of data like text, images, or audio. This functionality is the bedrock of modern AI, powering everything from semantic search and recommendation systems to facial recognition and anomaly detection. Instead of relying on separate, specialized vector databases, you can now perform these complex operations inside PostgreSQL. This integration streamlines your architecture, reduces operational complexity, and allows you to leverage your team’s existing PostgreSQL expertise. With pgvector, you can find the “closest” or most similar items in your dataset with incredible speed and efficiency using exact and approximate nearest neighbor searches.
Leveraging pgvector becomes even more powerful with Instaclustr’s managed PostgreSQL service. We handle the complexities of database management so you can focus on building innovative applications. Our platform is built for unwavering reliability and seamless scalability, ensuring that as your AI workloads grow, your database performance keeps pace without interruption. We provide expert, 24/7 support and proactive monitoring to guarantee your PostgreSQL instances, supercharged with pgvector, are always optimized for peak performance. With Instaclustr, you get a secure, scalable, and fully managed solution that empowers you to confidently build the next generation of AI-driven features.
For more information: