Connect to a PrivateLink ClickHouse Cluster
Overview
AWS PrivateLink is a networking feature provided by Amazon Web Services that enables direct and secure connectivity between AWS VPCs. This article describes how to connect clients in one VPC to a PrivateLink-enabled ClickHouse cluster in another VPC.
To establish the PrivateLink connection you will need to firstly retrieve the required cluster connection information from the Instaclustr Console. You will then subsequently create an Endpoint Security Group and the PrivateLink endpoint itself from the AWS Console. Read on for step by step instructions.
To create an AWS PrivateLink ClickHouse cluster, see this article.
Before proceeding, please note the following:
- The VPC of the client and ClickHouse PrivateLink cluster should be in the same Region as the Instaclustr platform does not support inter-Region access via PrivateLink.
- We recommend that your clients be located in separate Availability Zones to support high availability should any one Availability Zone become unreachable.
- ClickHouse tables without distribution or replication are not suitable for PrivateLink clusters, as individual nodes cannot be explicitly referenced. Ensure your tables use distributed or replicated engines for proper PrivateLink functionality.
Retrieve Required Cluster Connection Information
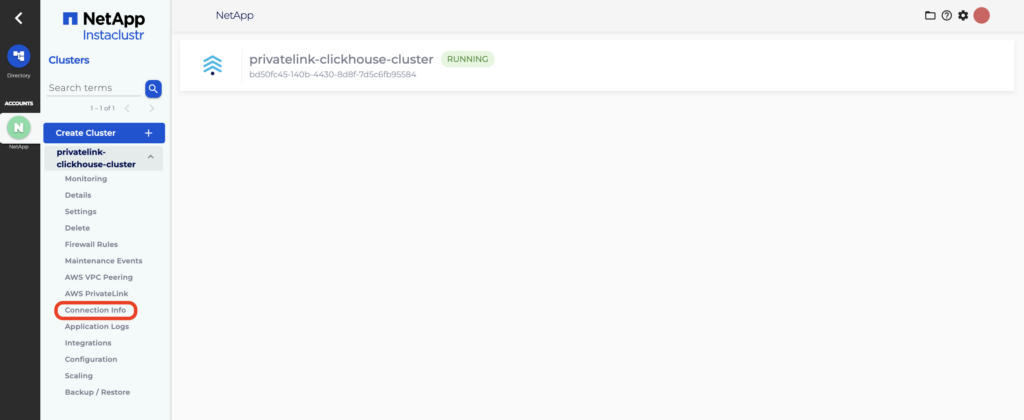
- Log into the Console, click the PrivateLink-enabled ClickHouse cluster you wish to connect to and select the Connection Info tab.
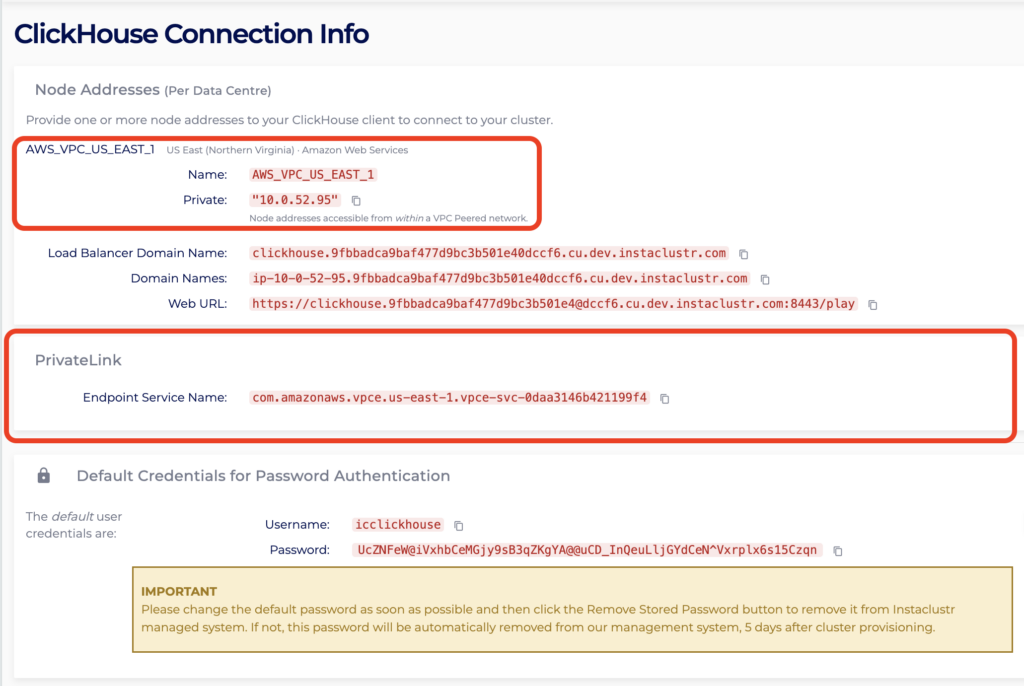
- On the Connection Info page, make note of the cluster Region and PrivateLink Endpoint Service Name. You will need these for the following steps.
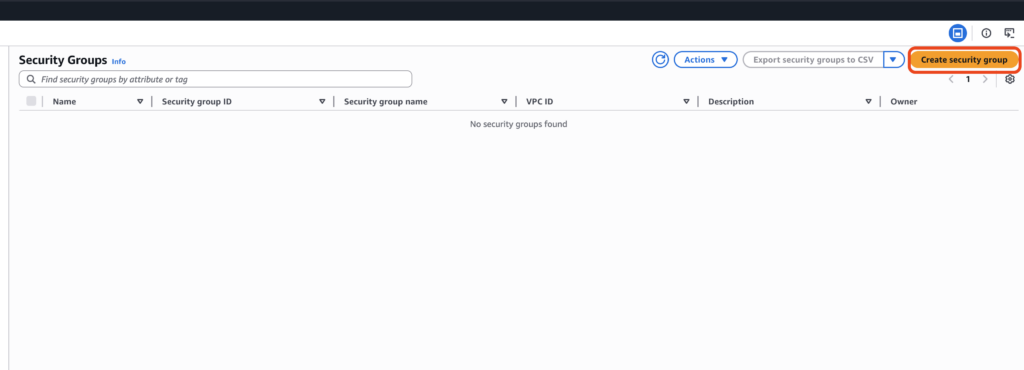
Create Endpoint Security Group
An Endpoint Security Group is required to allow traffic from your client VPC to the PrivateLink endpoint. The ClickHouse cluster will already have a security group applied to ensure the security of your cluster, but an endpoint cannot be created without having an associated security group. Therefore, the security group created here can be as permissive or as strict as you require. These steps will outline the minimum required security group configuration.
Note: ClickHouse uses port 9440 for native connections and port 8443 for HTTP/HTTPS. When connecting via PrivateLink, traffic on these ports is load‑balanced across the cluster. You’ll configure these ports later in this guide during the security group setup.
- Log into your AWS Account where you want to create the PrivateLink endpoint.
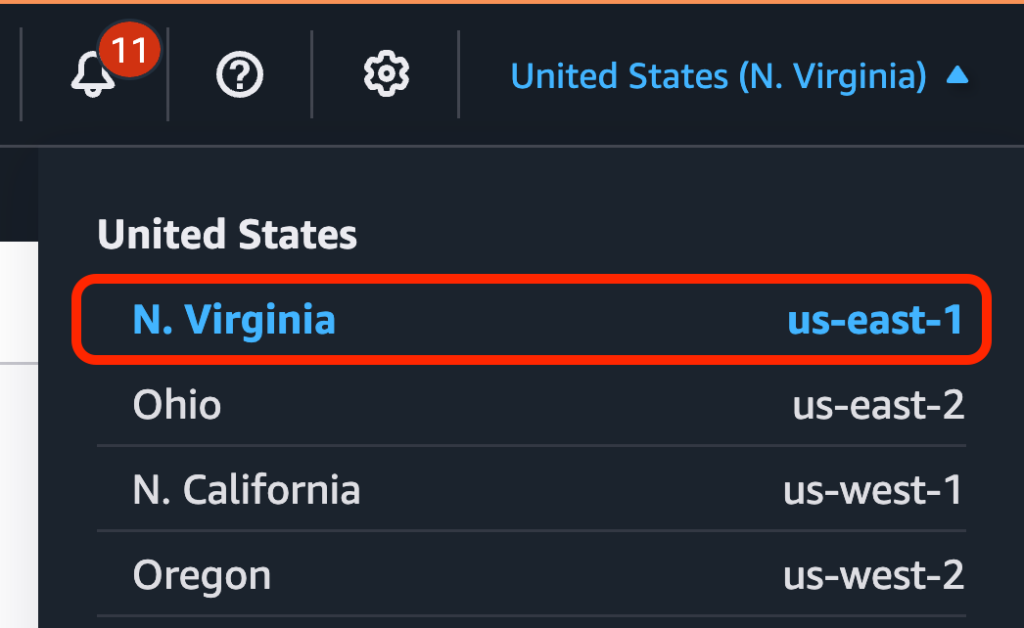
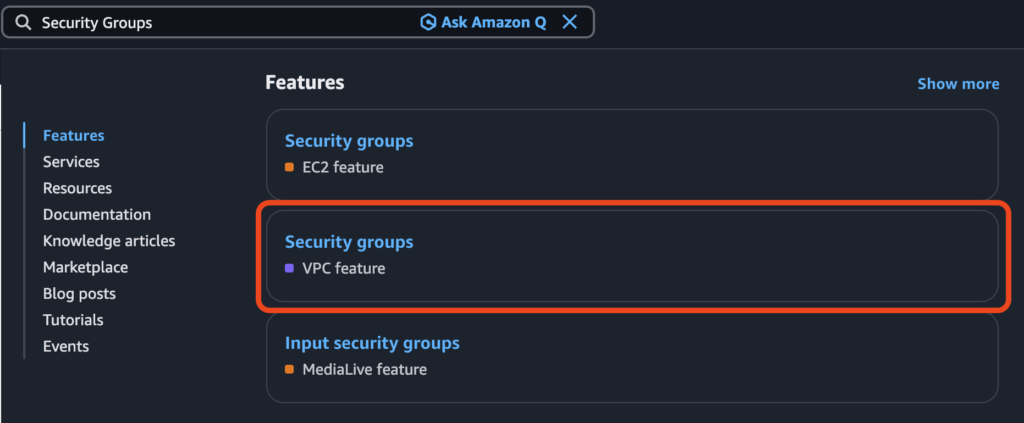
- Select the Region of your cluster identified in the steps above, then search for Security Groups and click the option labelled VPC feature.
- Click Create security group.
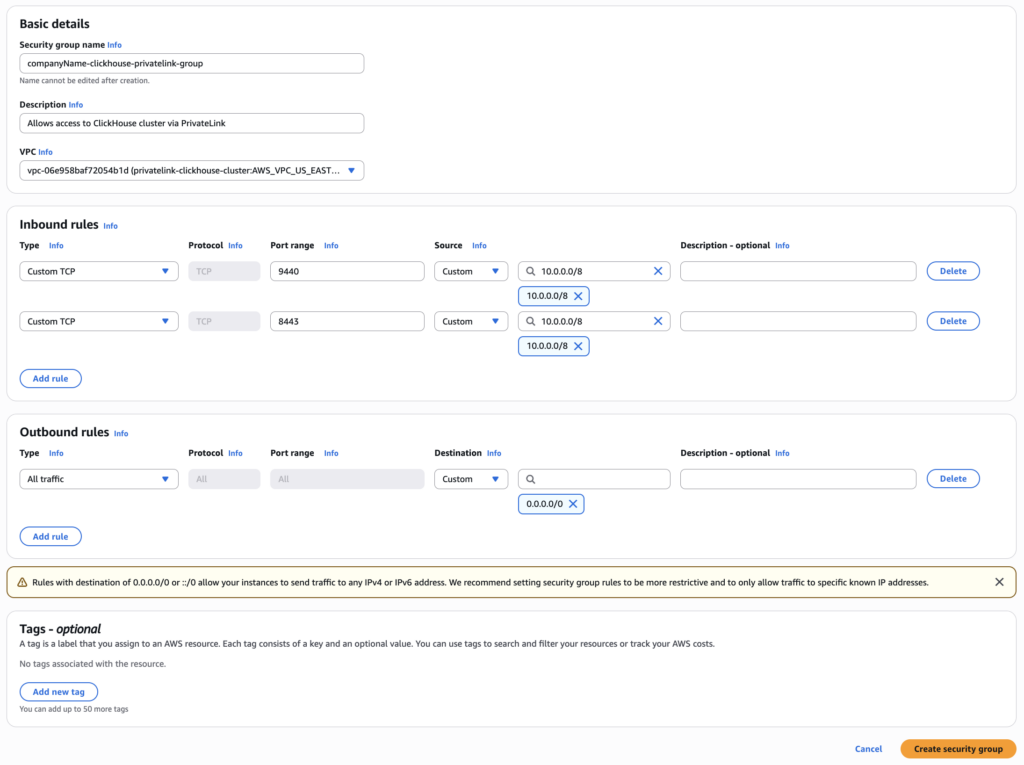
- In the field Security group name, enter a name for the security group. Note that this name must be unique for the associated VPC and cannot be modified after creation of the group, thus it is recommended to use a naming convention which allows easy identification of the PrivateLink endpoint and destination cluster it will be associated with.
- In the field Description, enter a short description of the security group. For example, “Allows access to ClickHouse cluster via PrivateLink”.
- In the field VPC, search for and select the client VPC which will connect to the ClickHouse cluster via PrivateLink.
- Under theheading Inbound rules, click Add rule. The rules created here permit traffic outbound from your VPC, inbound to the ClickHouse cluster over PrivateLink. Select Custom TCP in the Type field. Enter 9440 in the Port range Select Custom in the Source field, then enter the CIDR of the subnet from which your client will be connecting to the PrivateLink endpoint.
For example, if your client is running on an EC2 instance, use the CIDR within which this instance resides.
Optionally, add a description in the Description field. - Repeat Step 6 to create a second rule for port 8443.
- Confirm your security group configuration matches the sample below. Click Create security group.
Create the PrivateLink Endpoint
A VPC endpoint is required to establish a private connection between your AWS VPC and the ClickHouse PrivateLink cluster. Follow the steps below to create the endpoint using the AWS Console. For more information about VPC endpoints, refer to this article.
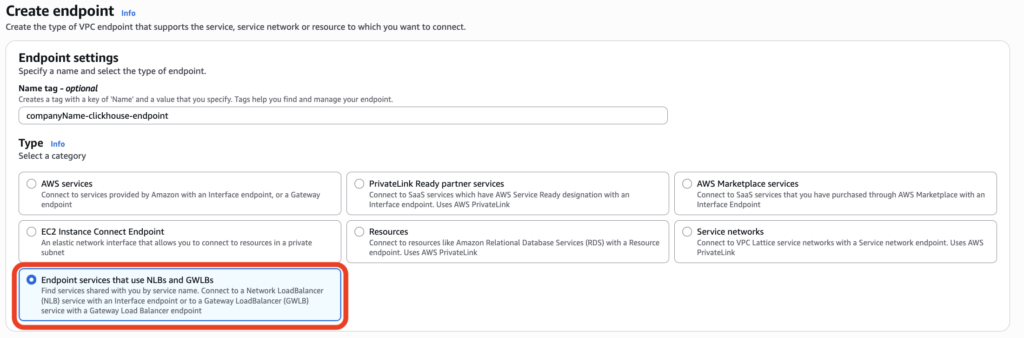
- In the AWS Console, search for Endpoints and click the correct option.

- Click Create endpoint.

- Under the Type category, select Endpoint services that use NLBs and GWLBs.
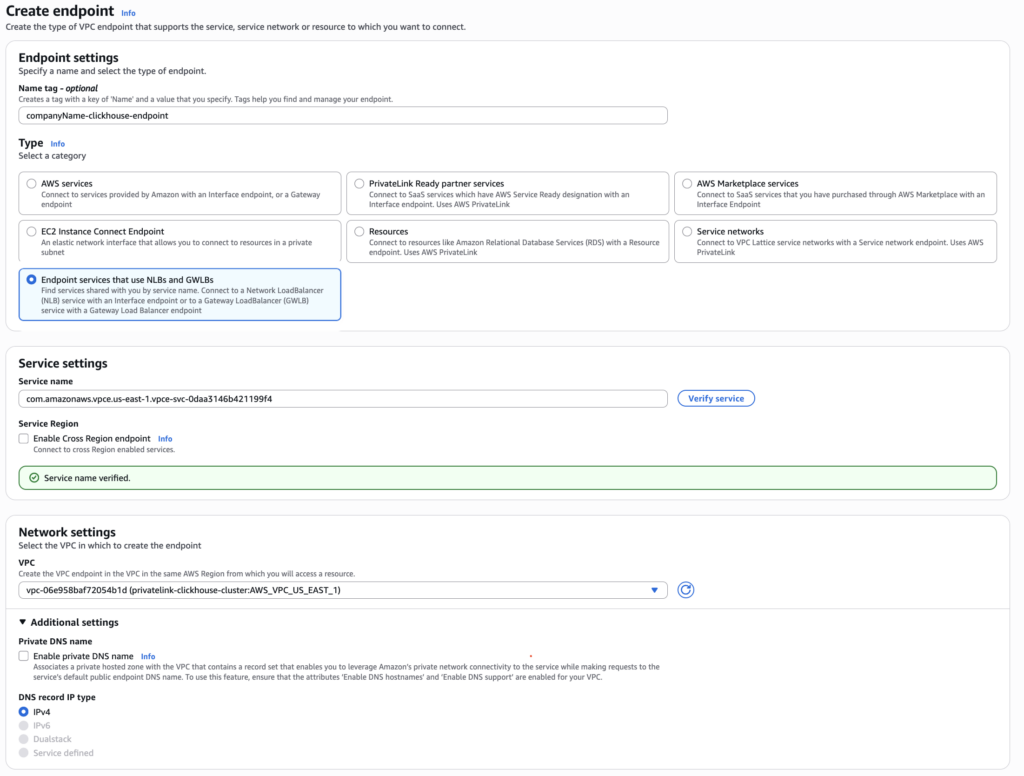
- Under Service settings, paste the endpoint service name (retrieved earlier from Connection Info page on the Instaclustr Console) into the Service name. Click Verify service and a confirmation message should appear.
Note: At this point if the Endpoint Service cannot be verified, please make sure you have provided the correct IAM Principal ARN while provisioning the cluster. For more info, please read Managing Principal ARNs of a PrivateLink ClickHouse Cluster.
- Under Network Settings, select the client VPC that will connect to the ClickHouse PrivateLink cluster.
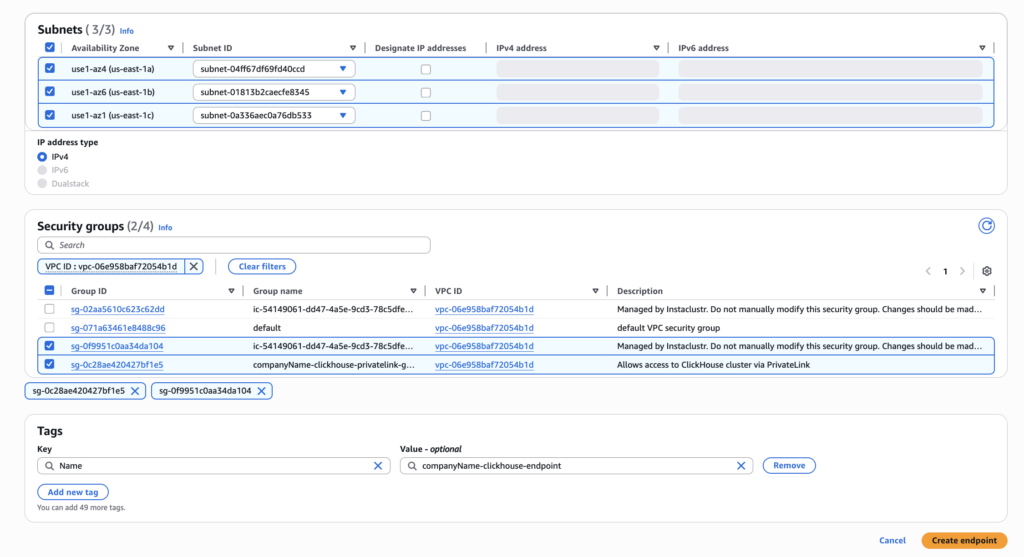
- Under Subnets, select one Subnet ID for each Availability Zone.
- Under Security groups, select the security group that you created earlier.
- Confirm your configuration matches the sample below. Click Create endpoint.
- You will be redirected to the main VPC endpoint page which will specifically show the created endpoint. Once the Status of the endpoint reaches Available, copy the first DNS under DNS names.

- The DNS name will need to be added to the NetApp Instaclustr public DNS domain to permit the connection. To do this please send an email to [email protected] and provide the following three details:
- DNS name above
- The Cluster ID (available from the Details tab in the Instaclustr Console)
- Cluster Data Centre ID
- NetApp Instaclustr Support will provide you with a confirmation email in reply when the DNS has been successfully added to the NetApp Instaclustr public DNS domain.
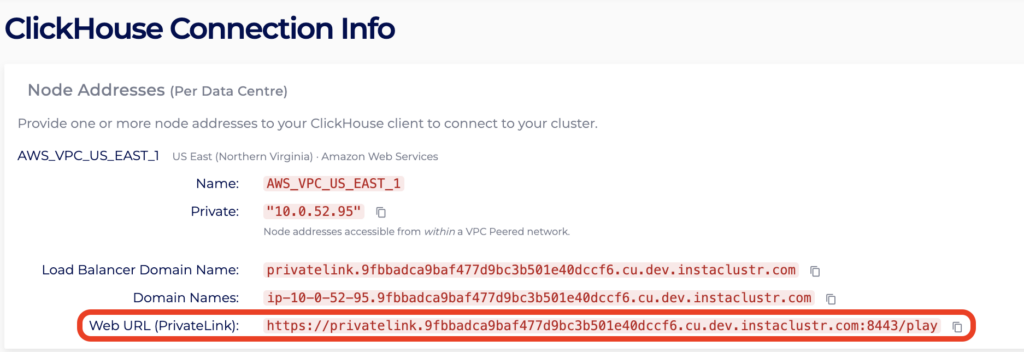
- The PrivateLink URL will be visible on the NetApp Instaclustr Console once you have refreshed the Connection Info page. The PrivateLink URL will now be updated and ready to use.
Questions
Please contact Instaclustr Support for any further inquiries.