Creating an Apache Kafka Connect Cluster
This article describes how to provision a Kafka Connect cluster using the Instaclustr Console. For information on how to provision an Apache Kafka Connect Cluster via the Instaclustr Provisioning API, see this page: Instaclustr Provisioning API
- A Kafka Connect cluster needs a Kafka cluster to connect to. You can either connect to an Instaclustr managed Kafka cluster or a non-Instaclustr Kafka cluster. To create a new Kafka cluster with Instaclustr, you can follow the instructions provided by our support team. If you already have an external Kafka cluster, read this article on using non-instaclustr Kafka clusters for more information.
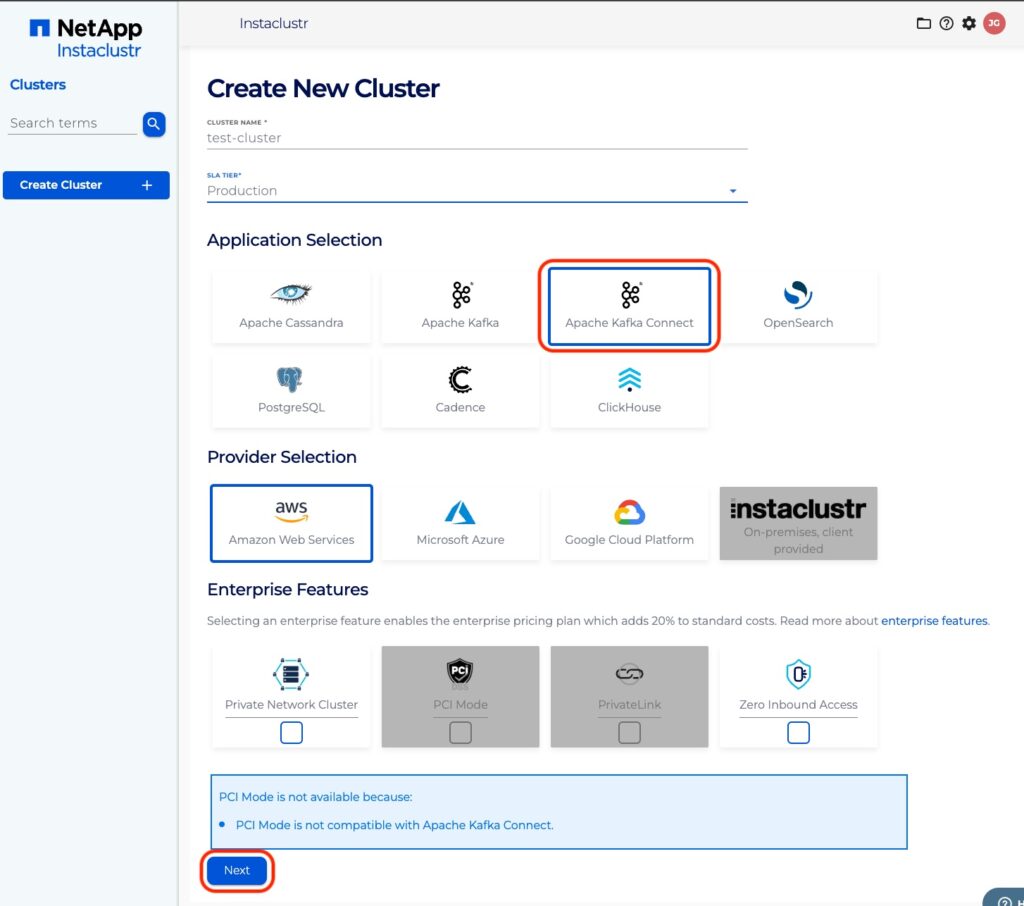
- To create a Kafka Connect cluster, click Create Cluster on the Instaclustr console. This will take you to the wizard for creating a new cluster.
- In the Application section, select Kafka Connect as the base application. Enter a unique name for your cluster and select your Infrastructure provider. You can also choose to enable Private Network add-on for the Kafka Connect cluster. The Private Network add-on is available for AWS, GCP and Azure AZ providers. For Azure AZ, private network clusters are available when the cluster is running in your own cloud provider account. More information on Private Network add-on can be found at Private Network cluster.
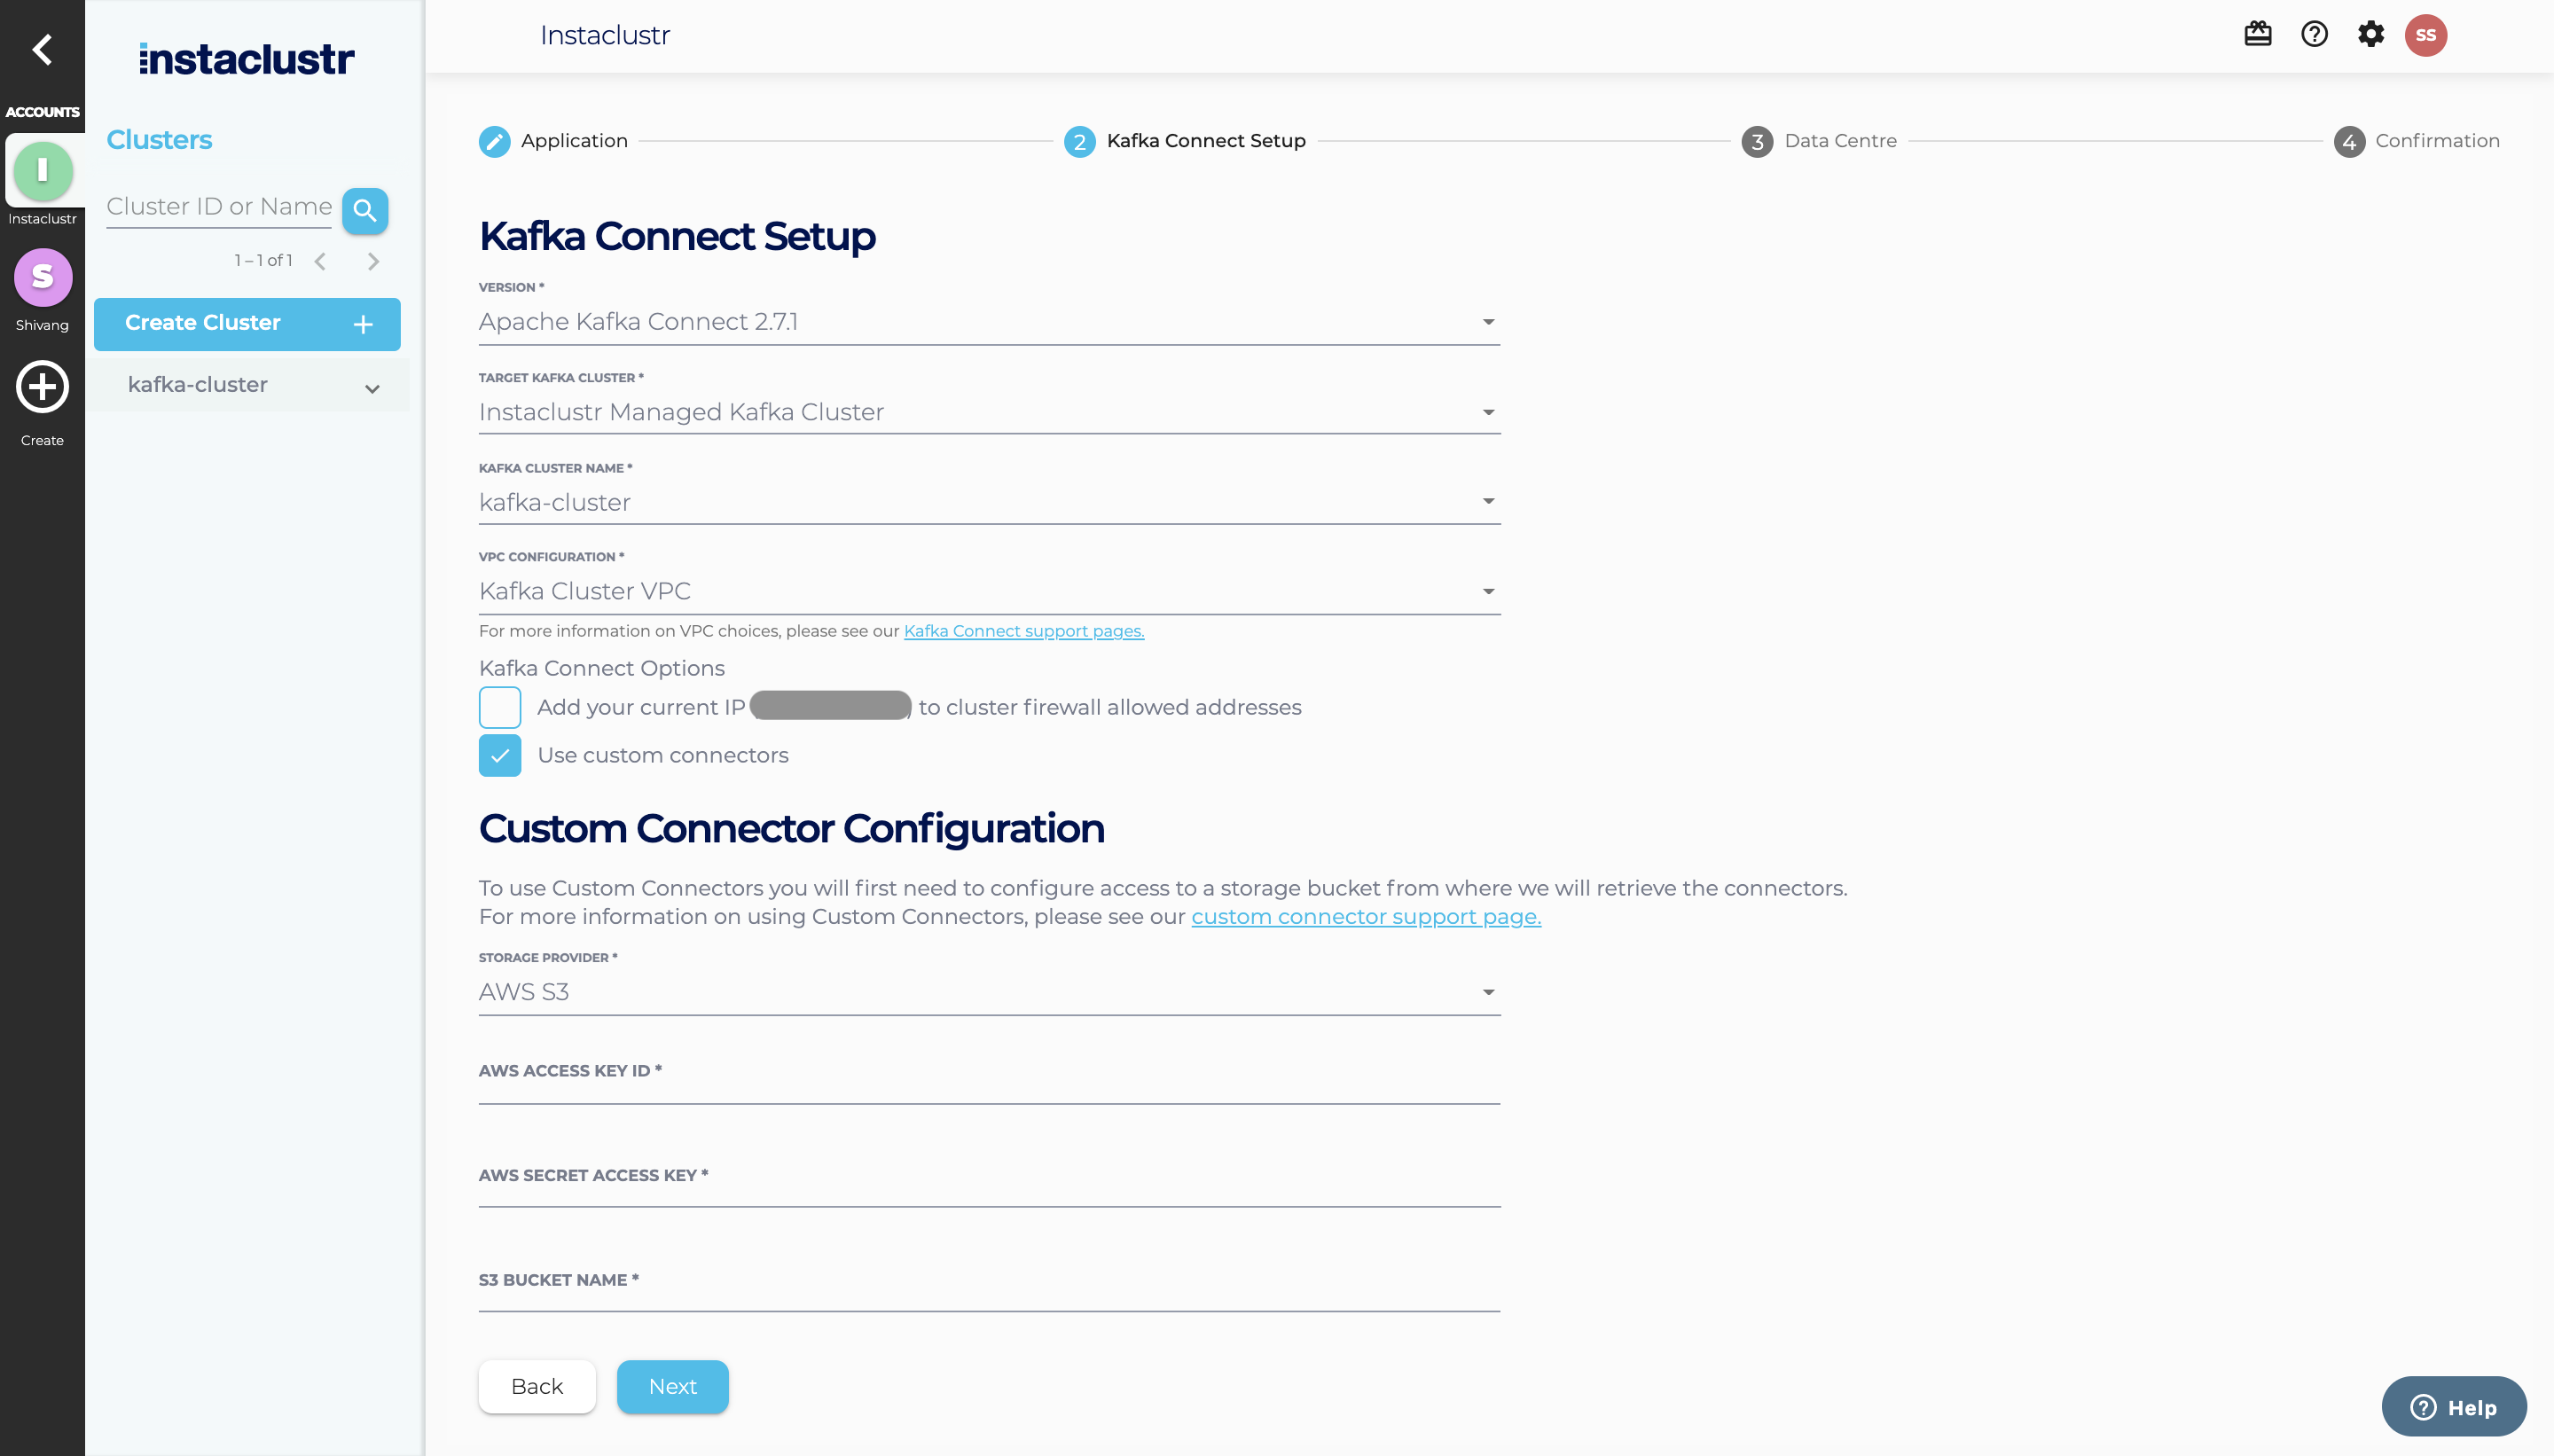
- In the Kafka Connect Setup section, there are several options to configure your Kafka Connect cluster
- Choose if you’d like to add your current IP to the cluster’s firewall of allowed addresses. This will enable your machine to access the Kafka Connect REST API. Select this if you will be managing connectors from the same machine that you’re creating the cluster from.
Note that Instaclustr detects the IP address of the computer used to access the Dashboard and provides the option to add a firewall rule for your computer to connect to the cluster. Certain web proxies may interfere with this mechanism and Instaclustr will see their IP address instead. We suggest you verify the detected address. - Choose which sort of Kafka Cluster you’d like to target. Choose an Instaclustr managed Kafka Cluster if possible, as this will be easier to configure and come with better integration options. If you need to connect to a non-Instaclustr cluster (e.g. MSK) then select the ‘Other Kafka Cluster’ option. If you do so, read this article on using non-instaclustr Kafka clusters for more information.
- There are three ways of configuring the VPC for your Kafka Connect cluster.
The first option is to provision the Kafka Connect cluster in the existing VPC (AWS & GCP) / Virtual Network (AZURE) of the target Kafka cluster. This will cause the Kafka Connect and Kafka clusters to connect over private IPs.
The second option, available only for AWS, is to provision Kafka Connect cluster in a new VPC and set up a VPC peering relationship between the Kafka connect cluster and the Kafka cluster. This will also cause Kafka Connect to connect over private IPs to the Kafka cluster. However, VPC peering incurs data transfer charges across peering connections. Also, if peering across regions, check the AWS documentation for which regions are supported for cross region peering.
The third option is to provision the Kafka Connect cluster in a new VPC without setting up peering. This will cause the Kafka Connect and Kafka clusters to connect over public IPs. -
If you plan on using your own custom connectors (bring your own code) on your Kafka Connect cluster, tick the Use Custom Connectors checkbox and fill out the name and access credentials of the cloud storage area where you will be placing your custom connectors. See our support page on how to set up a cloud bucket to store custom connectors for more information.
Note: For new Instaclustr accounts, the Custom Connector feature must first be enabled—contact [email protected] to request activation. Existing accounts can proceed without changes.
- Choose if you’d like to add your current IP to the cluster’s firewall of allowed addresses. This will enable your machine to access the Kafka Connect REST API. Select this if you will be managing connectors from the same machine that you’re creating the cluster from.
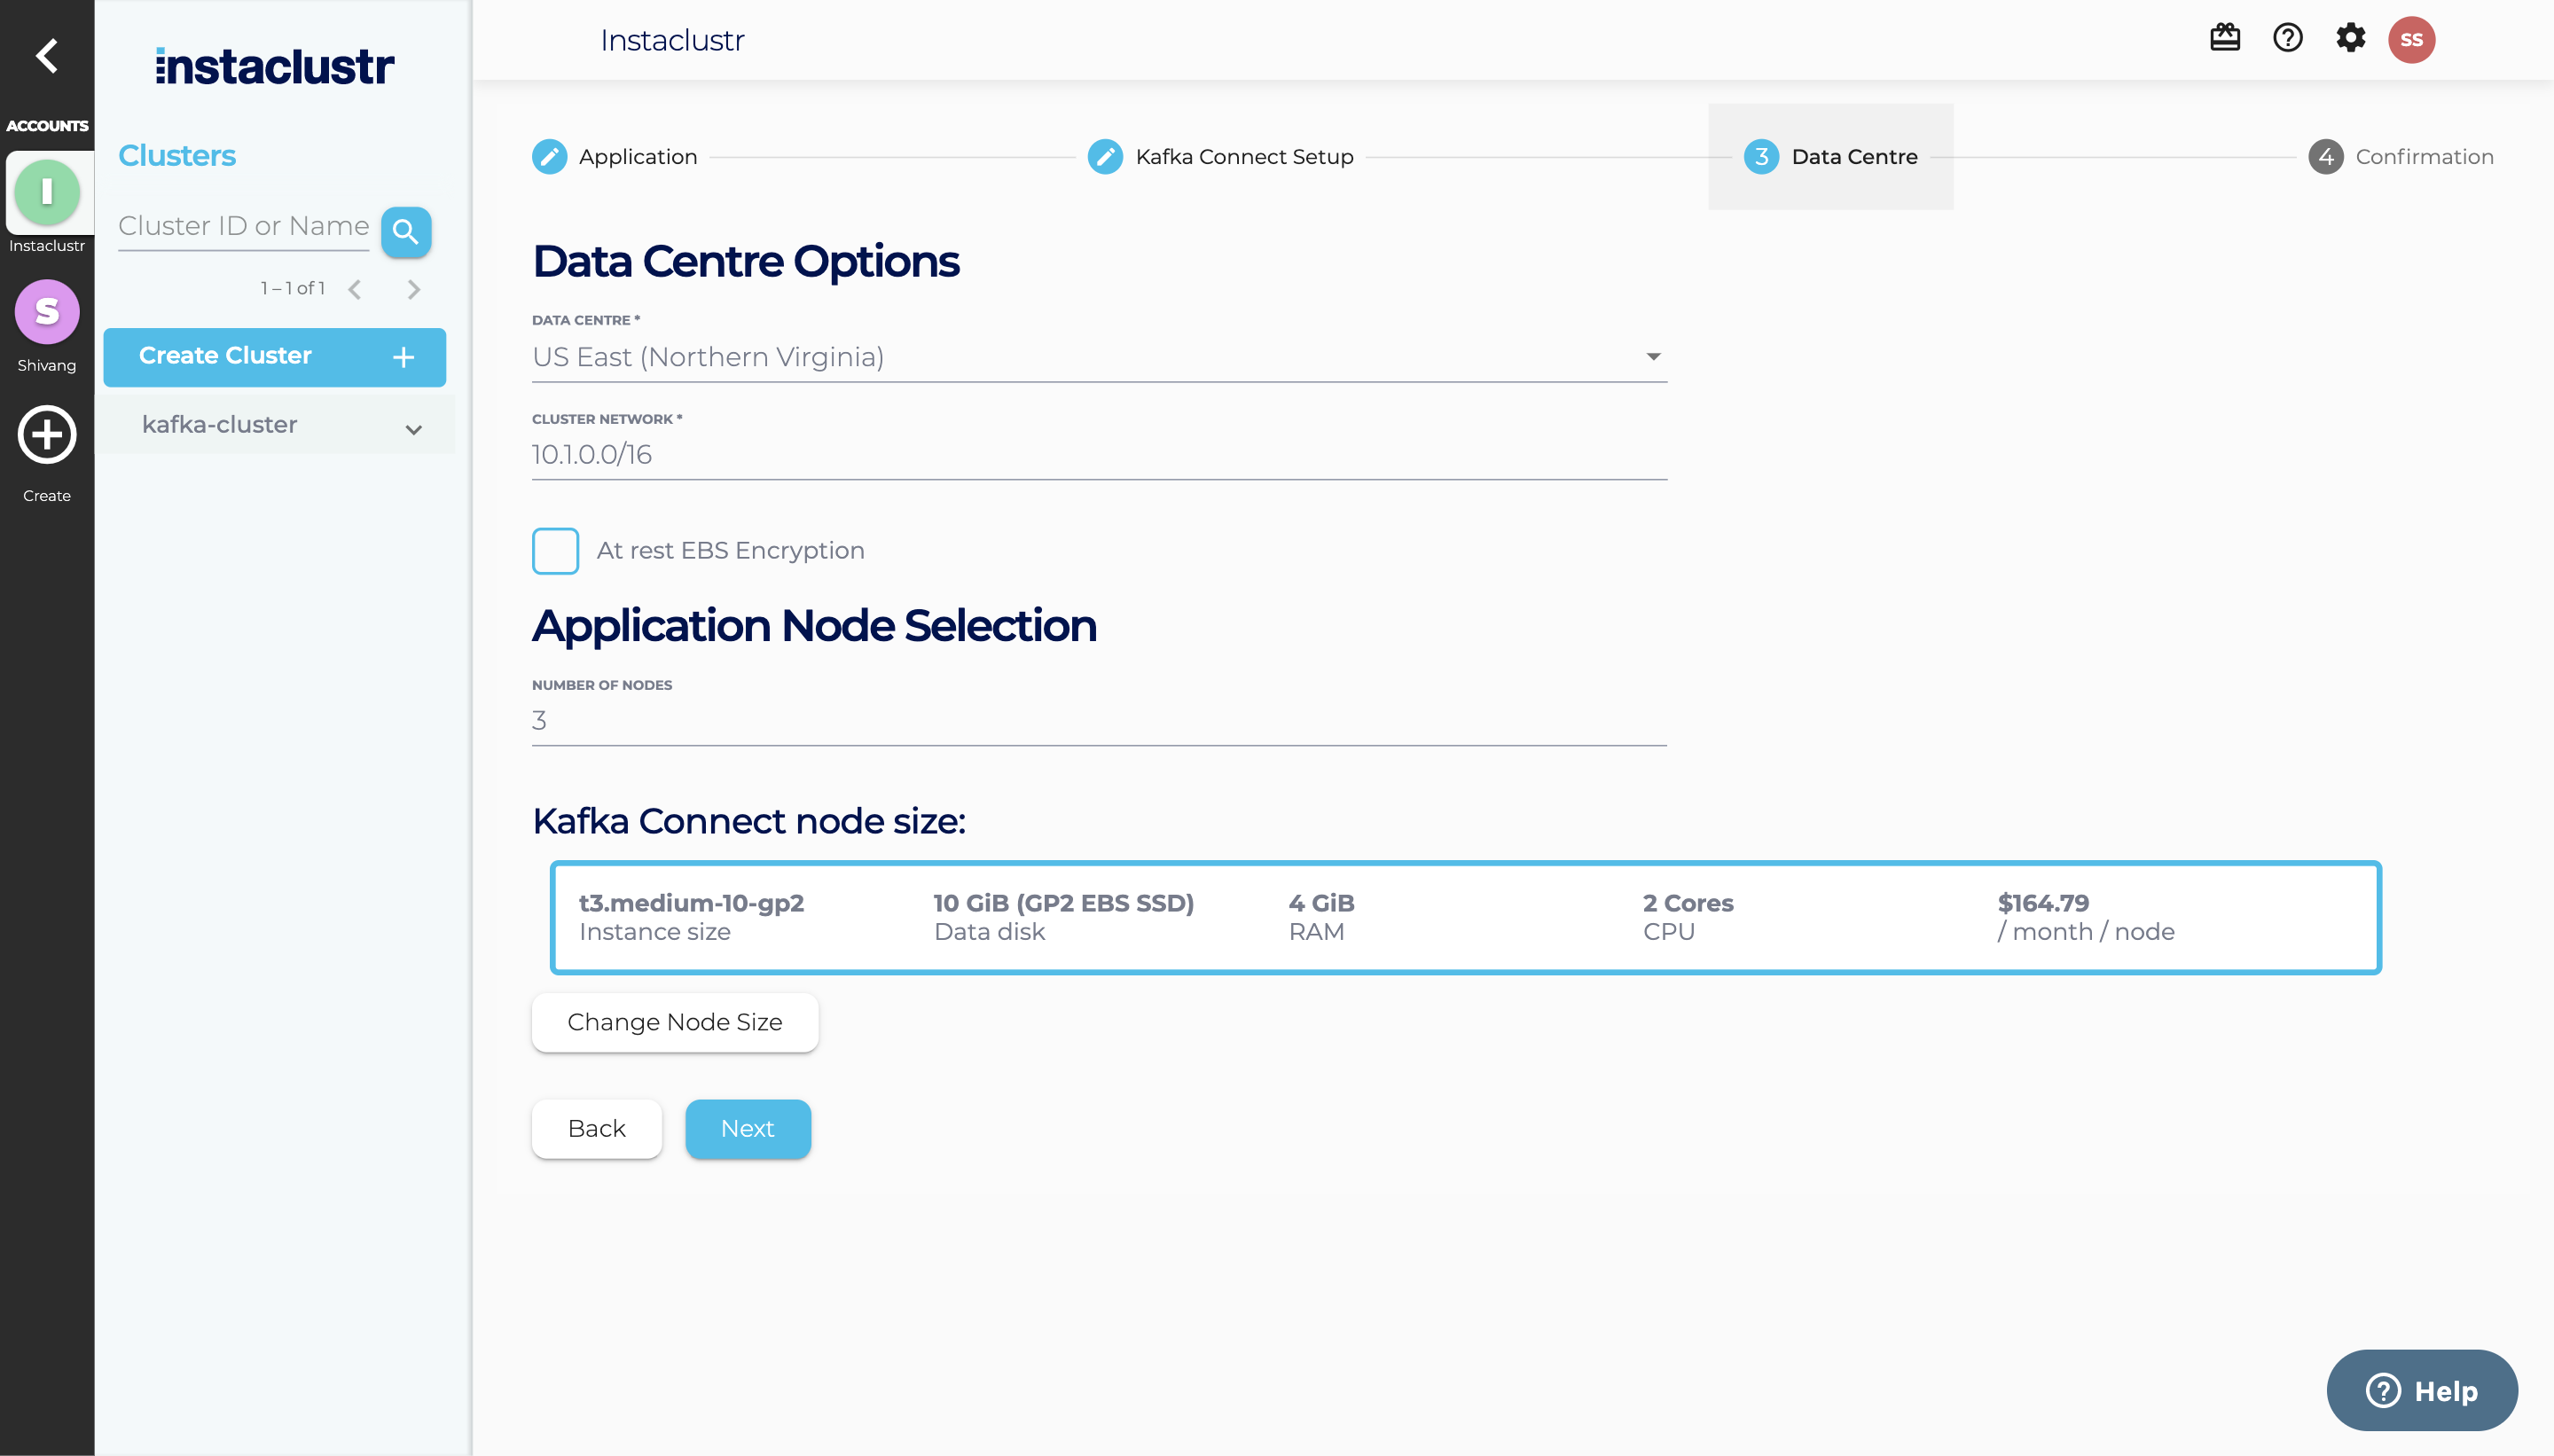
- Under the Data Centre section, select your Data Centre Region, Cluster Network address block, the number of nodes for your application, and the size of each node. Refer to our support article on Network Address Allocation to understand how we divide up the specified network range to determine the node IP addresses.
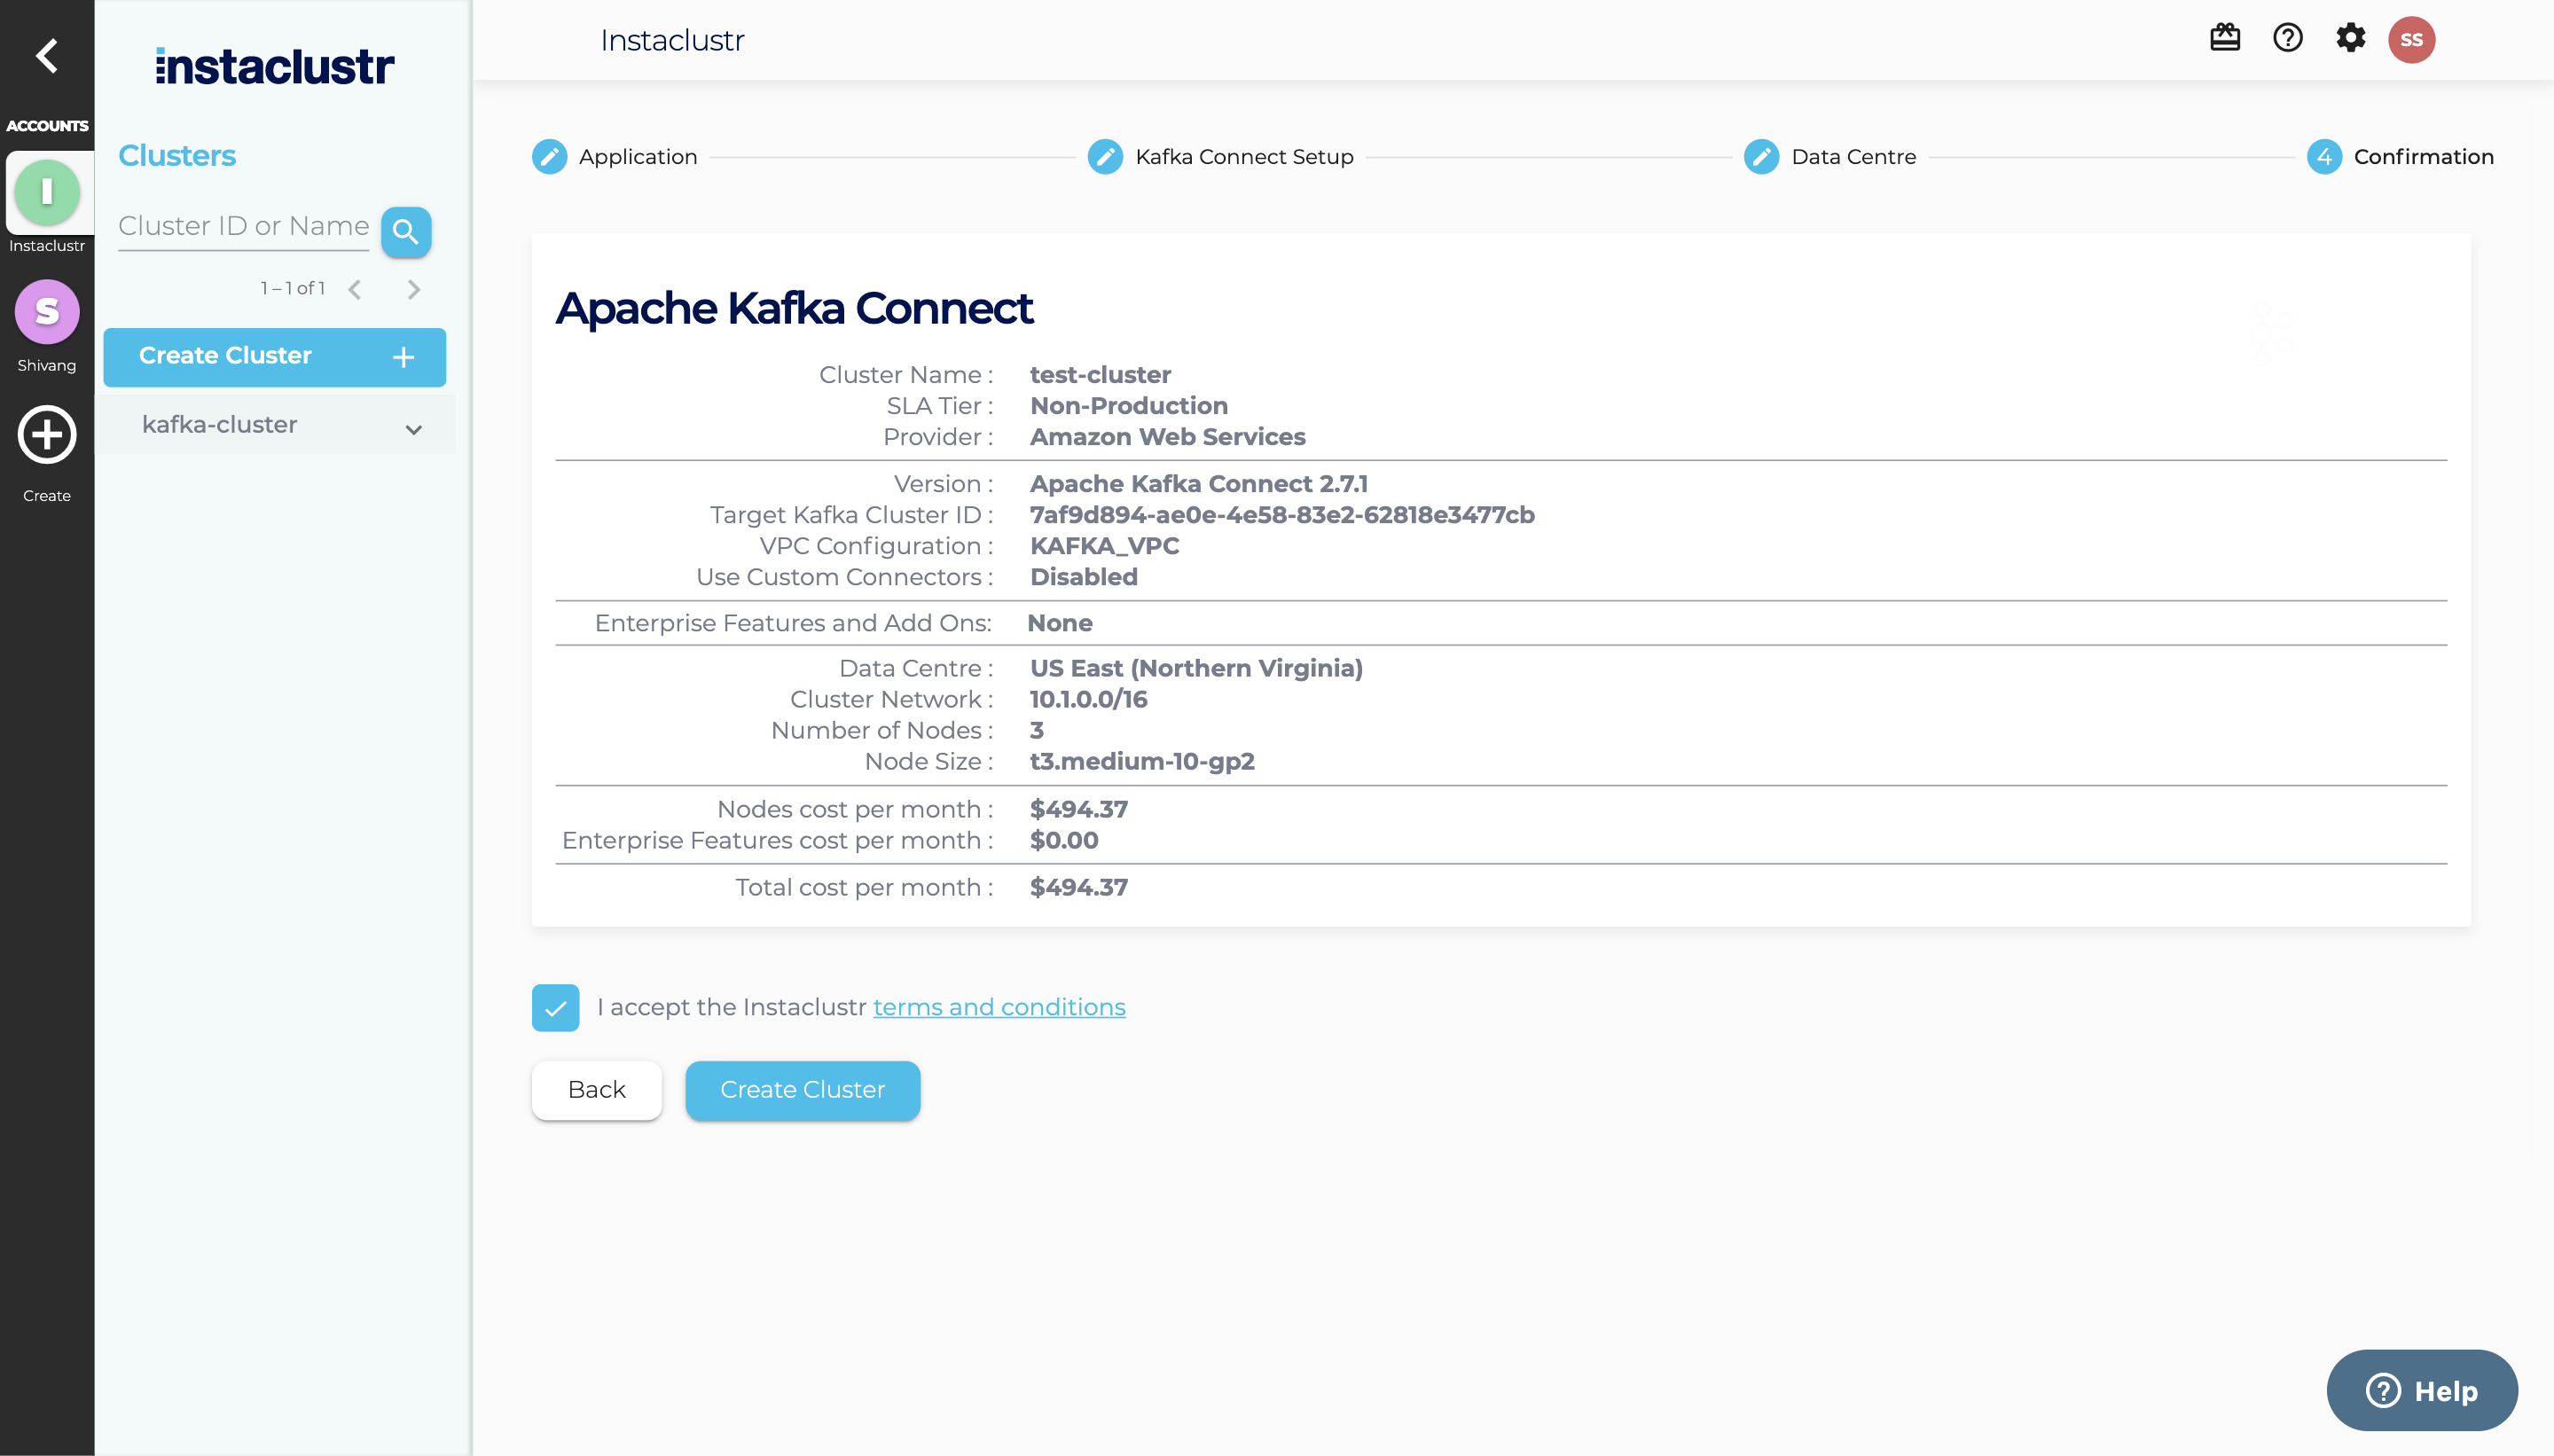
- The Confirmation section displays a brief summary of your cluster configurations and pricing details. Click the Terms and Conditions link to open the Instaclustr Terms and Conditions. After going through the document, select the checkbox to accept the Terms and Conditions. Once you are happy with the cluster configuration and have accepted the terms and conditions, click the Create Cluster button to start provisioning the cluster.
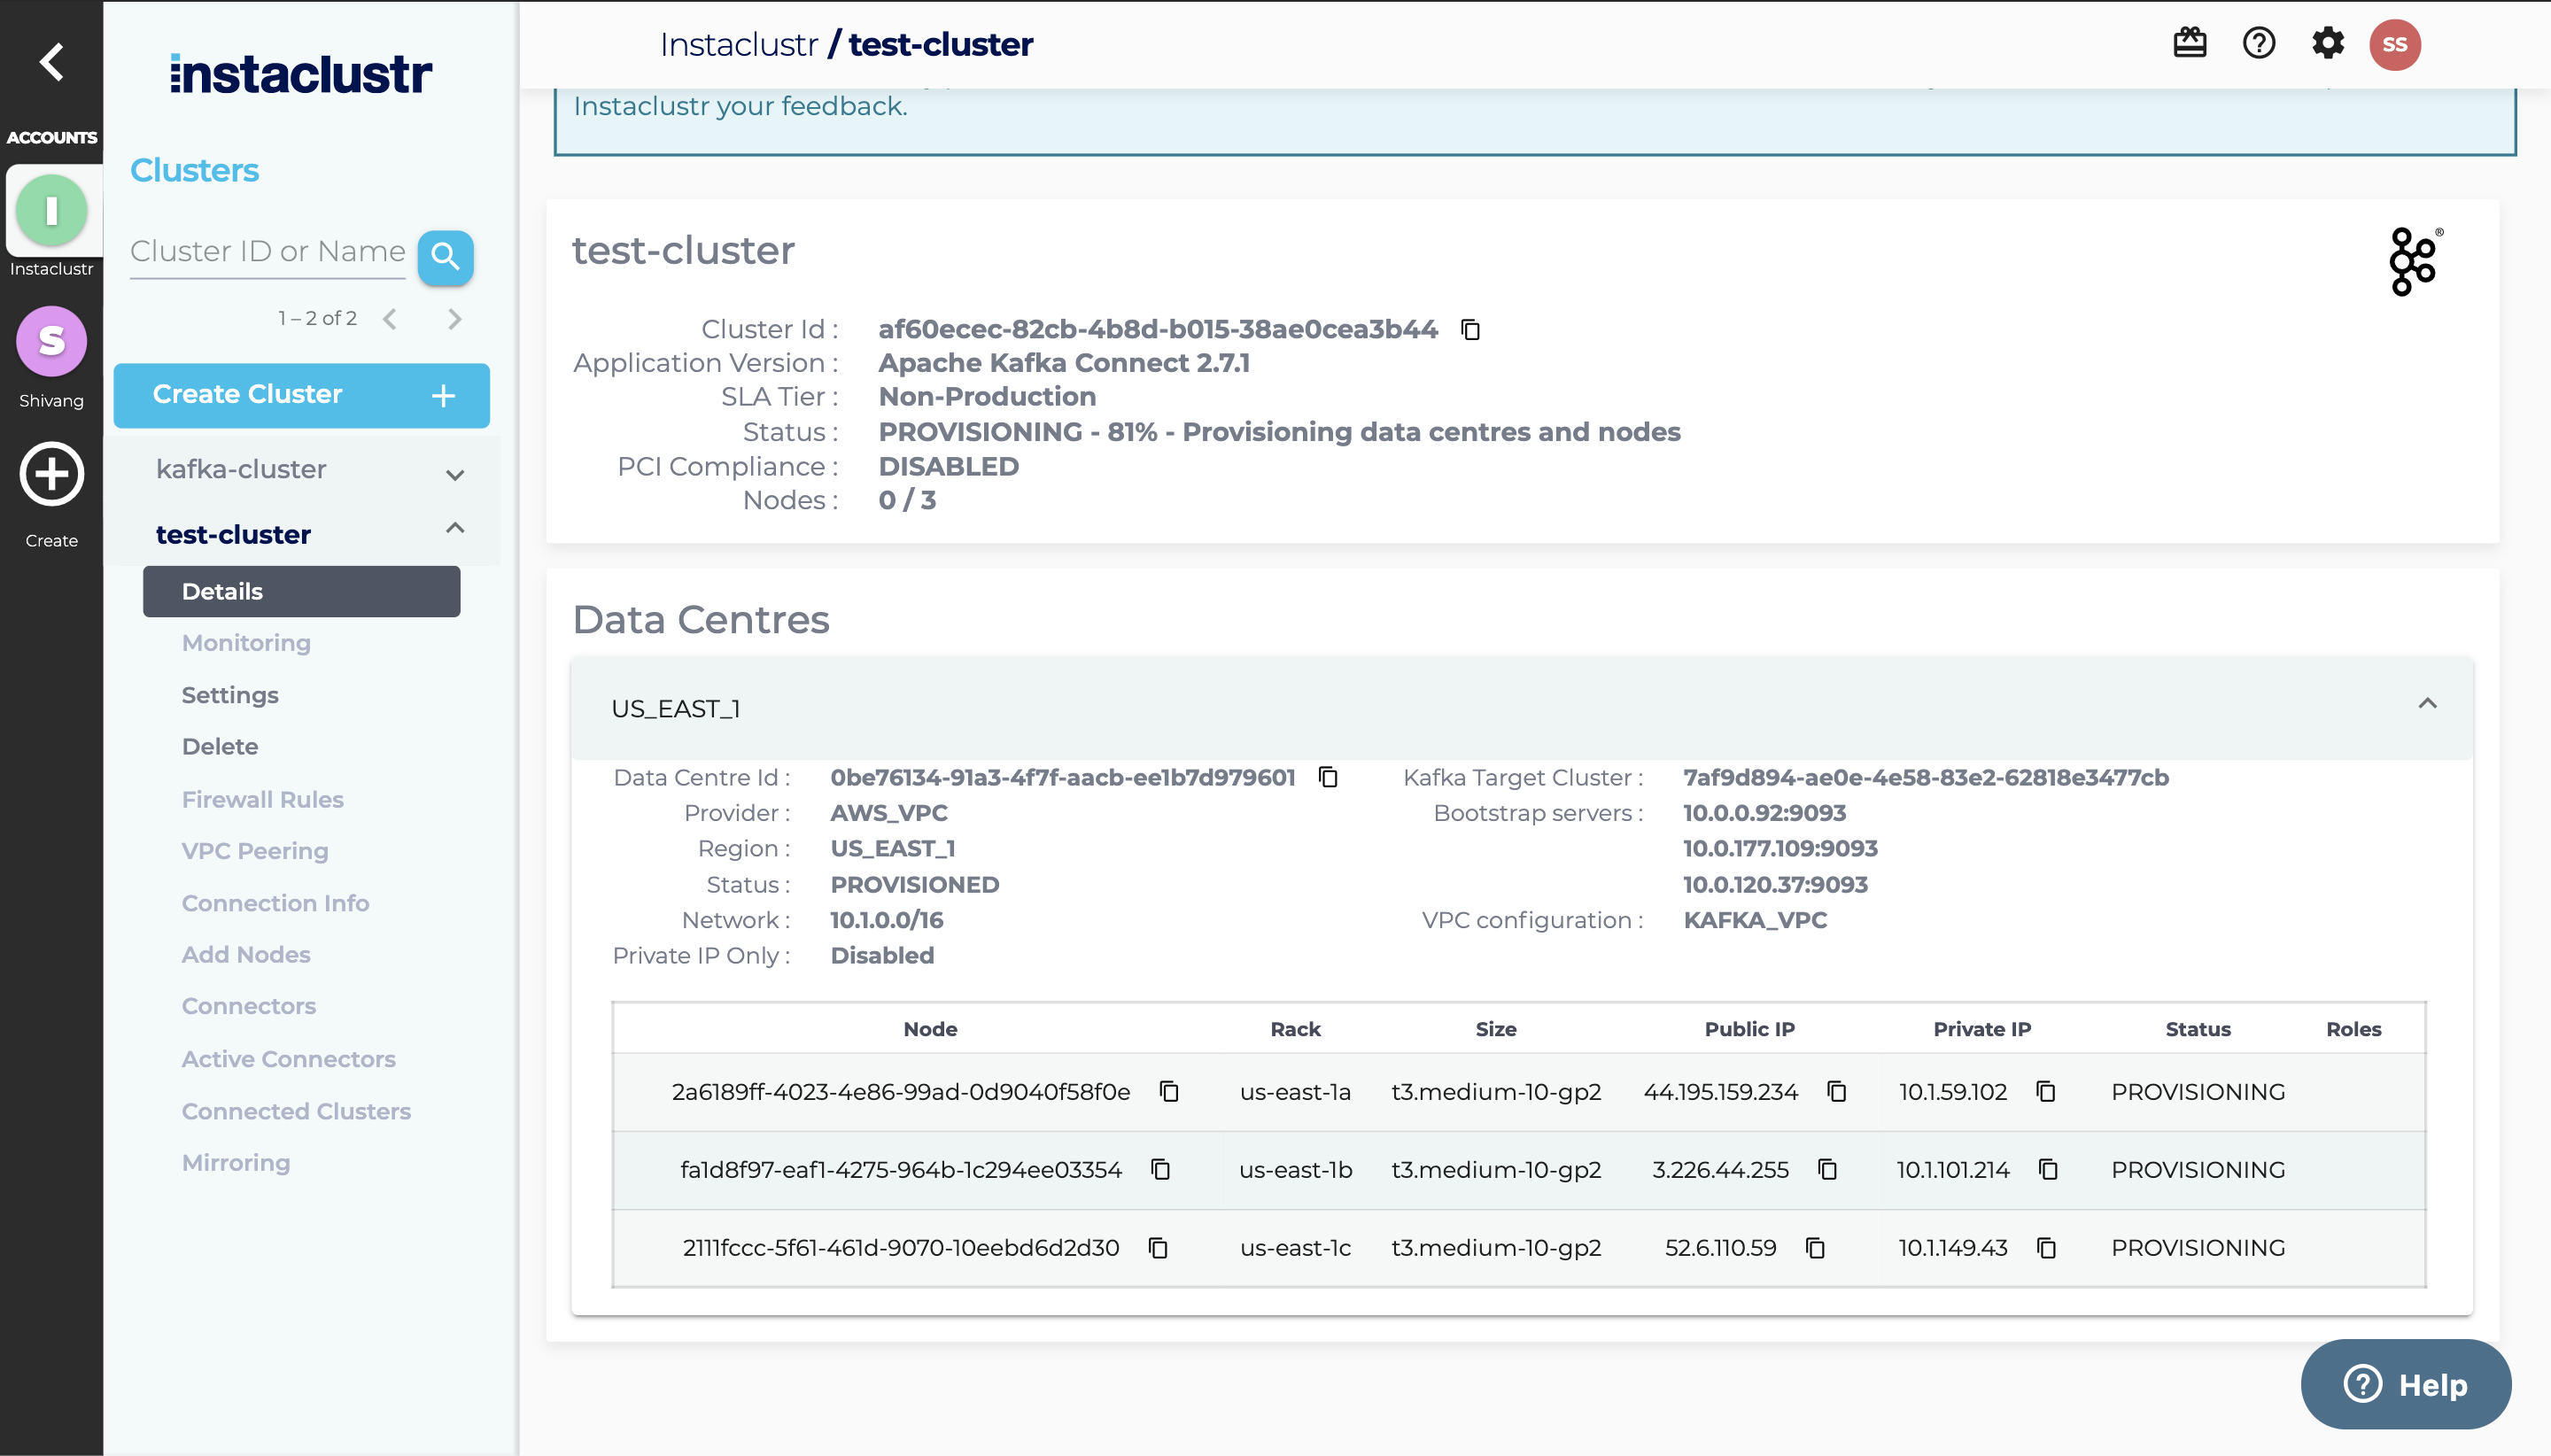
- Provisioning a cluster can take some time depending on the responsiveness of the underlying cloud provider. There are separate status indicators for the overall cluster provisioning state. Refer to our support article on The Provisioning Life Cycle to understand each of the different stages in more detail.