Getting Started with the Apache Spark Add-On for Apache Cassandra
| For Legacy Support Purposes Only |
|---|
The rest of this tutorial will walk you through options to submit Apache Spark jobs to your cluster.
The high-level steps in this tutorial are:
- Provision an Apache Cassandra cluster with the Apache Spark Add-On
- Set up a Spark Client
- Configure Client Network Access
- Basic Interaction with Spark Shell
- Using Spark SQL from Spark Shell
- Using Spark SQL from Spark Shell for Spark 3
- Creating and Submitting a Scala Job
- Conclusion
This tutorial assumes that you are familiar with launching and connecting to servers in AWS.
While this tutorial is specific to AWS, we also support Spark on Azure and IBM SoftLayer. You can follow a similar approach to set up on those platforms or contact [email protected] if you need more detailed instructions.
Table of Contents
Provision a cluster with Cassandra and Spark
- If you haven’t already signed up for an Instaclustr account, refer our support article to sign up and create an account.
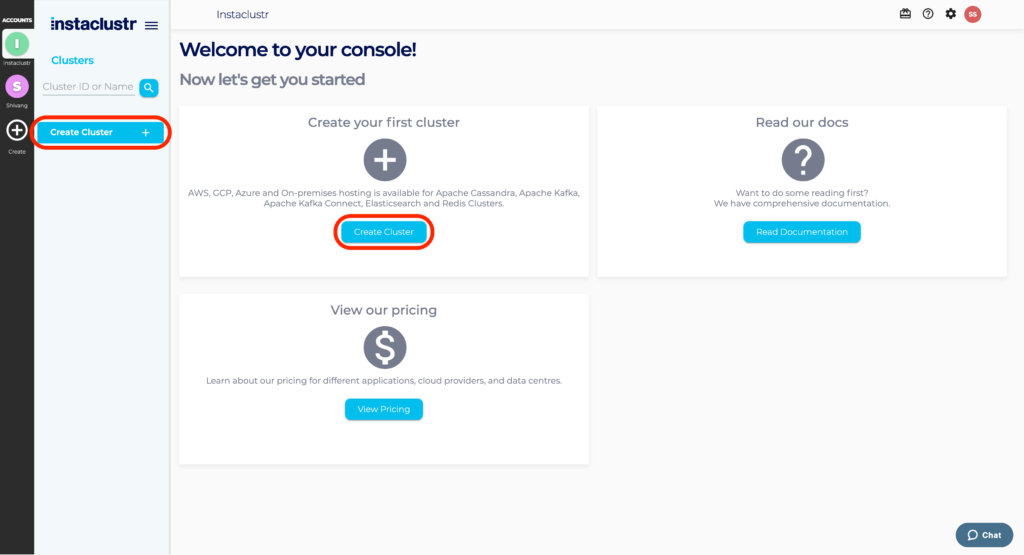
- Once you have signed up for Instaclustr and verified your email, log in to the Instaclustr console and click the Create Cluster button to create a new cluster.
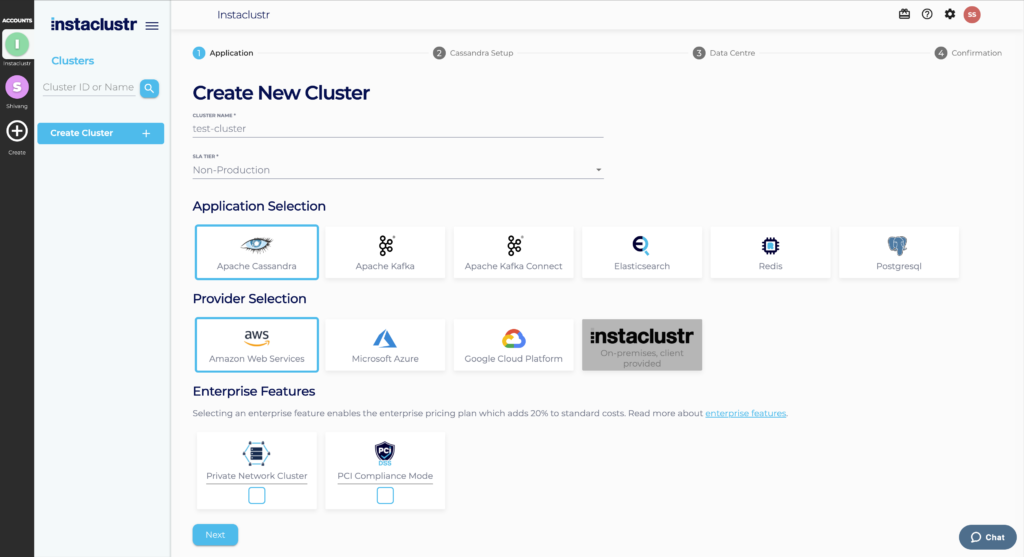
- Under the Application section, enter an appropriate name for your cluster. Select Apache Cassandra as the base application and Amazon Web Services as the infrastructure provider.
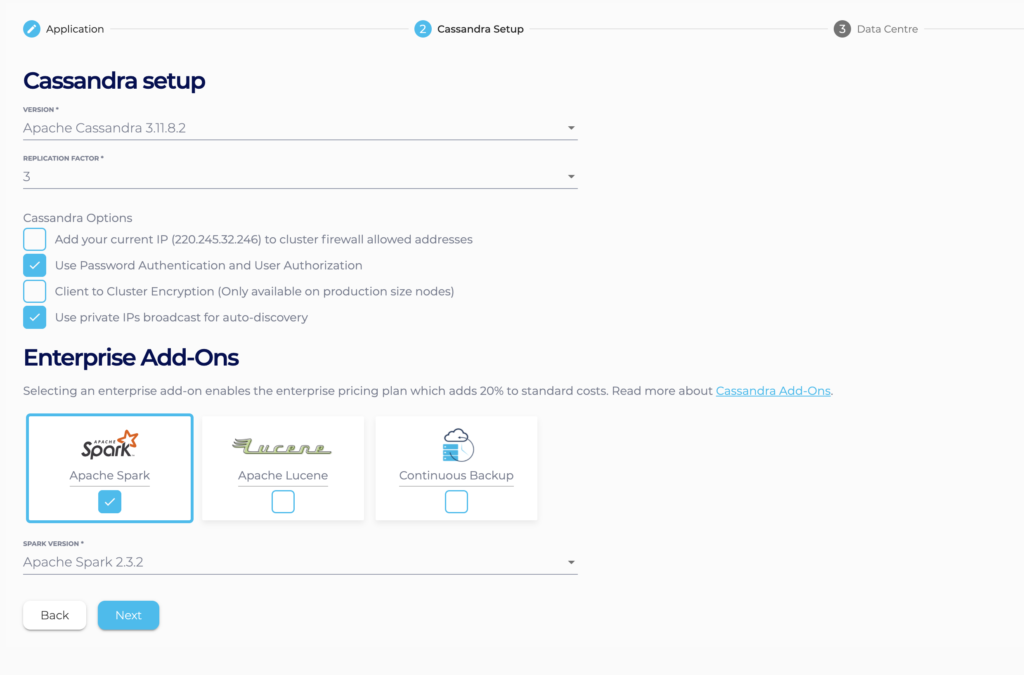
- Under Cassandra Setup, select Apache Spark as an add-on. Note that we recommend that you enable Use private IPs to broadcast for auto-discovery. Do not enable Client to Cluster Encryption. If you wish to configure Apache Spark with an SSL configured Cassandra Cluster, you may refer to our support article.
- Under the Data Centre section, select a Data Centre Region, a Cluster Network address block, the number of nodes for your application, and your desired node size.
 If the data centre for your cluster is running on Amazon’s EBS infrastructure, you can choose to encrypt your data with an AWS KMS key.Please refer to our support article on Network Address Allocation to understand how we divide up the specified network range to determine the node IP addresses.
 - Accept the terms and conditions and click the Create Cluster button. The cluster will automatically provision and will be available for use once all nodes are in the running state.
Set Up a Spark Client
To use our Spark cluster, you will need a client machine setup to submit jobs. Use the following steps to set up a client in AWS:
- Provision a new Amazon EC2 instance (a virtual AWS server) with the following configuration:
- AMI: Ubuntu Server 16.04 LTS (HVM), SSD Volume Type
- Instance Type: t2.small is sufficient for this tutorial and sufficient for many use-cases ongoing
- VPC: if possible, use a VPC with DNS resolution and DNS hostname enabled (Otherwise, refer to step 7 below). The VPC network range should not overlap with the network range of your instaclustr cluster. Also, ensure that the region of your VPC is the same as that of your newly created Cassandra and Spark cluster.
- ssh to the newly launched server with ubuntu as username.
- Download the spark version matching your instaclustr version. In this case, Spark 2.1.1:
1<span style="font-weight: 400;">wget https://archive.apache.org/dist/spark/spark-2.3.2/</span><a href="https://archive.apache.org/dist/spark/spark-2.3.2/spark-2.3.2-bin-hadoop2.6.tgz"><span style="font-weight: 400;">spark-2.3.2-bin-hadoop2.6.tgz</span></a>
- Extract the Spark files:
1<span style="font-weight: 400;">tar -xvf </span><a href="https://archive.apache.org/dist/spark/spark-2.3.2/spark-2.3.2-bin-hadoop2.6.tgz"><span style="font-weight: 400;">spark-2.3.2-bin-hadoop2.6.tgz</span></a>
- Download the Spark Cassandra assembly Jar (this is a fat Jar built by Instaclustr to include all required dependencies, to be used for spark shell). The latest version available for your spark version should be accessible via the Connection Info page of Instaclustr console.
1<span style="font-weight: 400;">wget </span><a href="https://static.instaclustr.com/spark/spark-cassandra-connector-assembly-2.3.2.jar"><span style="font-weight: 400;">https://static.instaclustr.com/spark/spark-cassandra-connector-assembly-2.3.2.jar</span> </a>
- Install the Java Development Kit:
12sudo apt-get updatesudo apt-get install default-jdk
- If you are not using a VPC with DNS resolution and DNS hostname enabled, you will need to change the hostname of the client to the IP so that it resolves when used by Spark (a bit of a hack – the right way is to edit /etc/hosts but this is quicker):If your spark version is equal or above 2.3.2 you will have to add SPARK_PUBLIC_DNS=<your_ip> and SPARK_LOCAL_IP=<your_ip> to the spark-env.sh in the conf directory of your spark installation.
1sudo hostname
- If you will be building the final scala example, then install sbt:
12345<span style="font-weight: 400;">echo "deb https://repo.scala-sbt.org/scalasbt/debian all main" | sudo tee /etc/apt/sources.list.d/sbt.list</span><span style="font-weight: 400;">echo "deb https://repo.scala-sbt.org/scalasbt/debian /" | sudo tee /etc/apt/sources.list.d/sbt_old.list</span><span style="font-weight: 400;">curl -sL "https://keyserver.ubuntu.com/pks/lookup?op=get&search=0x2EE0EA64E40A89B84B2DF73499E82A75642AC823" | sudo apt-key add</span>sudo apt-get updatesudo apt-get install sbt
Configure Client Network Access
As Spark has minimal security, we recommend that you access Spark from a peered VPC in AWS to increase the security of network-based access rules. To set up the peered VPC and allow connections from your VPC to the cluster, follow our support article on Using VPC Peering AWS.
Note: When following the VPC Peering instructions, you must add your VPC network range to the Spark Allowed Addresses and the Cassandra Allowed Addresses. The Spark driver on your client machine needs to be able to connect to Cassandra as well as the Spark workers (to establish partition ranges).
In addition to connections from the Spark Client to the cluster, the architecture of Spark means that the Spark Cluster needs to be able to connect to the clients. Enable this in AWS by editing the security group associated with your Spark Client to add an Inbound rule with the following values:
- Type: Custom TCP Rule
- Protocol: TCP
- Port Range: 1024-65535
- Source: Custom IP, <your cluster network range> (viewable from the cluster details page in the Instaclustr console)
Basic Interaction with Spark Shell
We will now connect to the Spark cluster using the Spark Shell and run an analytic job. (Note: sometimes the log messages from Spark shell overwrite the shell prompt. If processing seems to have stopped with no prompt then hit the enter key to get a prompt.)
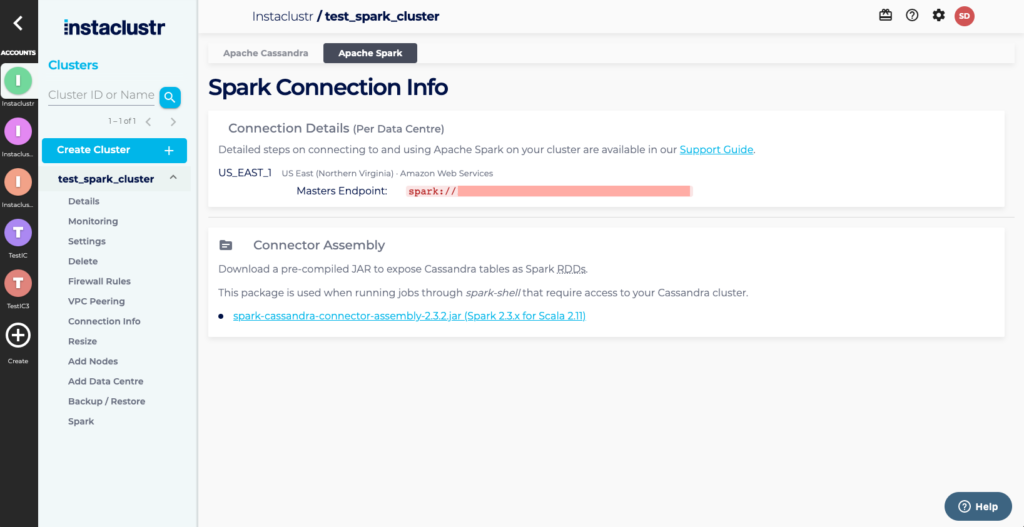
- Find the IP addresses of the three Spark Masters in your cluster – this is viewable on the Apache Spark tab on the Connection Info page for your cluster.
- Log in to your Spark Client and run the following command (adjust keywords in <> to specify your spark master IPs, one of Cassandra IP, and the Cassandra password if you enabled authentication).
For Spark 3, include the key value pair spark.sql.extensions=com.datastax.spark.connector.CassandraSparkExtensions with –conf. This option will enable Cassandra Specific Catalyst optimizations and functions.
12cd ~/spark-2.1.1-bin-hadoop2.6/bin./spark-shell --master spark://<spark_master_IP1>:7077,<spark_master_IP2>:7077,<spark_master_IP3>:7077 --conf spark.cassandra.connection.host=<cassandra_private_IP> --conf spark.cassandra.auth.username=iccassandra --conf spark.cassandra.auth.password=<iccassandra password> --conf spark.driver.host=<your_ip> --jars ~/spark-cassandra-connector-assembly-2.0.2.jar - Spark-shell should start without any errors. There will be a lot of log message. Once fully started you will see a prompt: “scala>”.
- Some imports are necessary. For this simple job, enter the following at the prompt:
123import org.apache.spark.{SparkConf, SparkContext}import org.apache.spark.SparkContext._import com.datastax.spark.connector._
- Now we can create an rdd and execute an action on it. Only the action (rdd.count) will trigger the calculation. In this case, we use the “system_schema” keyspace that is used by cassandra to keep tracks of internals, such as the list of keyspaces.
12val rdd = sc.cassandraTable("system_schema","keyspaces")println("Row count: " + rdd.count)
- You should see a lot of log messages followed by the row count message.
Using Spark SQL from Spark Shell
Spark SQL allows you to run complex SQL queries against Cassandra data. The following step demonstrate how to execute a Spark SQL query against Cassandra using the Spark SQL connector. Execute these steps in the same Spark shell session where you executed the previous example:
- Import the required libraries:
12import org.apache.spark.sql.cassandra._import org.apache.spark.sql
- Create a temporary view to access datasets using Spark SQL:
12345678val createDDL = """CREATE TEMPORARY VIEW keyspacesUSING org.apache.spark.sql.cassandraOPTIONS (table "keyspaces",keyspace "system_schema",pushdown "true")"""spark.sql(createDDL)
- Run queries on the temporary view:
1234spark.sql("SELECT * FROM keyspaces").showval rdd1 = spark.sql("SELECT count(*) from keyspaces")println("Row count: " + rdd1.first()(0))
Using Spark SQL from Spark Shell for Spark 3
- Create a Catalog Reference to your Cassandra Cluster
1spark.conf.set(s"spark.sql.catalog.mycatalog", "com.datastax.spark.connector.datasource.CassandraCatalog")
- Create a keyspace and table in Cassandra using spark sql
12spark.sql("CREATE DATABASE IF NOT EXISTS mycatalog.testks WITH DBPROPERTIES (class='SimpleStrategy',replication_factor='1')")spark.sql("CREATE TABLE mycatalog.testks.testtab (key Int, value STRING) USING cassandra PARTITIONED BY (key)")
- To List the contents
12spark.sql("SHOW NAMESPACES FROM mycatalog").showspark.sql("SHOW TABLES FROM mycatalog.testks").show
Creating and Submitting a Scala Job
In this step of the tutorial we will demonstrate how to build and submit a Scala job. This is useful where you wish to create a job and submit it multiple times.
- Log in to your Spark client machine.
- Create required directories for your project:
1234mkdir ~/cassandra-countcd cassandra-countmkdir -p src/main/scalamkdir project
- Create a file called build.sbt in the cassandra-count directory with the following contents (note: the blank lines are important):
123456789101112131415161718name := "cassandra-count"version := "1.0"scalaVersion := "2.11.8"libraryDependencies += "org.apache.spark" %% "spark-core" % "2.1.1" % "provided"libraryDependencies += "com.datastax.spark" %% "spark-cassandra-connector" % "2.0.2"libraryDependencies += "org.apache.spark" %% "spark-sql" % "2.1.1" % "provided"assemblyMergeStrategy in assembly ~= {(old) => {case PathList("META-INF", "io.netty.versions.properties") => MergeStrategy.lastcase x => old(x)}}
- Create a file called assembly.sbt in the cassandra-count/project directory with the following contents (this will include required dependencies in the output jars):
1addSbtPlugin("com.eed3si9n" % "sbt-assembly" % "0.14.5")
- Create a file called cassandra-count.scala in the cassandra-count/src/main/scala directory with the following contents:
1234567891011121314151617181920212223import org.apache.spark.SparkContextimport org.apache.spark.SparkConfimport com.datastax.spark.connector._object cassandraCount {def main(args: Array[String]) {// 1. Create a conf for the spark context// In this example, spark master and cassandra nodes info are provided in a separate count.conf file.val conf = new SparkConf().setAppName("Counting row of a cassandra table")// 2. Create a spark contextval sc = new SparkContext(conf)// 3. Create an rdd that connect to the cassandra table "schema_keyspaces" of the keyspace "system"val rdd = sc.cassandraTable("system_schema", "keyspaces")// 4. Count the number of rowval num_row = rdd.count()println("n Number of rows in system_schema.keyspaces: " + num_row + "n")// 5. Stop the spark context.sc.stop}}
- Create a file called cassandra-count.conf in the cassandra-count directory (this file contains the configuration that will be used when we submit the job):
123456789spark.master spark://<spark_master_private_IP1>:7077,<spark_master_private_IP2>:7077,<spark_master_private_IP3>:7077spark.executor.memory 1gspark.driver.host <your ip>spark.cassandra.connection.host <private ip of cassandra>spark.cassandra.auth.username iccassandraspark.cassandra.auth.password <iccassandra password>spark.serializer org.apache.spark.serializer.KryoSerializerspark.eventLog.enabled truespark.eventLog.dir .
- Build the job (from cassandra-count directory):
1sbt assembly
- Submit the job (from cassandra-count directory):
1~/spark-2.1.1-bin-hadoop2.6/bin/spark-submit --properties-file cassandra-count.conf --class cassandraCount target/scala-2.11/cassandra-count-assembly-1.0.jar
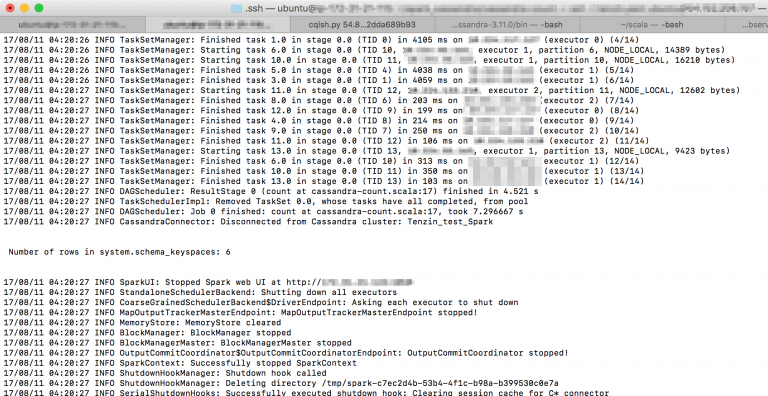
- You should see a lot of log messages with the row count message about 15 messages from the end.
Conclusion
In this tutorial you have learned how to:
- Provision a cluster with Cassandra and Spark
- Setup and configure Spark client
- Use Spark SQL from spark shell and
- Create a submit a scala job
For more information, refer to the following resources: