Creating an AWS PrivateLink enabled Apache Cassandra Cluster on the Instaclustr Platform
This article describes how to provision an Apache Cassandra® cluster with AWS PrivateLink using the Instaclustr Console. AWS PrivateLink is a networking feature provided by Amazon Web Services (AWS) that provides direct and secure connectivity between AWS VPCs. You can read more about PrivateLink and our support for it here.
Note that AWS PrivateLink is not currently supported with:
- Cassandra versions 3.11 and earlier. Refer to our Lifecycle Status of Applications for more information on application compatibility.
Provision a Cassandra AWS PrivateLink enabled cluster on the Instaclustr platform
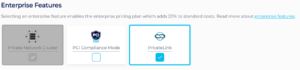
1 – Login to the Instaclustr Console and provision a new Cassandra cluster and ensure you select the AWS PrivateLink Enterprise Feature.
2 – Select the cluster’s Cassandra version. Note that only Cassandra versions 4.0 and above are supported by PrivateLink.
3 – Enter the AWS IAM principal ARNs to use for provisioning the AWS PrivateLink endpoints into your VPC. Please double check this value as an incorrect entry will lead to errors later in the process. Alternatively, since this is an optional field, you will have the option to update it later in the process and you can skip entering it until you are certain of the value.
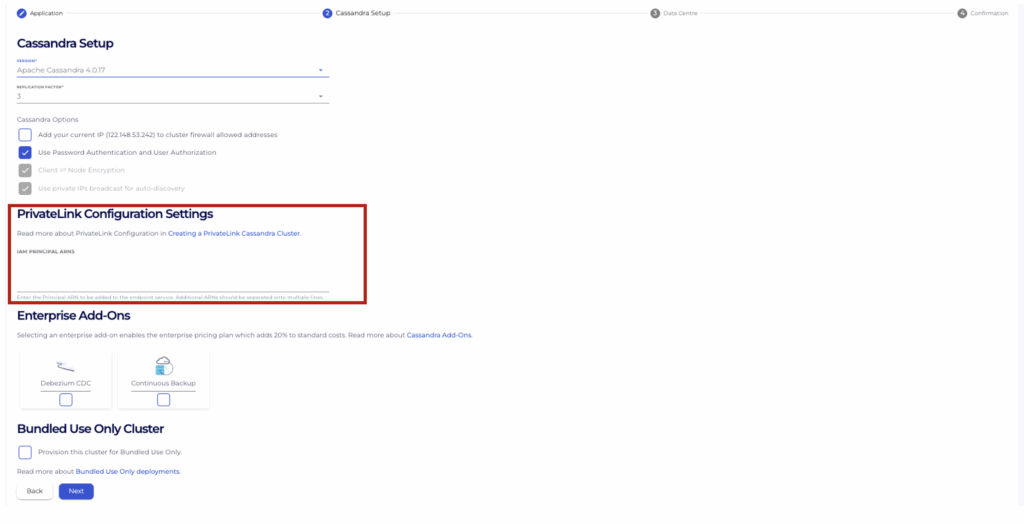
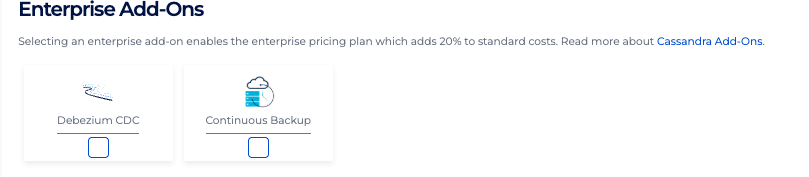
4 – Select any other Enterprise Add-ons you would like to include in the cluster.
5 – Select your desired node sizes for the Cassandra cluster and the Shotover Proxy and your desired Datacenter to provision into.
We recommend selecting a region that is geographically located near to the VPC from where you intend to connect from to reduce latency between the client application and the cluster.
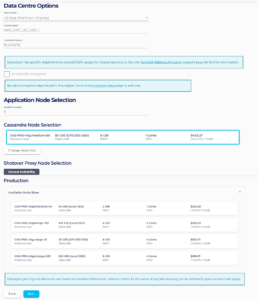
We recommend selecting your Shotover Node Size based on the number of cores of your Cassandra Nodes. You will need to sum the total of CPU cores in the Cassandra cluster and then use the table below to find the corresponding Shotover node size for that number of total CPU cores.
| Sum of total CPU Cores in Cassandra Cluster | Shotover Node Size |
| Up to 24 CPU | CSO-PRD-c6gd.medium-54 |
| Up to 48 CPU | CSO-PRD-c6gd.large-109 |
| Up to 96 CPU | CSO-PRD-c6gd.xlarge-220 |
| Above 96 CPU | CSO-PRD-c6gd.2xlarge-441 |
6 – The confirmation page provides you the opportunity to check the options you have selected on the console. Click the Create Cluster button when you are happy with your selection and agree to the Instaclustr terms and conditions.
7 – Wait for your cluster to reach the RUNNING status, this usually takes around 10 minutes, but may take longer depending on the region and number of nodes you have selected. Instaclustr will contact you in the event of an error or provisioning failure.
8 – Once your AWS PrivateLink enabled Cassandra Cluster is running, further steps are required to connect to it with your Cassandra client. Please refer to our support page on Connecting to a PrivateLink Cassandra Cluster steps that need to be taken to connect Cassandra clients in one VPC to an AWS PrivateLink enabled Cassandra cluster on the Instaclustr platform.
For more information on AWS PrivateLink, please refer to our support documentation or contact Instaclustr Support for further assistance.