Creating an Apache Cassandra Cluster
This article describes how to provision an Apache Cassandra Cluster using the Instaclustr Console. You can alternatively choose to provision a Cassandra Cluster via the Instaclustr Provisioning API.
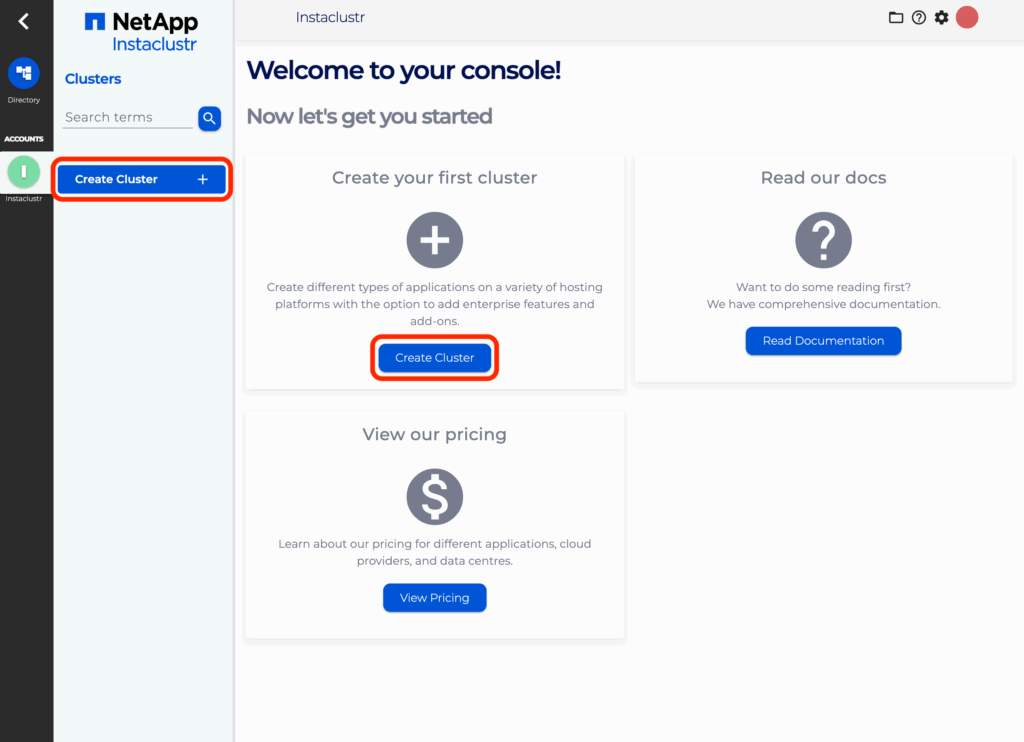
- To get started, after setting up your user account and logging into the console, click the Create Cluster button. This will take you to the wizard for creating a new cluster.
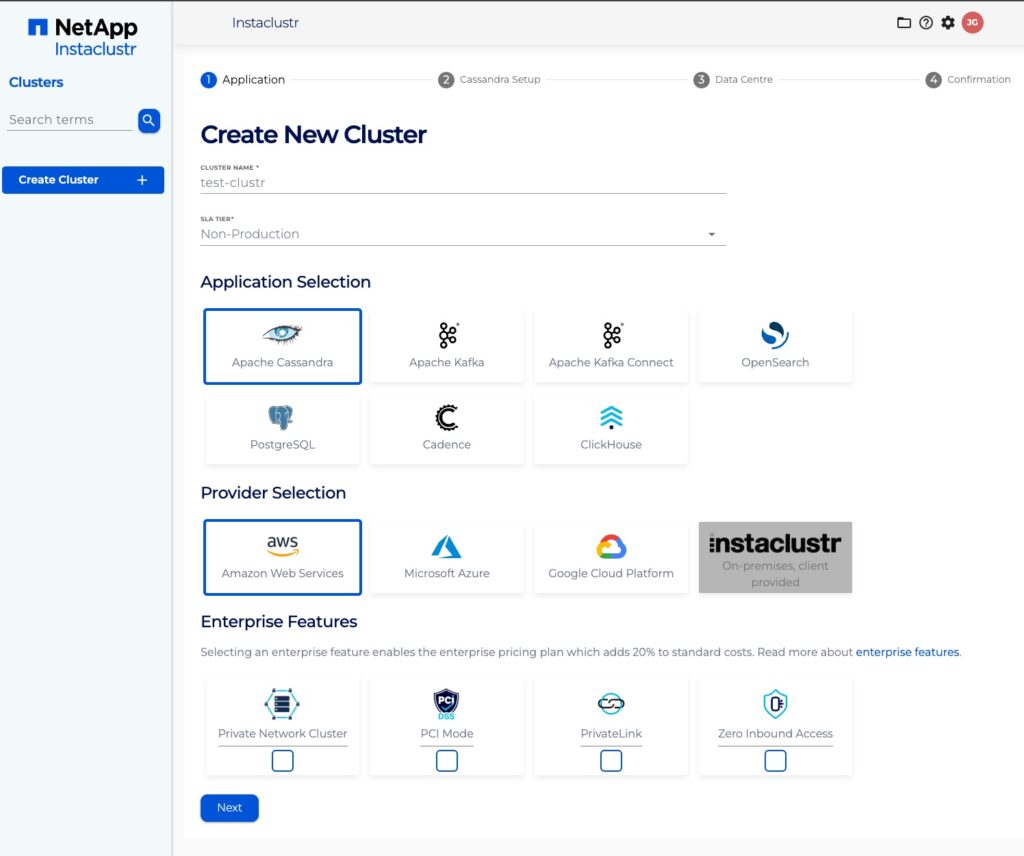
- Under the Application section, enter an appropriate name for your cluster, and select a base application and infrastructure provider. You will be able to customise specific configurations matching your performance and pricing requirements in the following sections of the wizard.
Subject Alternative Names are available for Cassandra clusters hosted in AWS cloud but only if PrivateLink is not enabled.
- Under the Cassandra Setup page, select a Cassandra version, replication factor, your Network and Security settings, and any Enterprise Add-Ons that you require.
Instaclustr detects the IP address of the computer used to access the Dashboard and provides the option to add a firewall rule for your computer to connect to the cluster. Certain web proxies may interfere with this mechanism and Instaclustr will see their IP address instead. We suggest you verify the detected address.
If you are using this Cassandra cluster solely as a dependency for a Cadence cluster, then you can use the Bundled Use Only option for a discount. For more information, see our Bundled Use Only Cluster Deployments documentation.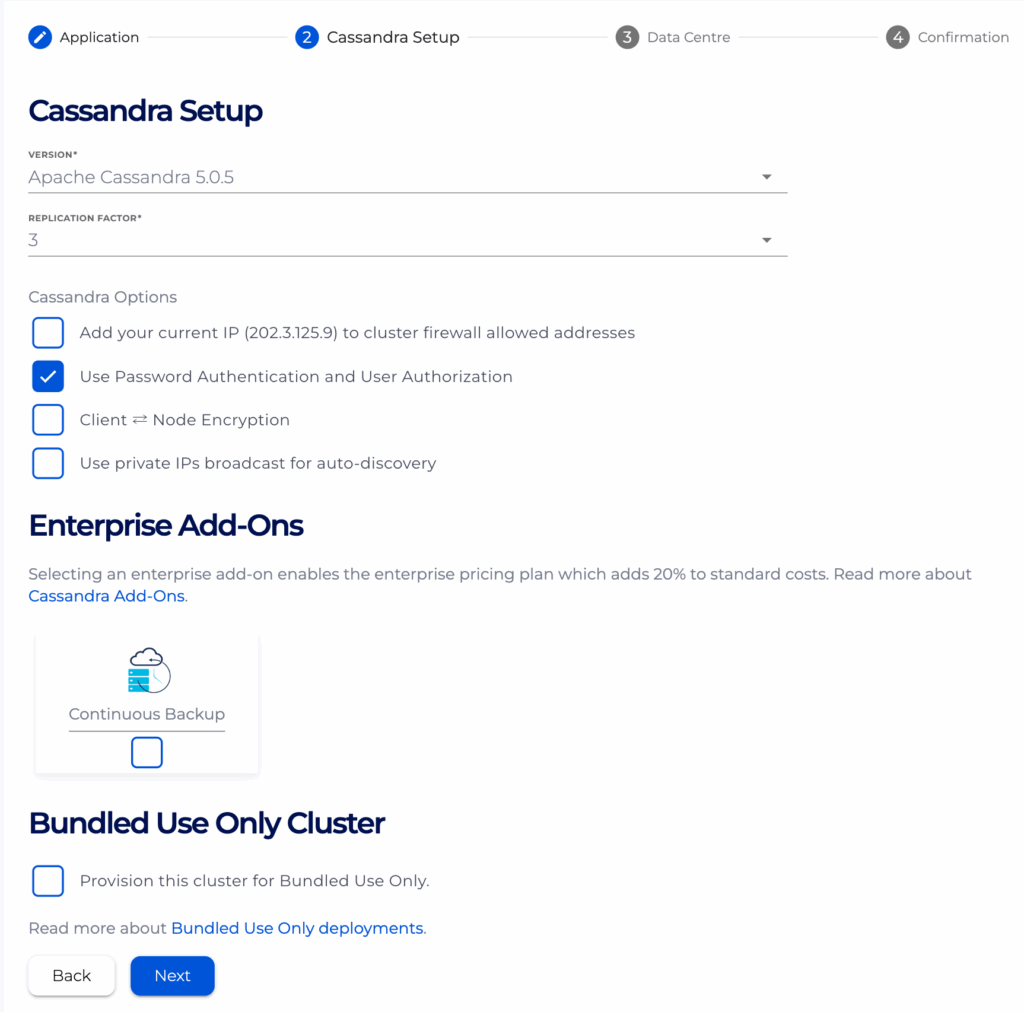
- Under the Data Centre section, select a Data Centre region, a Data Centre Network address block, the Number of Nodes for your application, and your desired node size.
Refer to our support article on Network Address Allocation to understand how we divide up the specified cluster network range to determine the node IP addresses.
If the data centre for your cluster is running on Amazon’s EBS infrastructure, you can choose to encrypt your data with an AWS KMS key.
The slider is defaulting to 1 in order to create a single data centre Apache Cassandra cluster. Changing the slider will result in clusters with multiple data centres. For more information about how these clusters are configured, please refer to Setting Up a Multi-Datacentre Cluster with Instaclustr.
If client encryption is enabled for the cluster, you can enter custom subject alternative names on this page.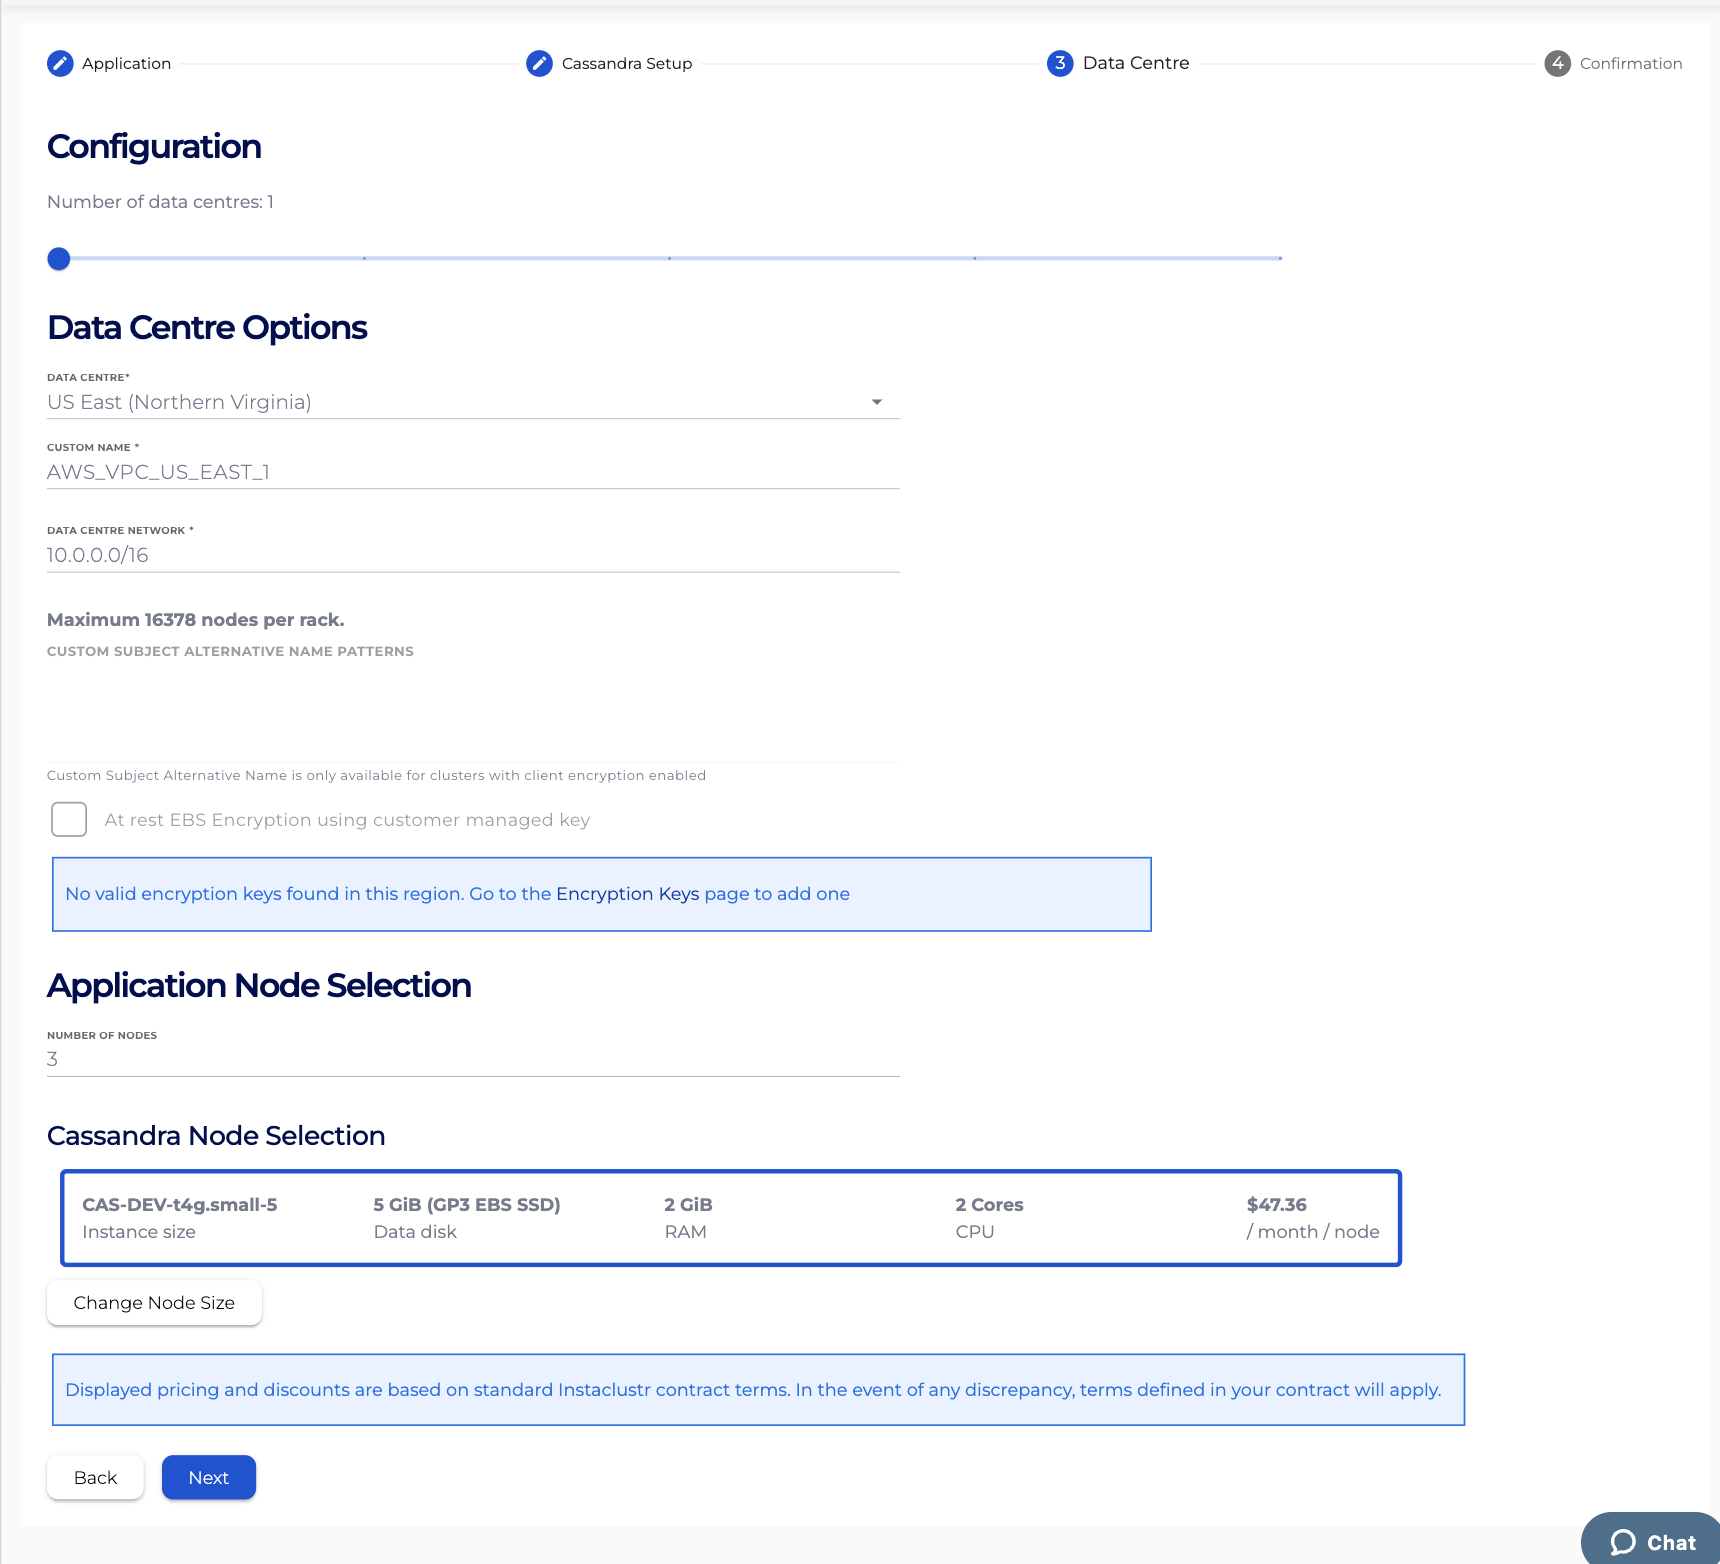
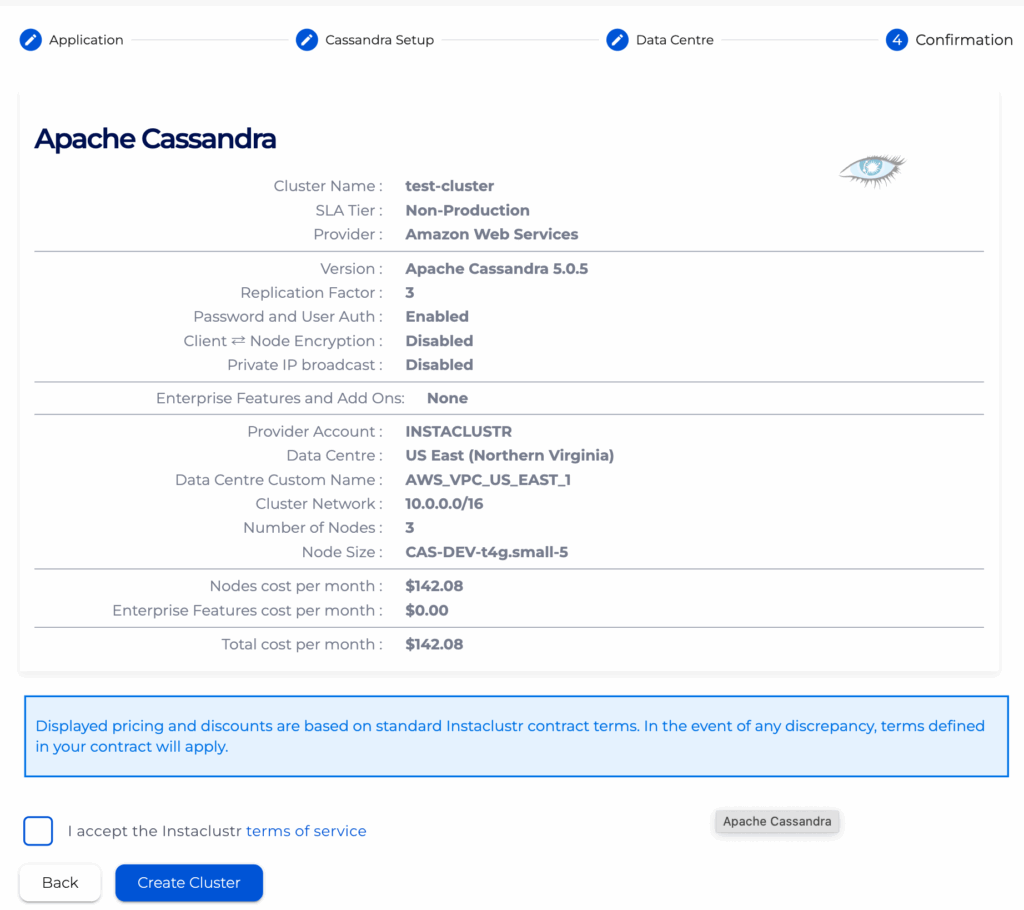
- The Confirmation section displays a brief summary of your cluster configurations and pricing details. Click the Terms and Conditions link to open the Instaclustr Terms and Conditions. After going through the document, select the checkbox to accept the Terms and Conditions. Once you are happy with the cluster configuration and have accepted the terms and conditions, click the Create Cluster button to start provisioning the cluster.
- Provisioning a cluster can take some time depending on the responsiveness of the underlying cloud provider. There are separate status indicators for the overall cluster provisioning state. Refer to our support article on The Provisioning Life Cycle to understand each of the different stages in more detail.

- You have now finished creating your cluster, congratulations! All your clusters will be listed on the left sidebar of the console. You can view your cluster’s configuration details by navigating to the Details page.
- We recommend reviewing the following support articles as a next step:
Contact us at [email protected] if there is any issue in provisioning your cluster.