Creating a PrivateLink Cadence Cluster
Overview
This article describes how to provision a Cadence cluster with PrivateLink using the Instaclustr Console. PrivateLink is a networking feature provided by Amazon Web Services (AWS) that provides direct and secure connectivity between AWS VPCs. You can read more about PrivateLink and our support for it here.
There are 2 approaches to creating the Cadence cluster with PrivateLink:
- Packaged Solution – The best option for simple production and testing environments. This provisions a complete Cadence configuration including the required supporting Cassandra cluster.
- Cadence Cluster Only – The most flexible option for environments at all scales. This requires that you have already created the necessary Cassandra cluster and provisions a Cadence cluster to use that existing cluster.
Packaged Solution
-
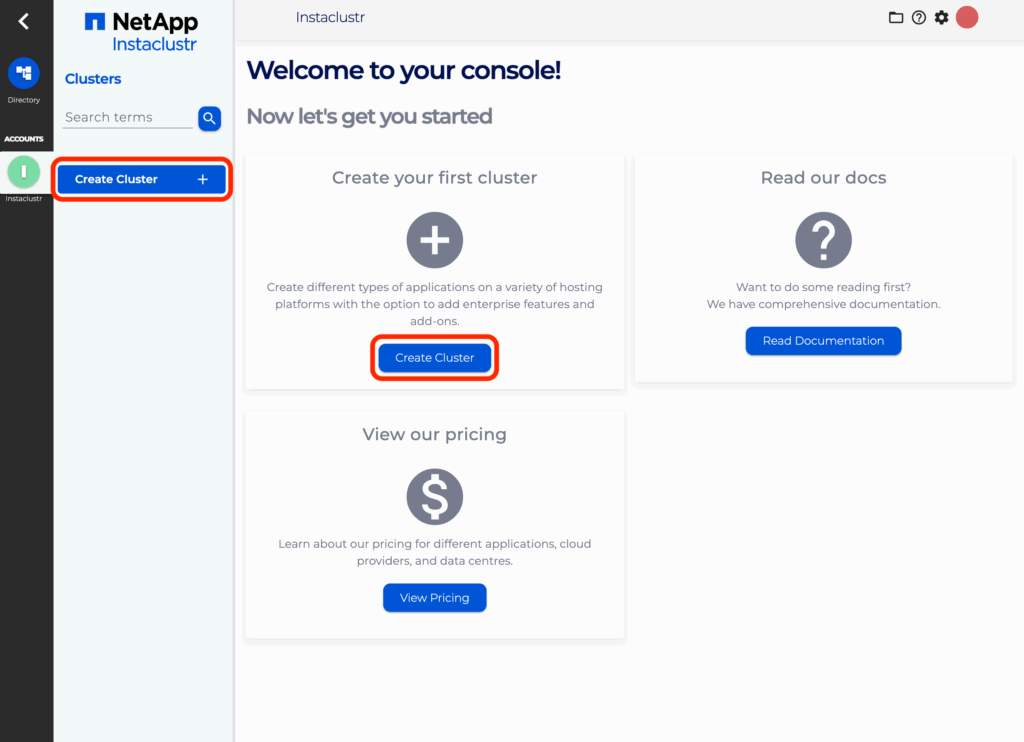
- Log into the Instaclustr Console and click the Create Cluster button. This will take you to the wizard for creating a new cluster.
- Give your cluster a name, select Cadence as the application, and select AWS as the provider. Click the checkbox in the Enterprise Features called PrivateLink thn click Next.
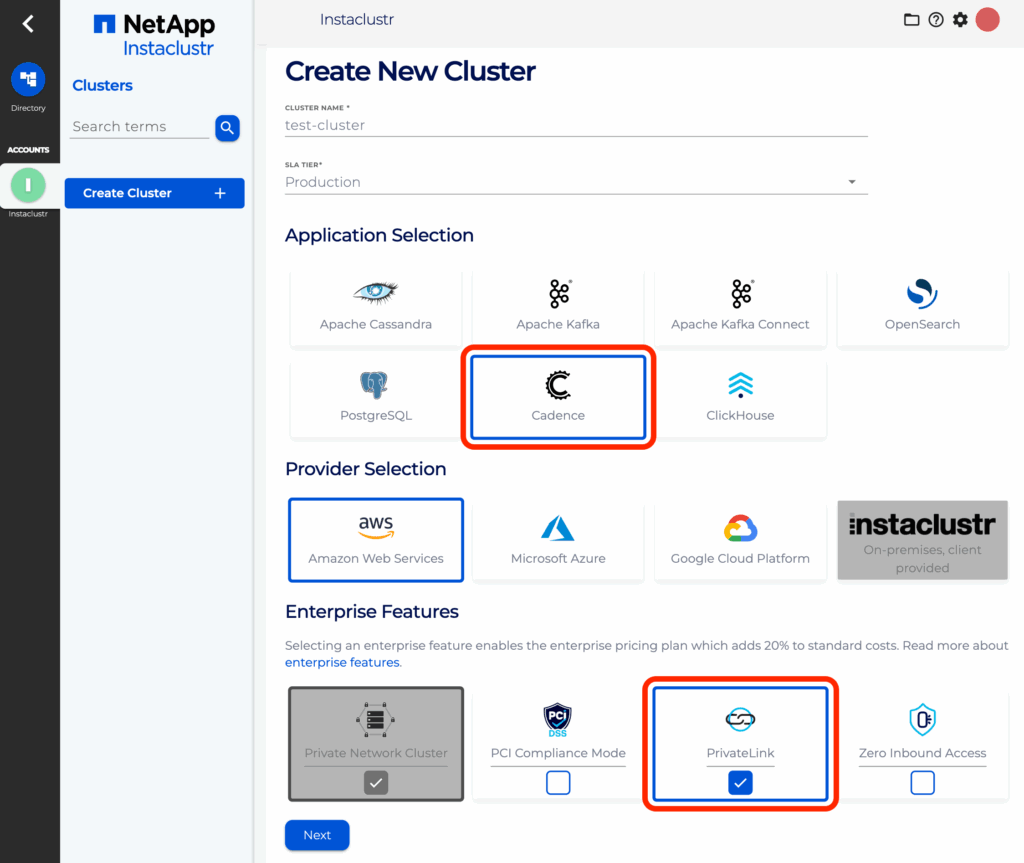
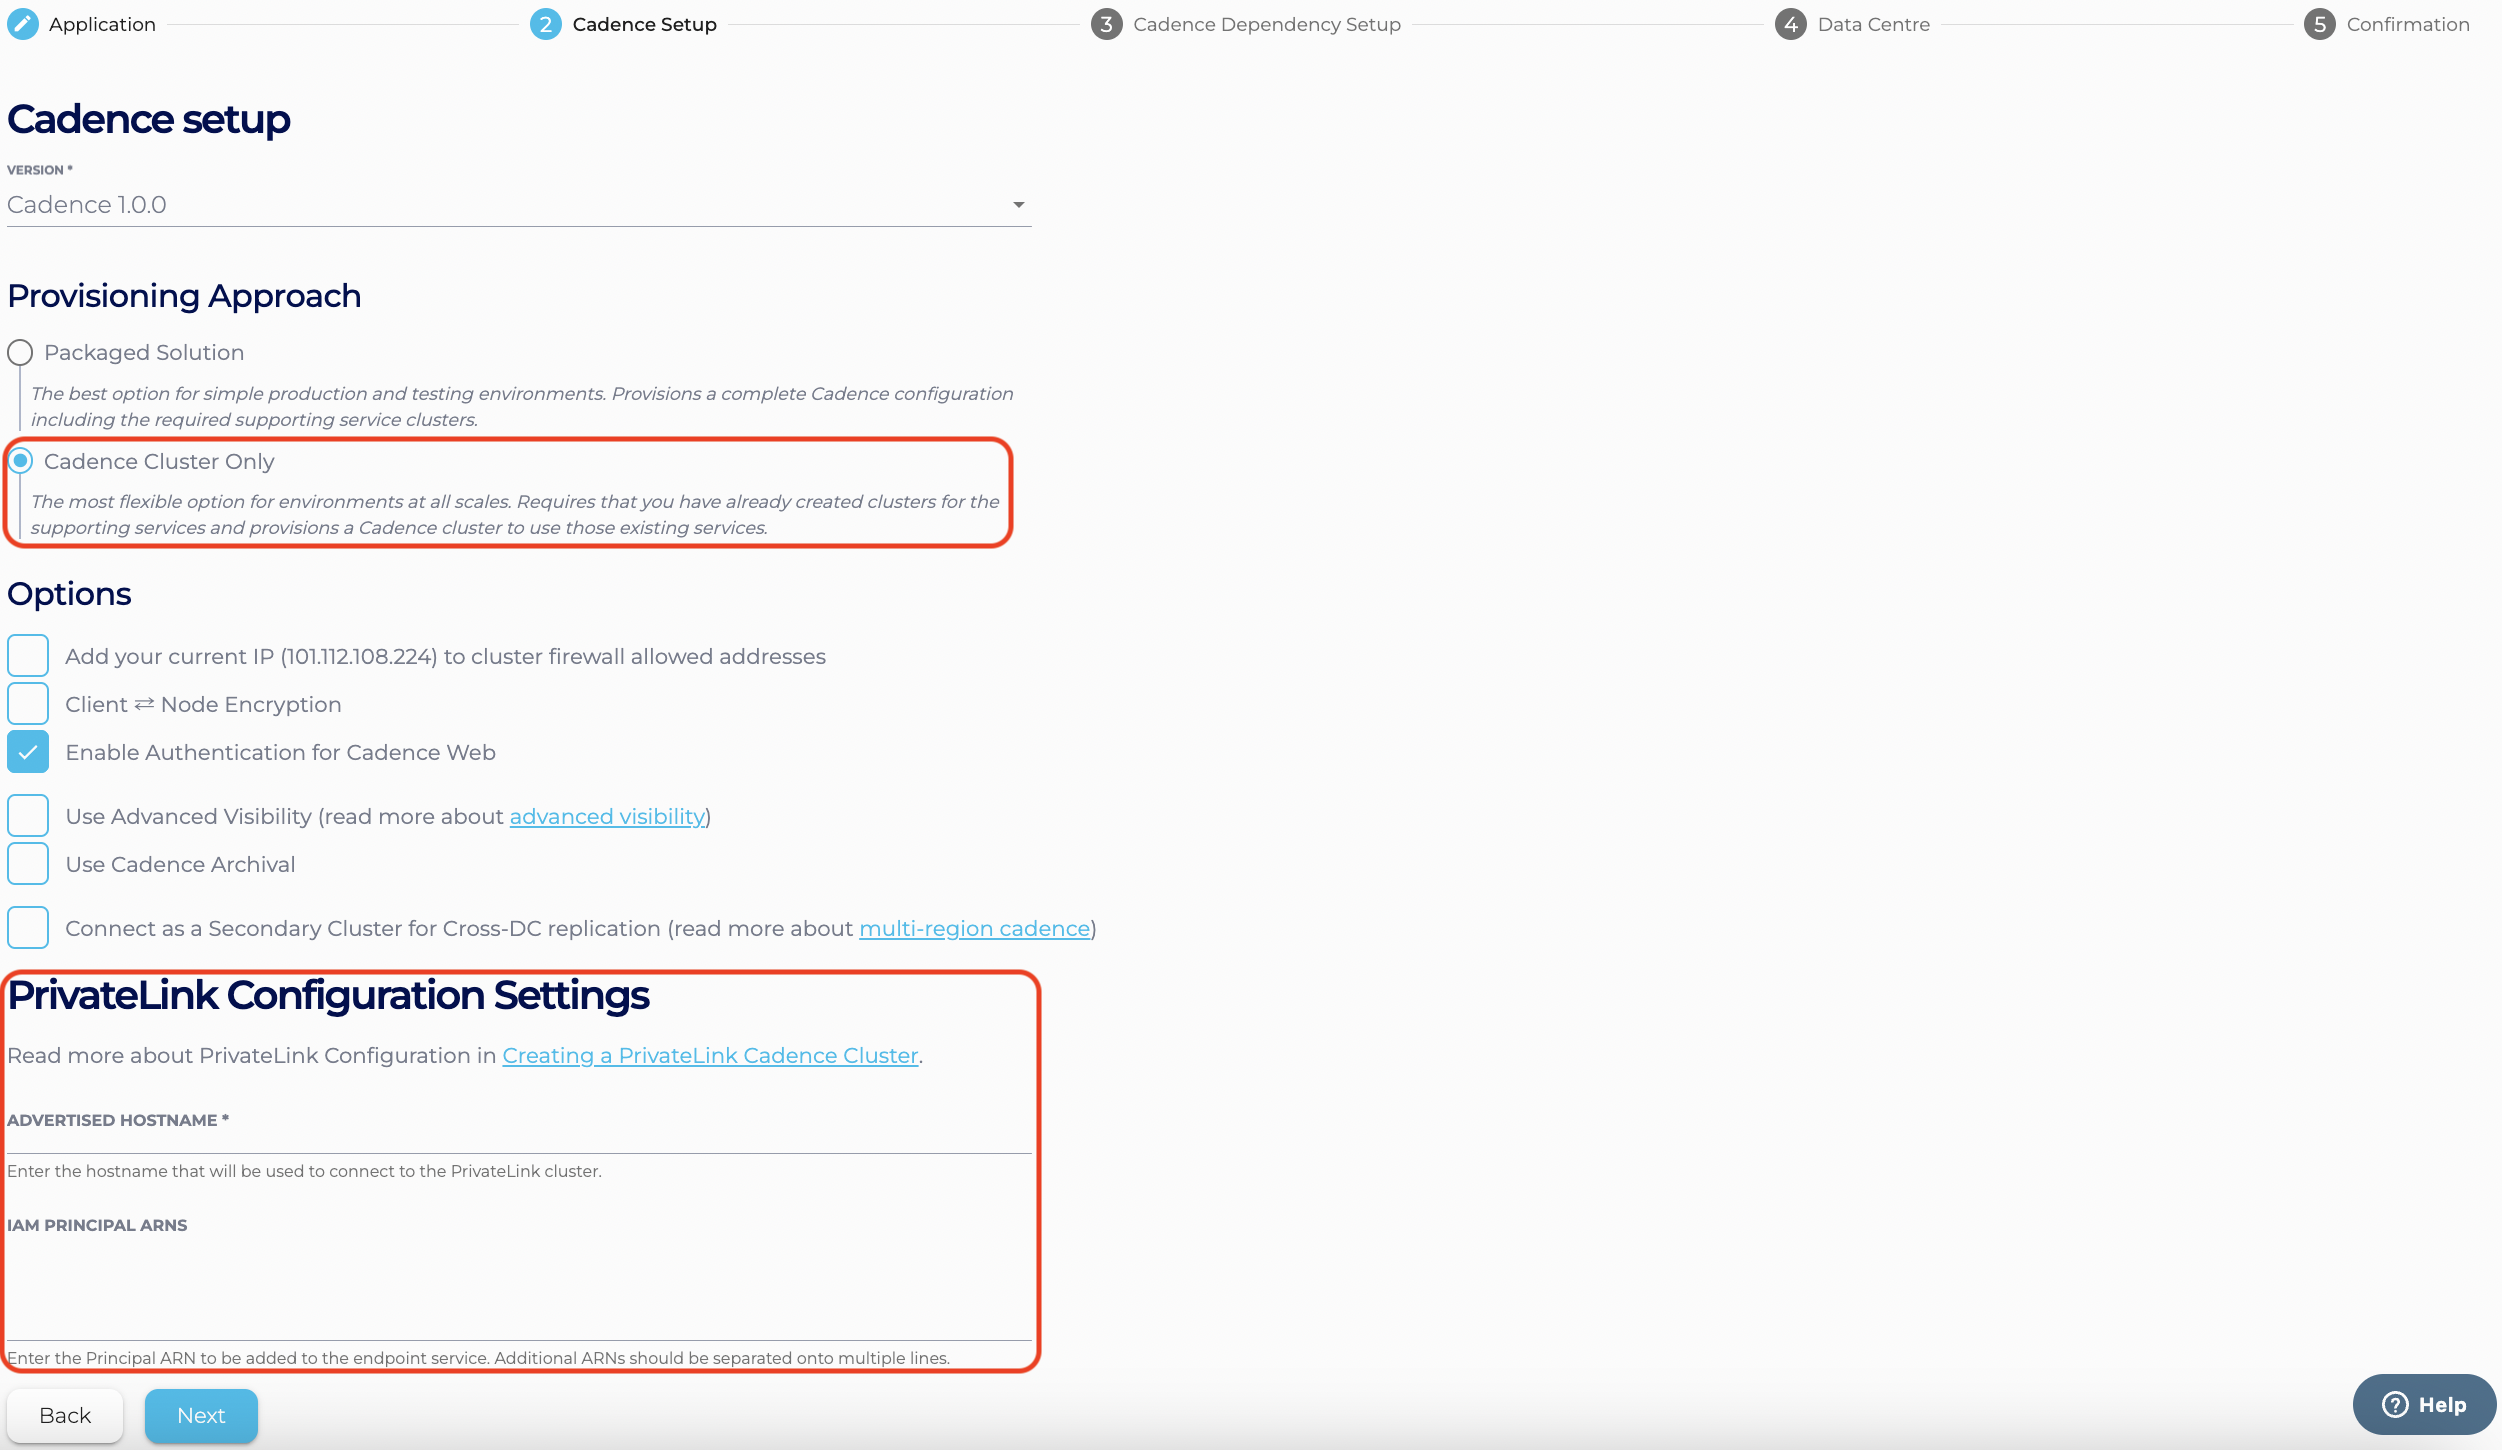
Note: As PrivateLink is currently only supported for AWS, selecting any other provider will cause the PrivateLink option on this page to not be selectable. - On the Cadence Setup page, we can select the version of Cadence. Select “Packaged Solution“ as the provisioning approach. There should be a section called PrivateLink Configuration Settings. In this section, there are 2 fields: Advertised HostName is required to be filled and IAM Principal ARNs is optional
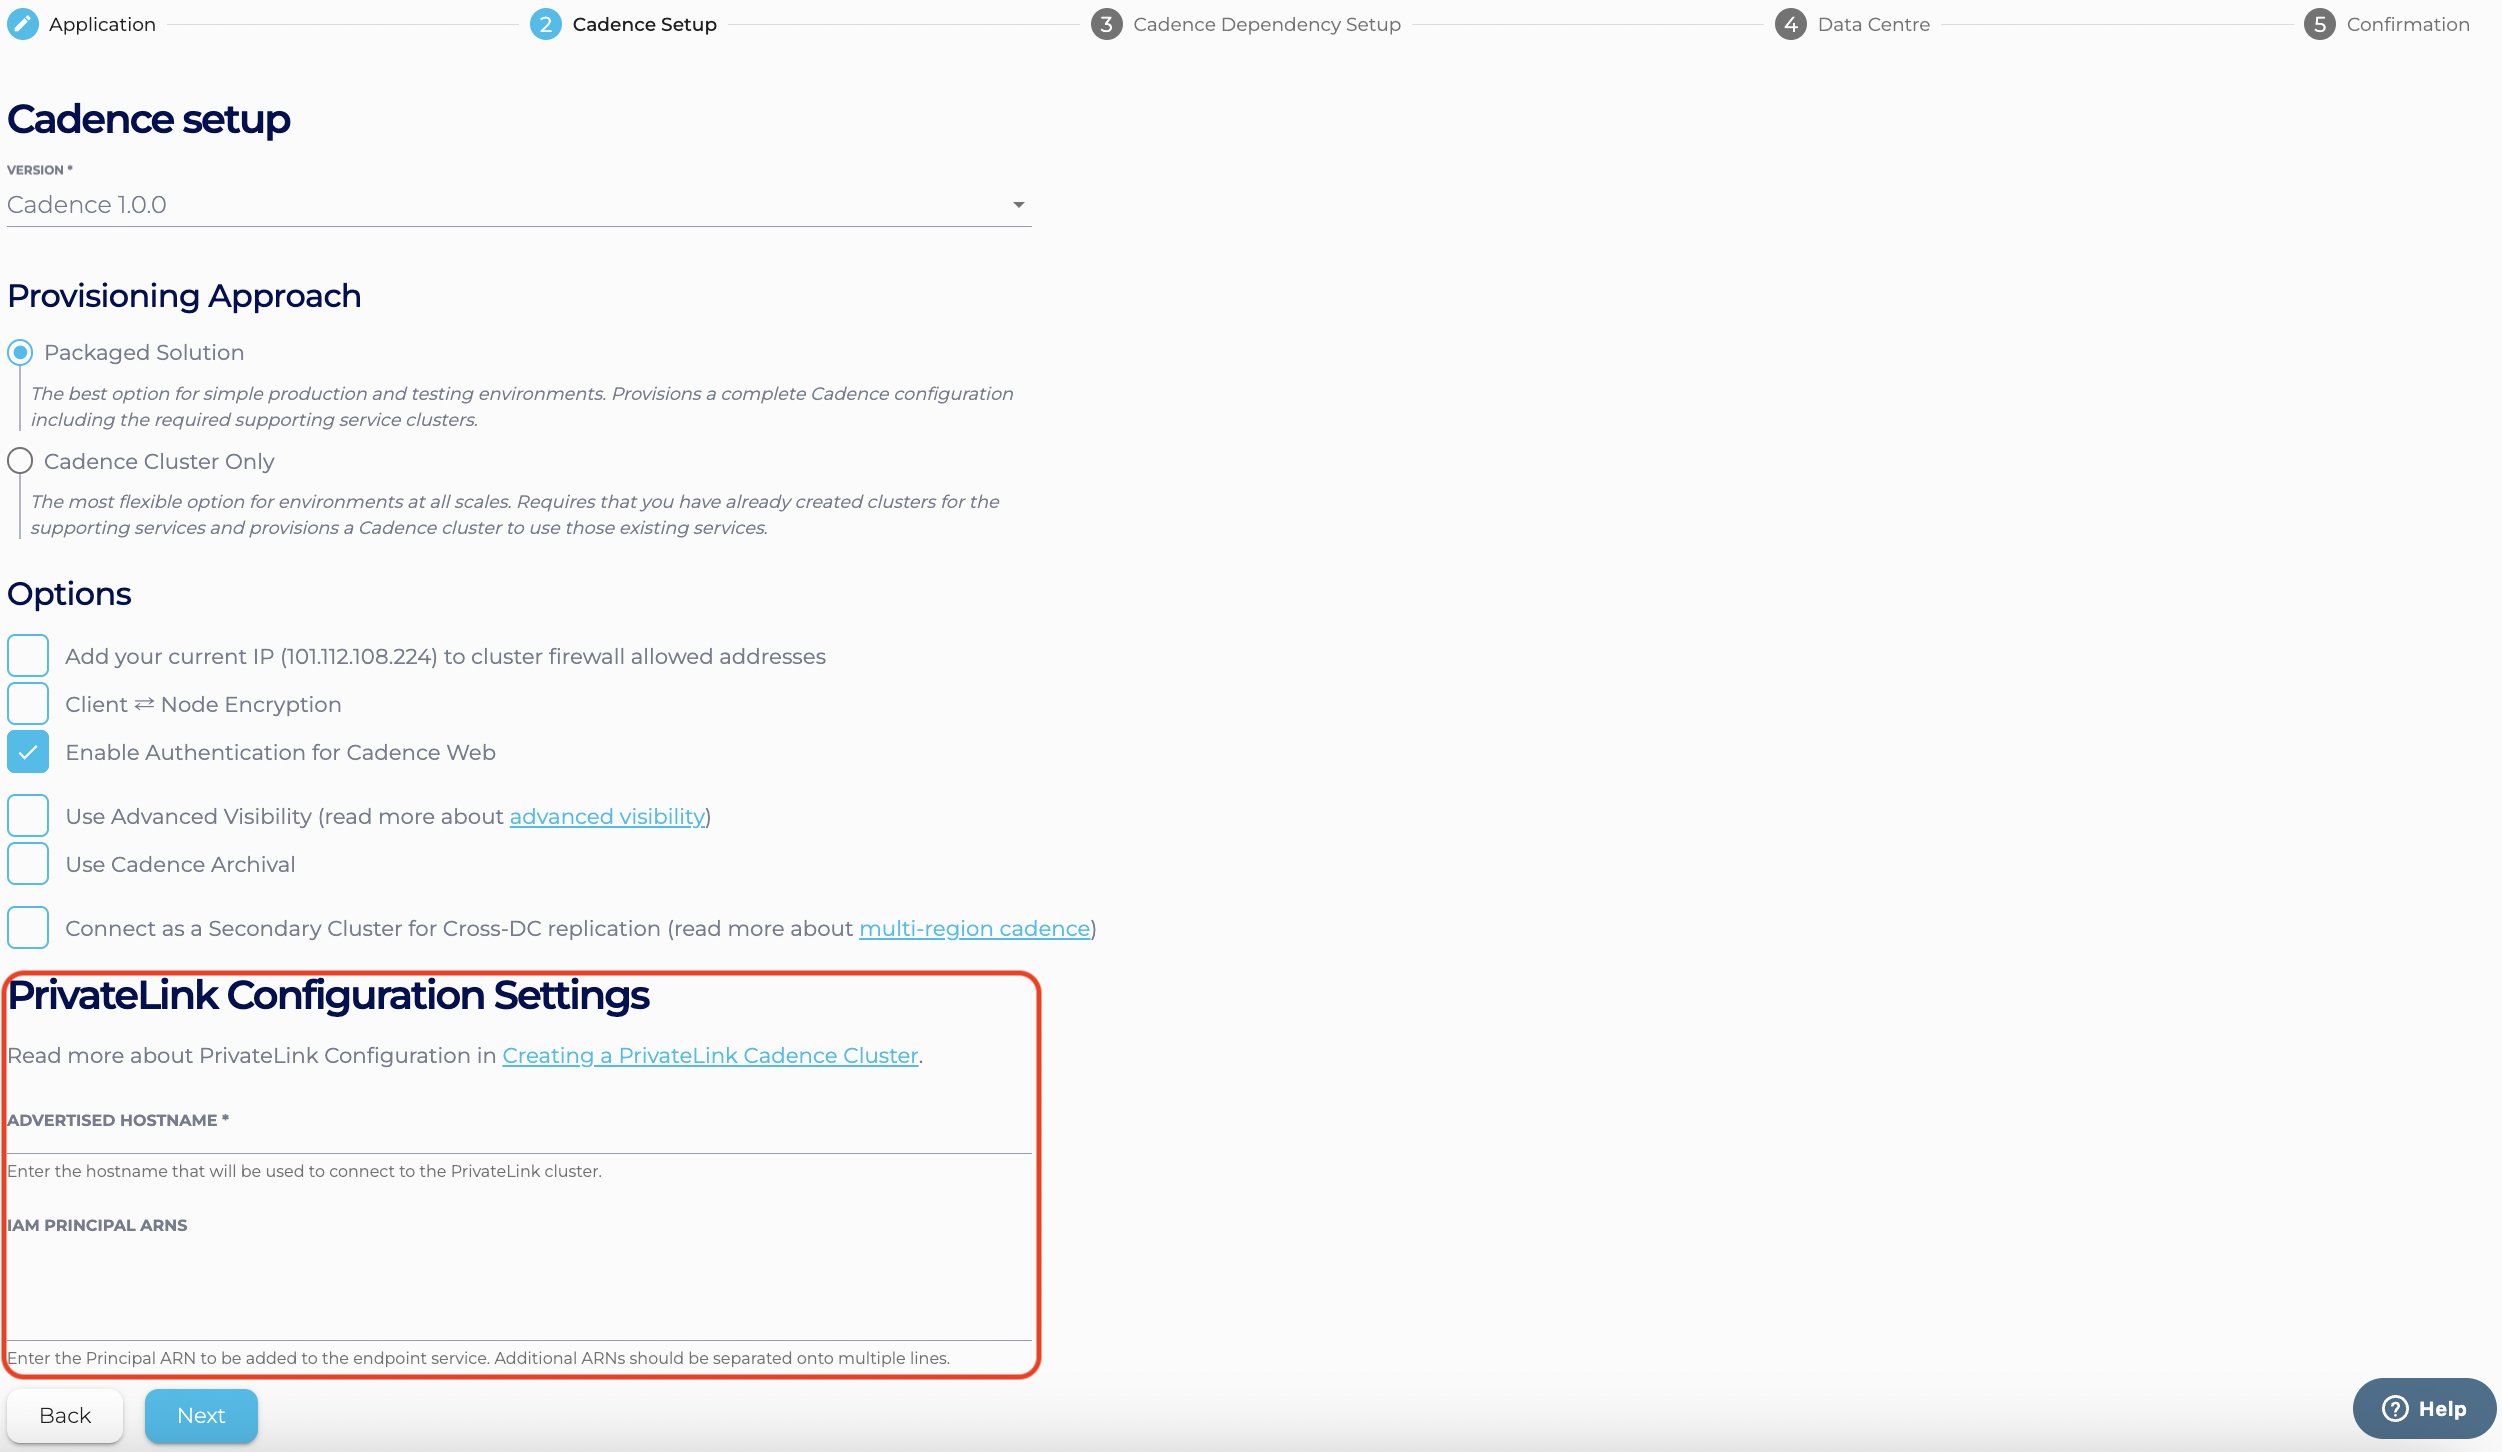 Advertised HostName is required for PrivateLink as it is used by clients to connect to the cluster. For instance, if Advertised HostName is cadence.test.com, when connecting to this cluster, use cadence.test.com:7933. IAM Principal ARNs can be adjusted later by following the managing Principal ARNs. IAM Principal ARNs are used to allow connection from your endpoint to the created cluster’s endpoint service. For instance, if arn:aws:iam::123456789012:user/companyNameTest is a real AWS Principal ARN, and is added to this field, you will be able to create an endpoint with the provided endpoint service name. Fill those fields and click Next.
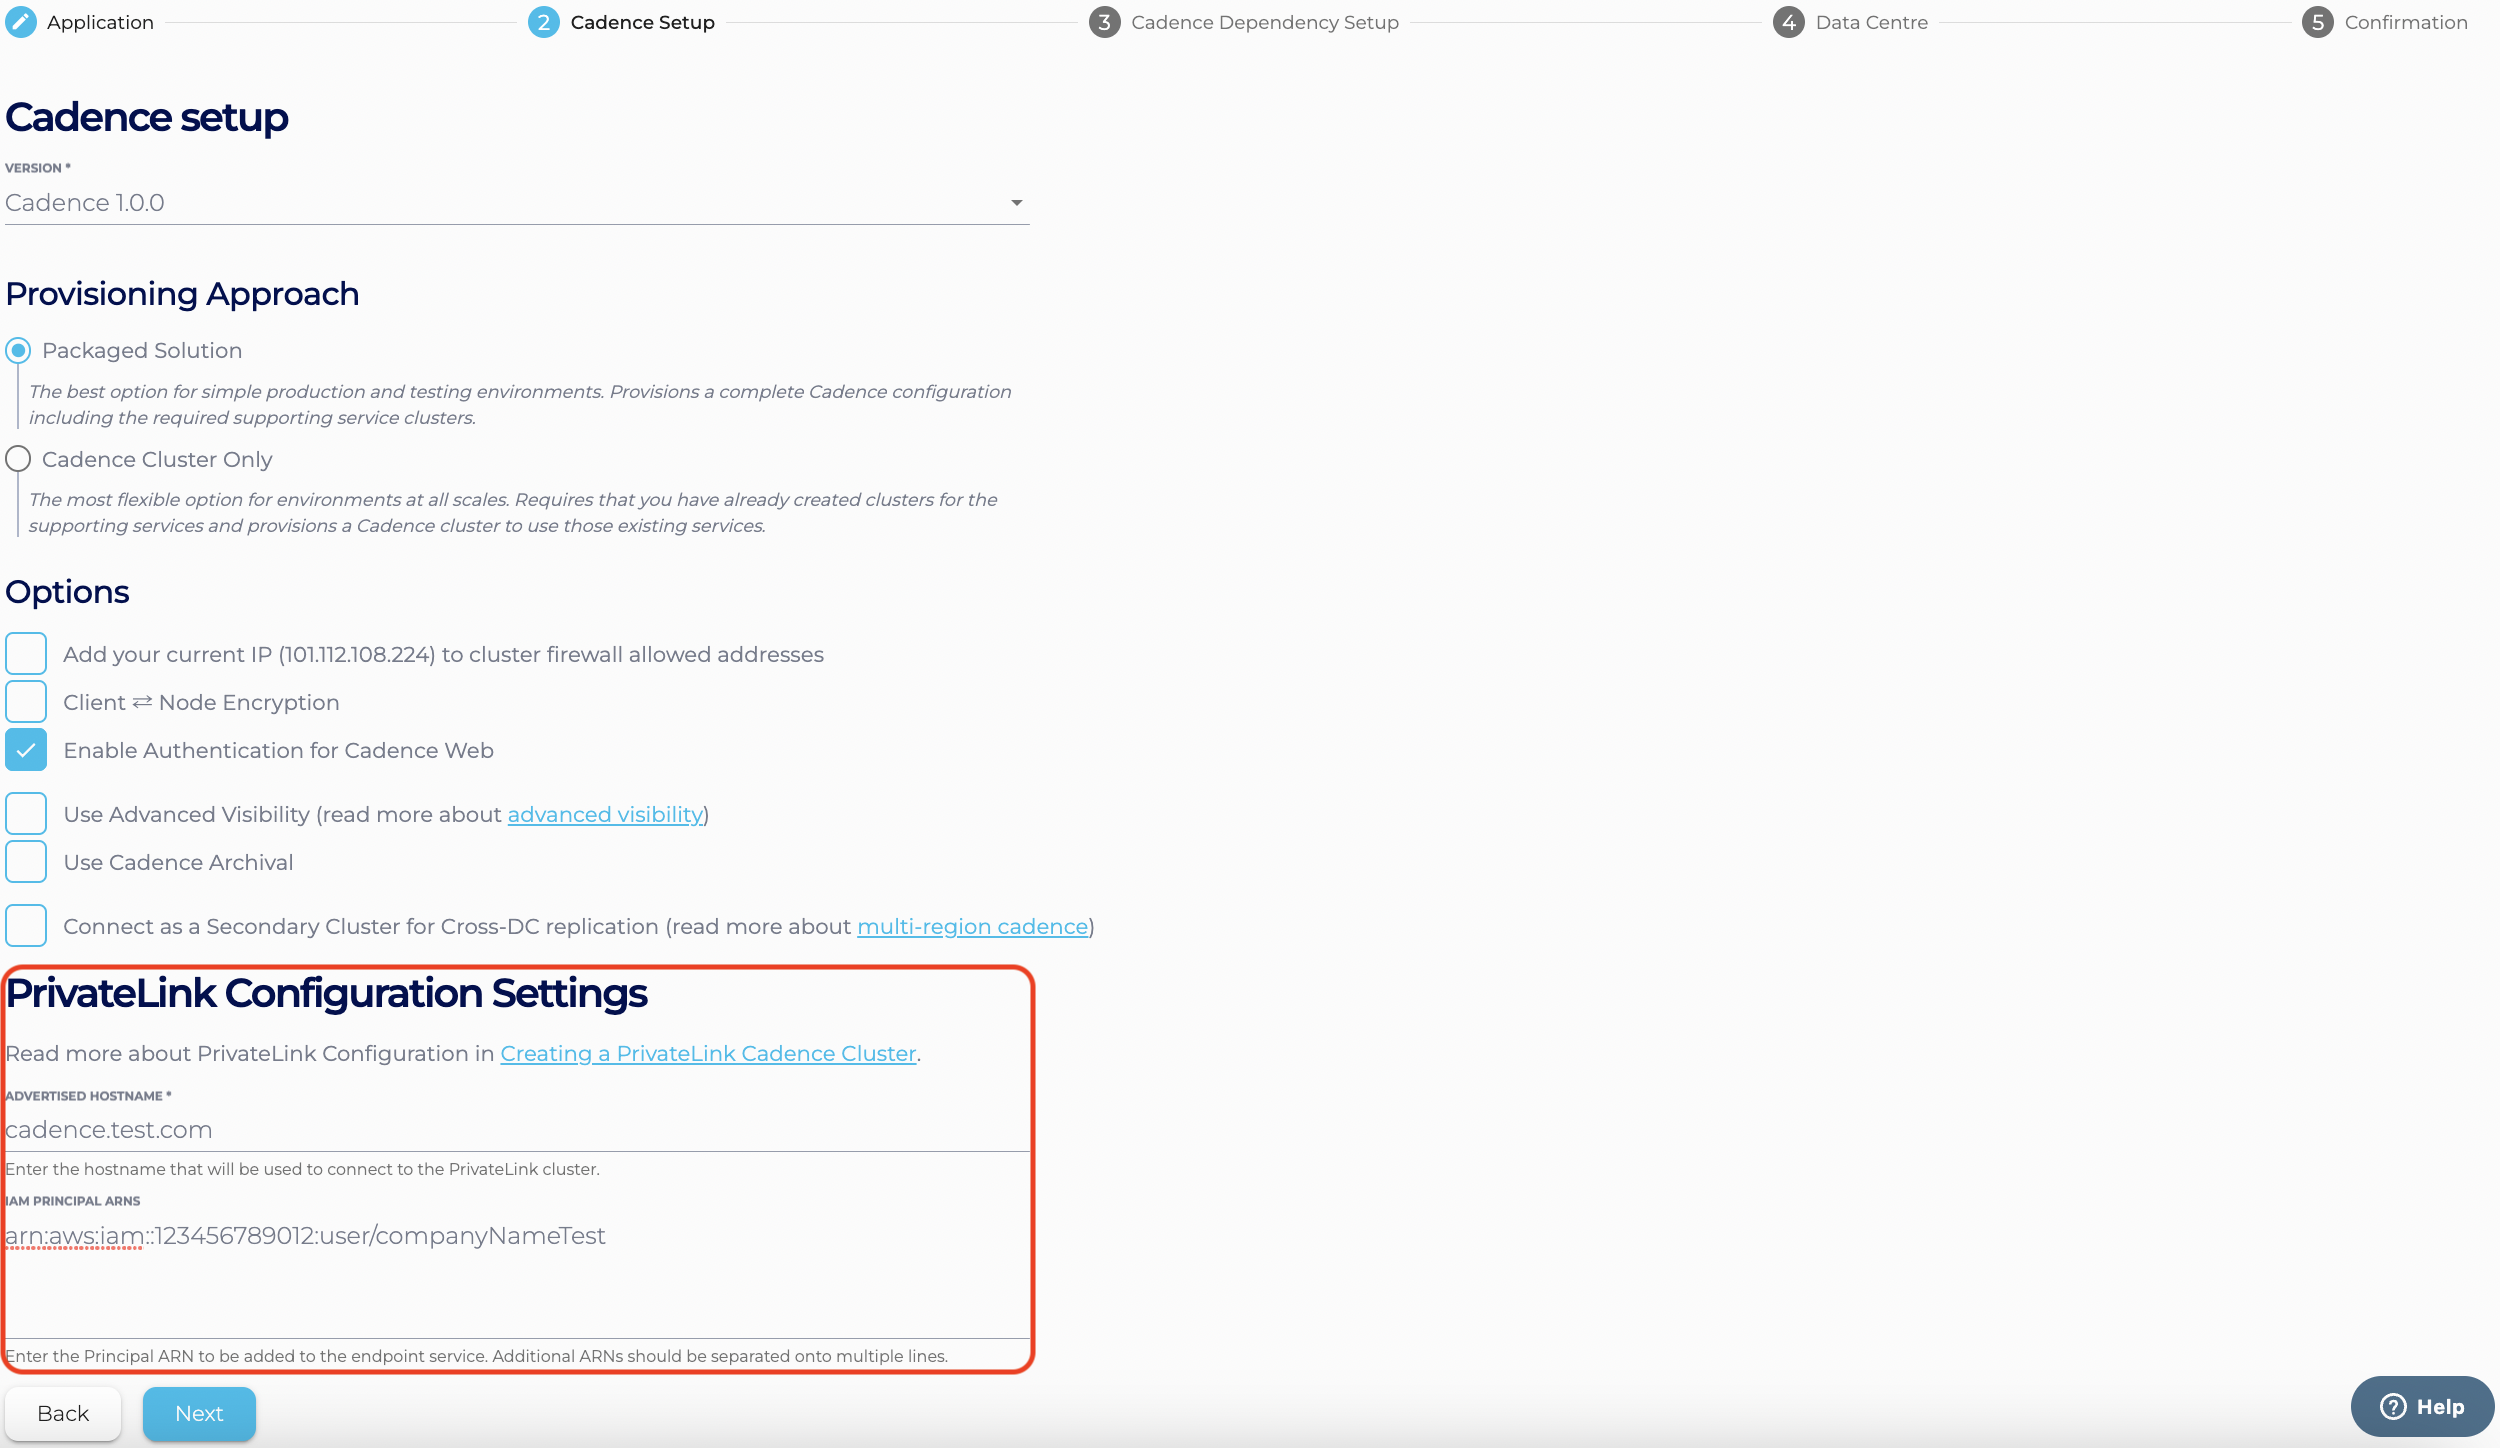
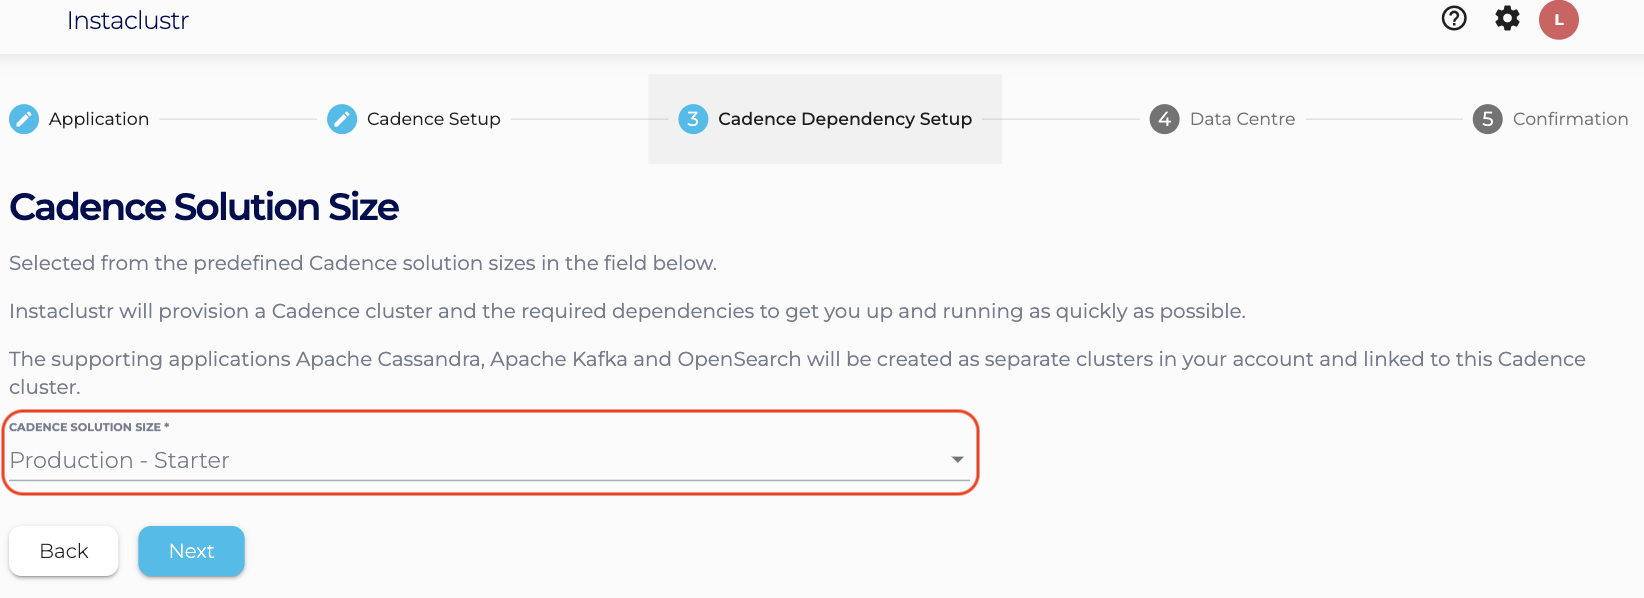
- On the Cadence Dependency Setup page, select one option from the predefined Cadence Solution Sizes (Production – Starter or Production – Small) and click Next. This will provision a Cadence cluster and the required Cassandra cluster of the selected (predefined) size in your account and link them together.
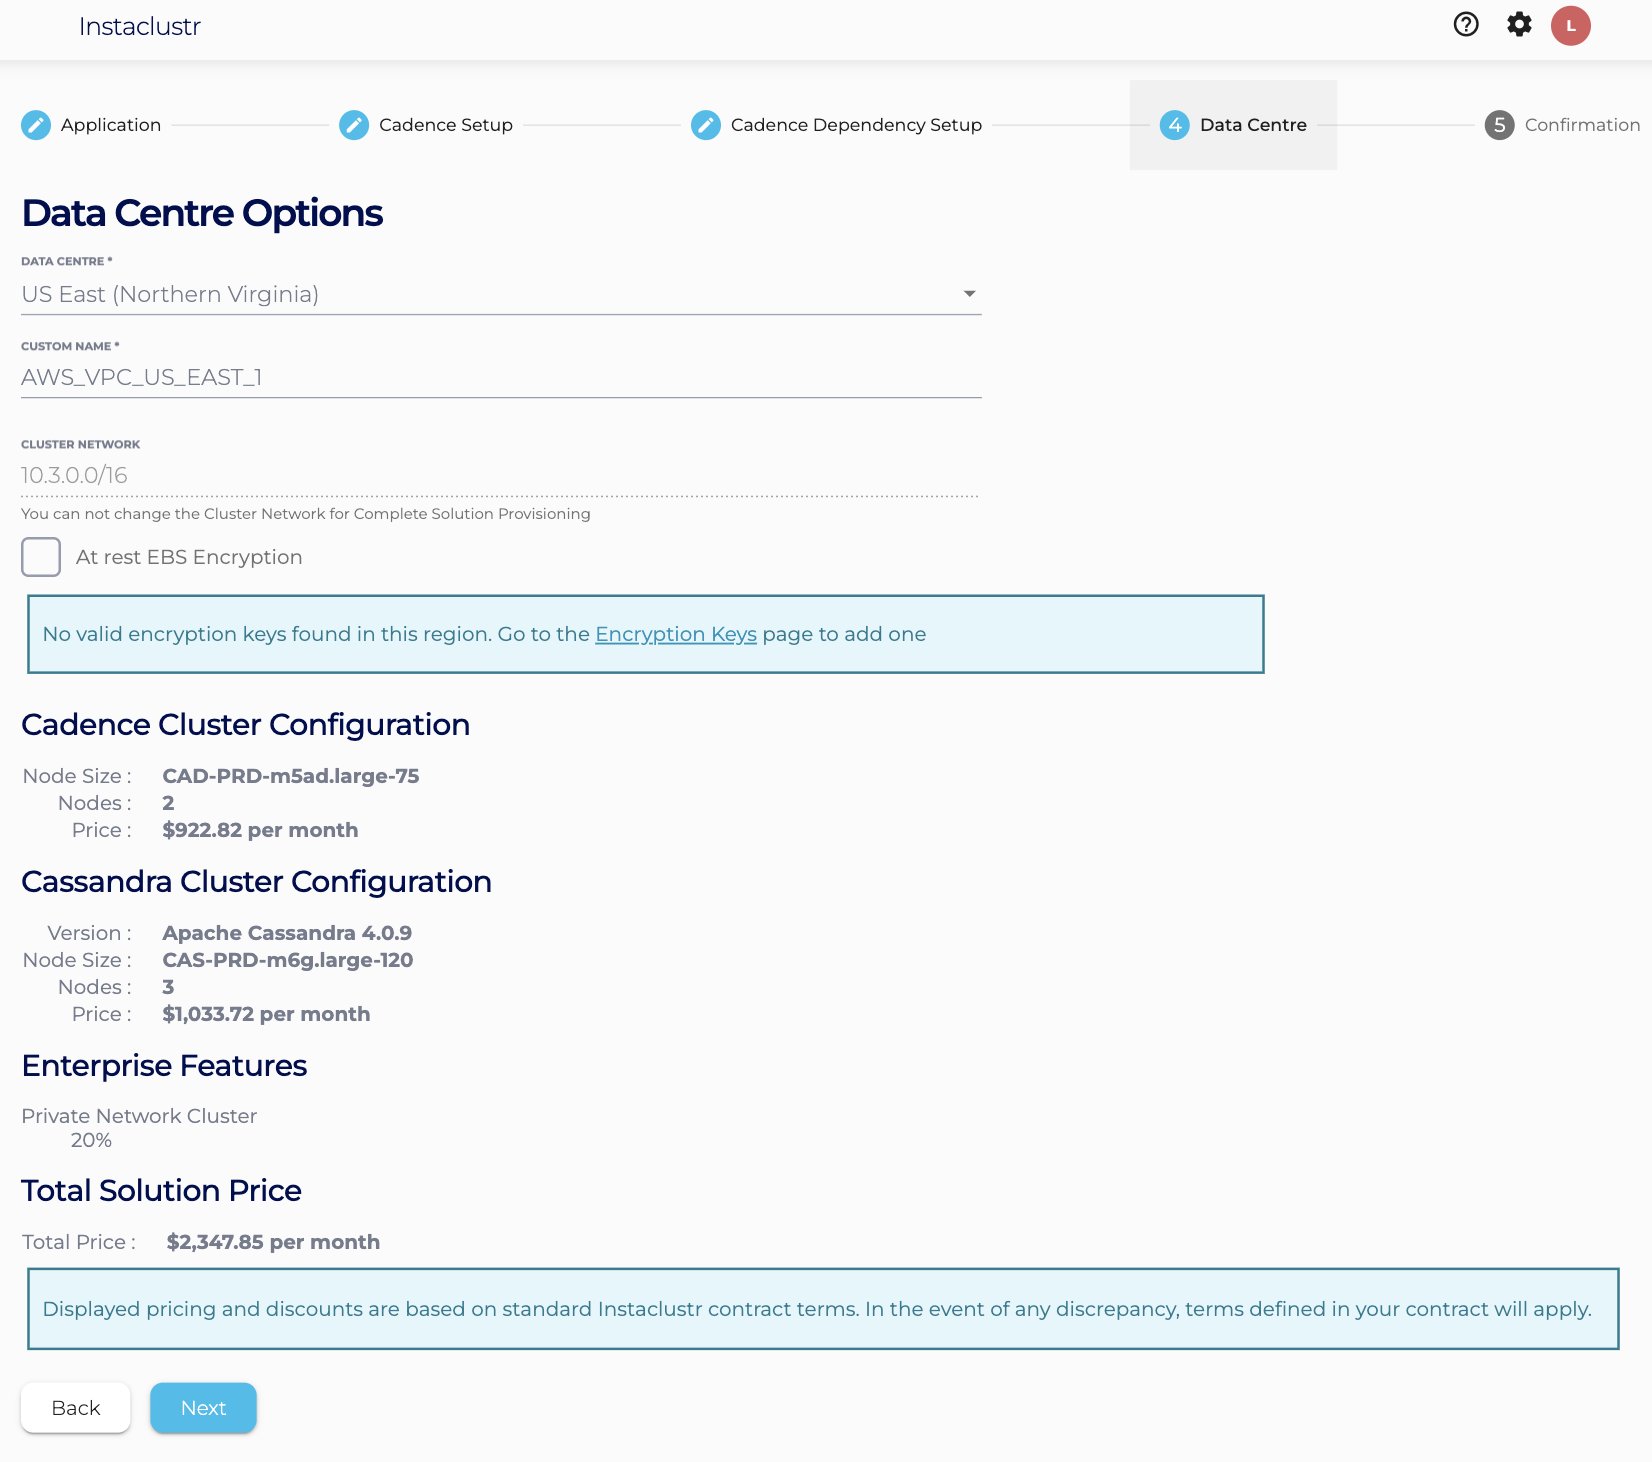
- Under the Data Centre page, confirm the selected Data Centre is correct. Click Next.
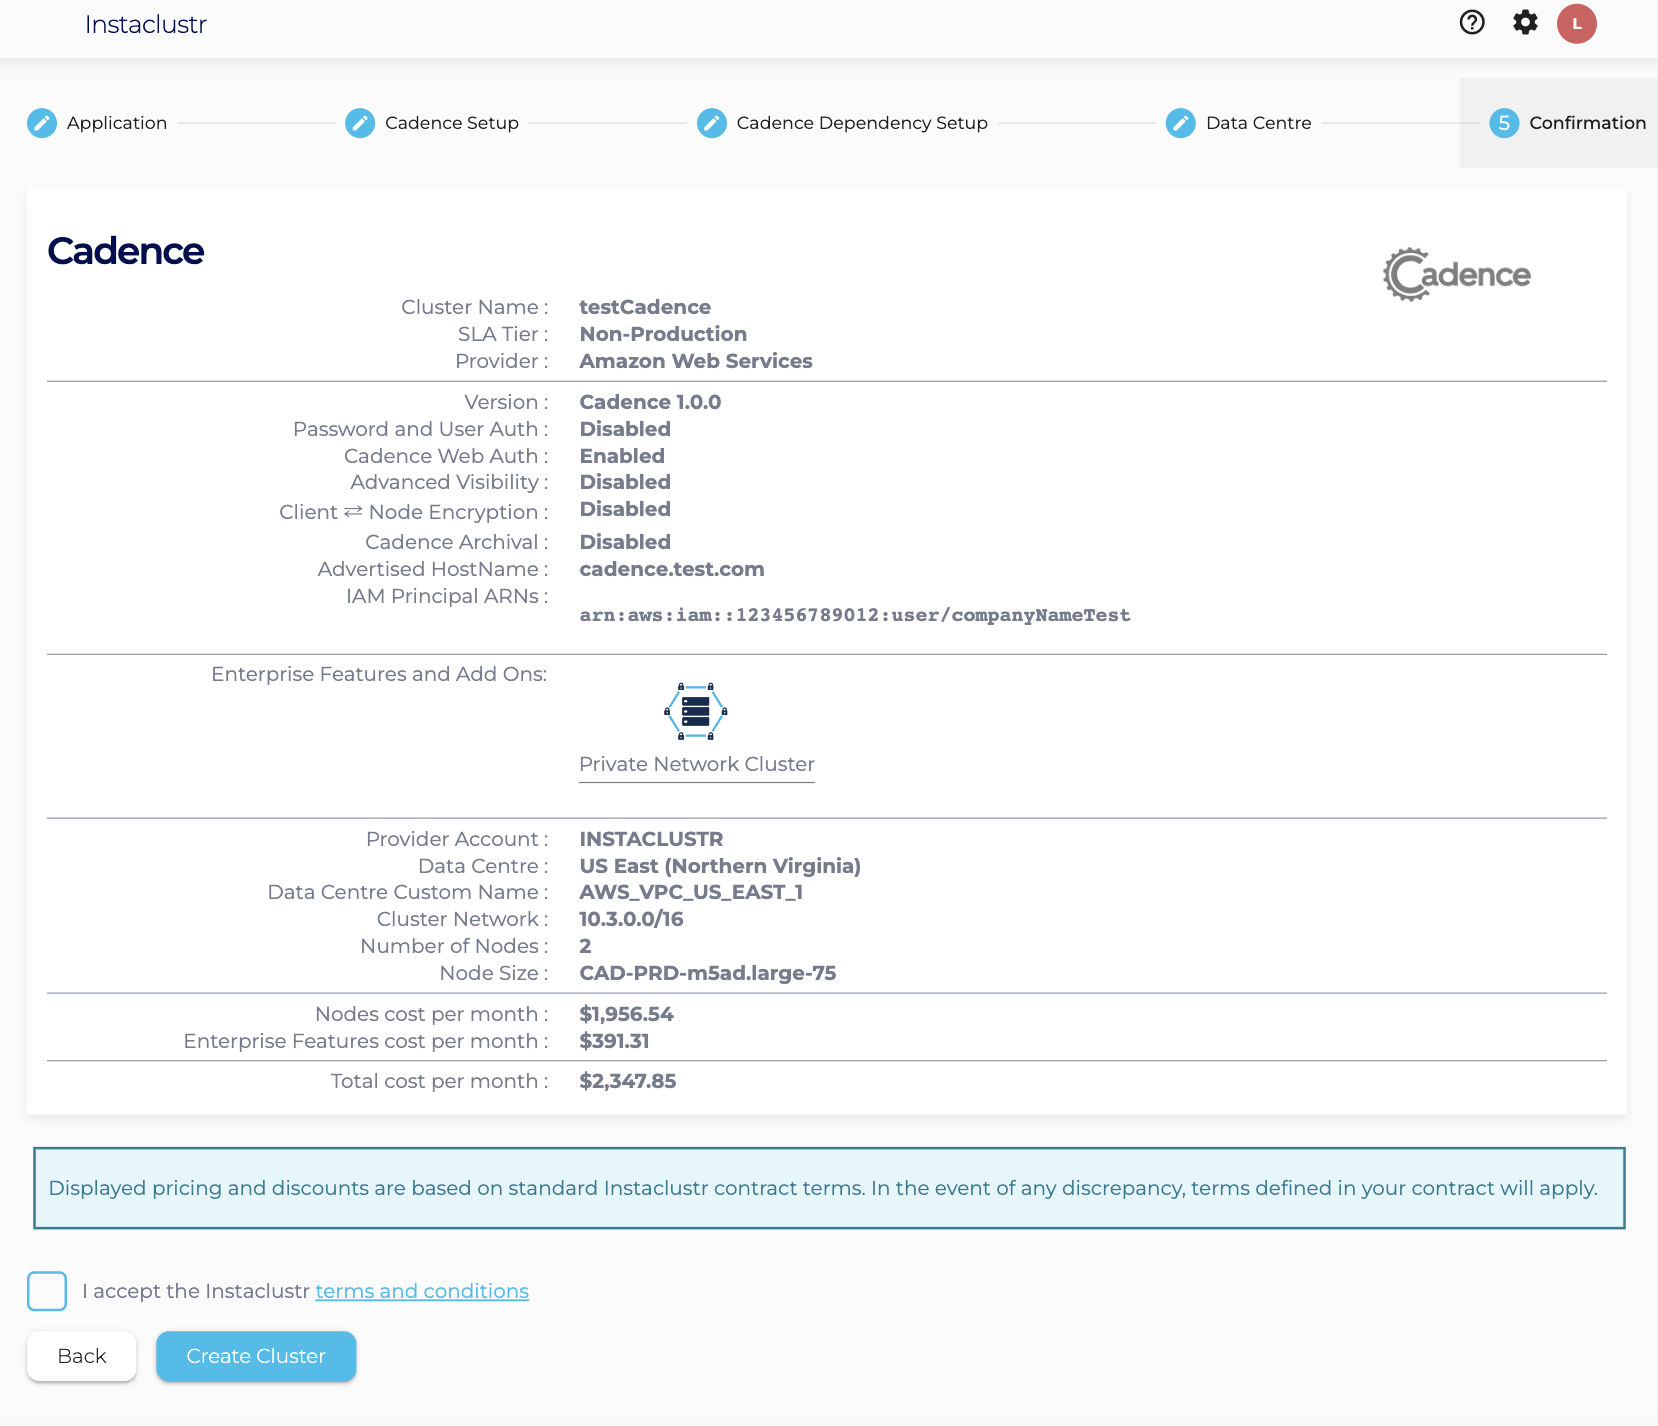
- Under the Confirmation page, check that the configurations such as Advertised HostName and IAM Principal ARNs are properly configured, accept Instaclustr terms and conditions, and click Create Cluster.
- Once your cluster is running, further steps will still be required to connect to it. Please refer to our support article on Connecting to a PrivateLink Cadence Cluster for a guide through this process.
- Log into the Instaclustr Console and click the Create Cluster button. This will take you to the wizard for creating a new cluster.
Cadence Cluster Only
Step 1 – Create an Apache Cassandra® cluster
For a step by step guide of creating an Apache Cassandra® cluster with ‘Private Network Cluster’ enabled, you can read this guide.
For an abbreviated guide, you can do as follows:
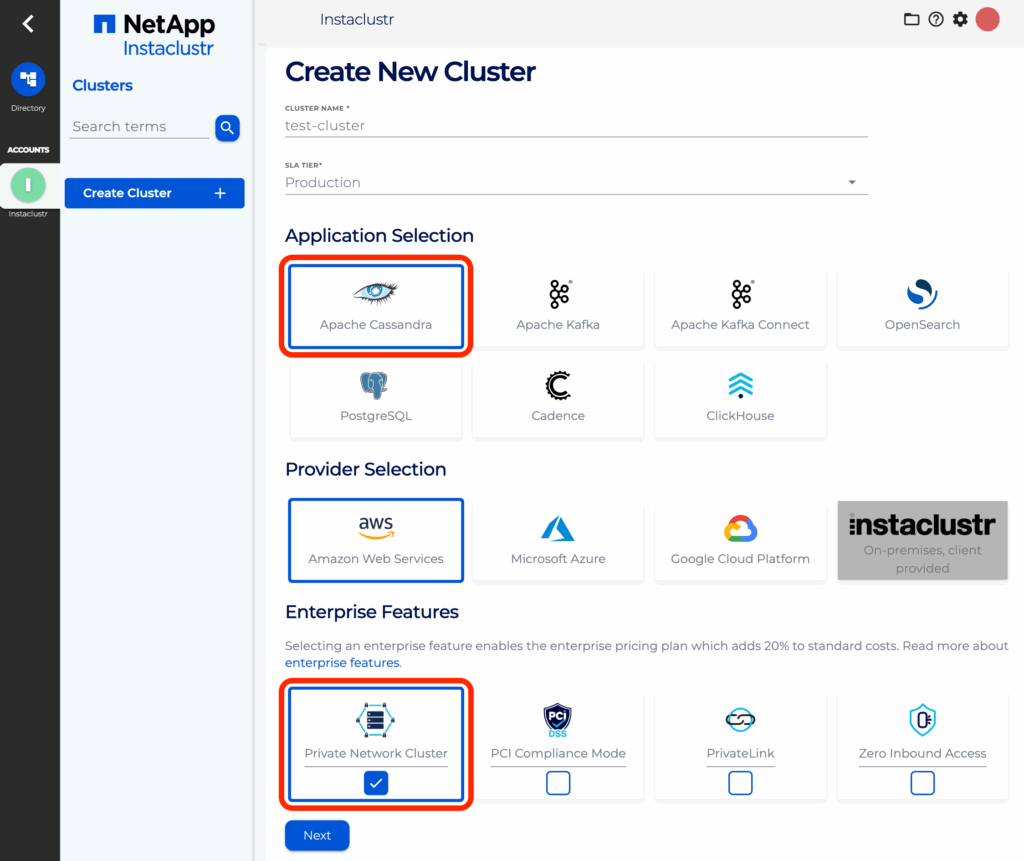
- Log into the Instaclustr Console and click the Create Cluster button. This will take you to the wizard for creating a new cluster.
- Give your cluster a name, select Apache Cassandra as the application, select AWS as the provider, select Private Network Cluster, and click Next.
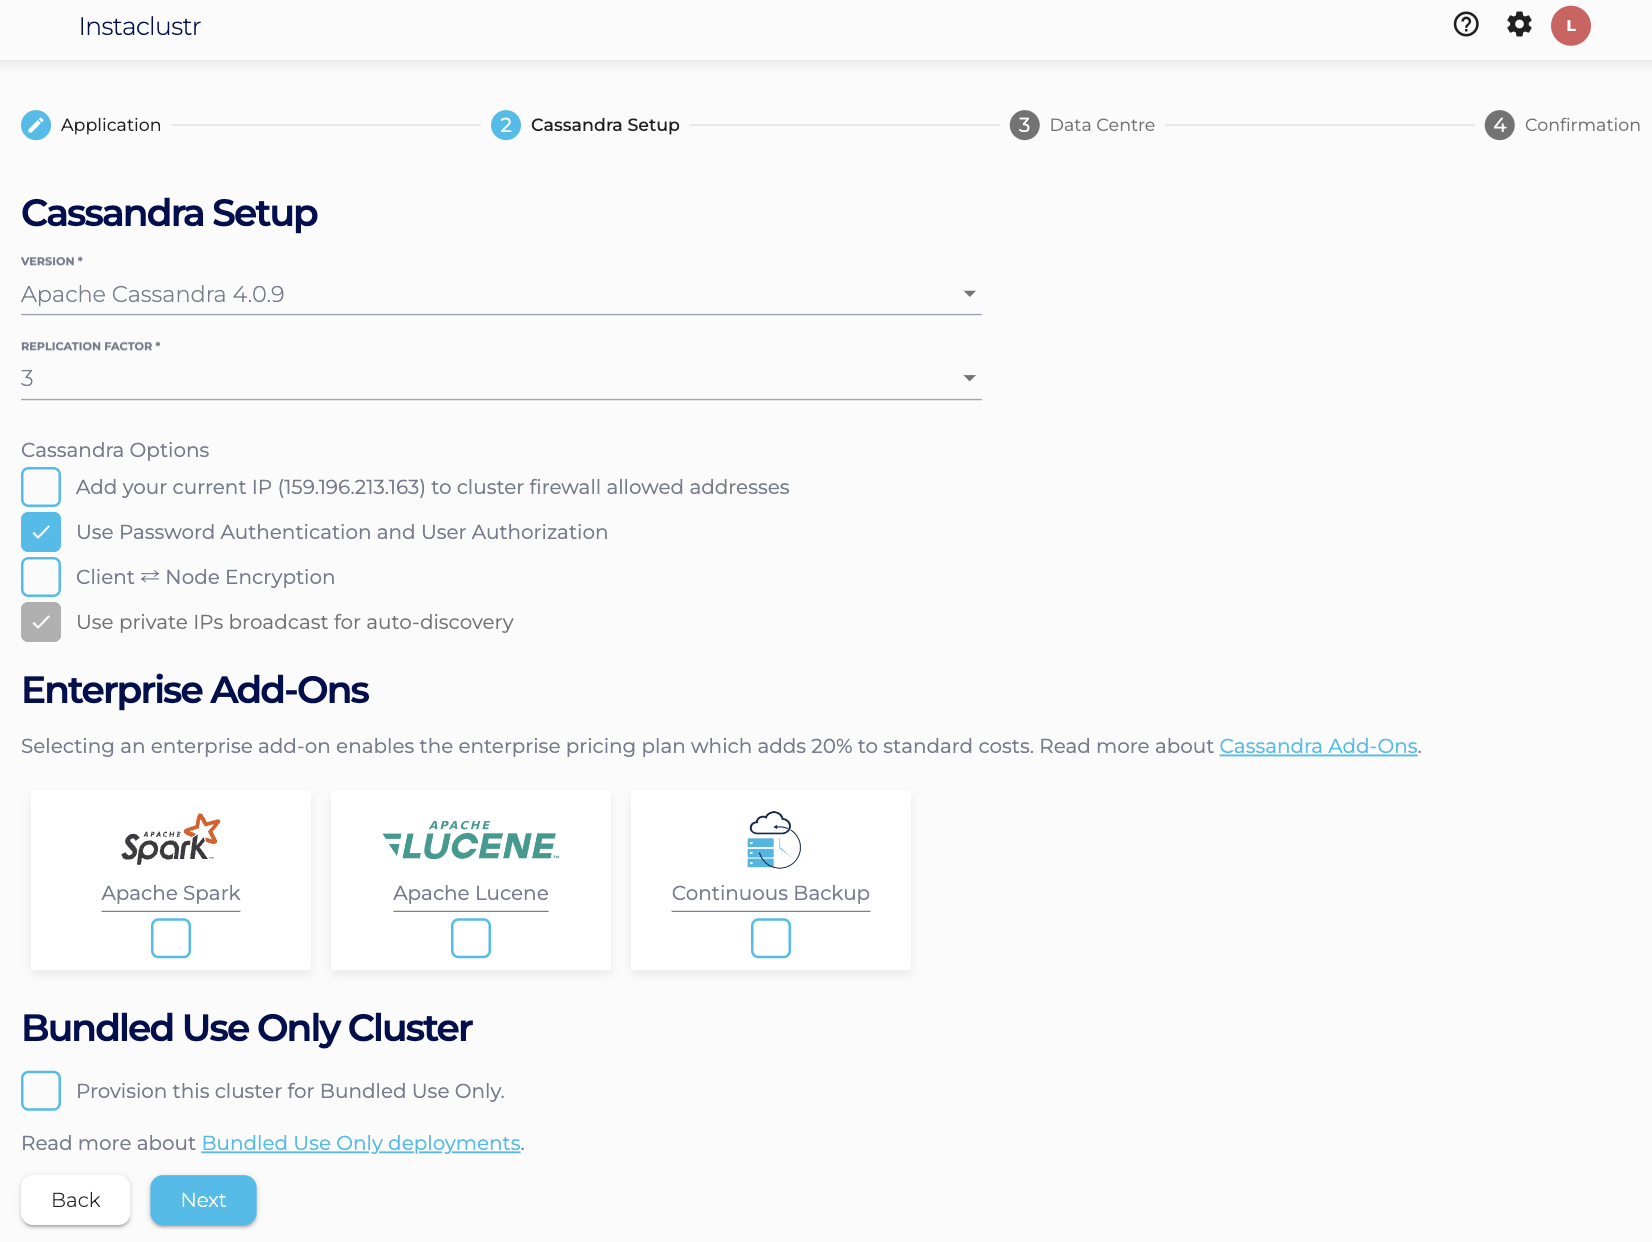
- Under the Cassandra Setup page, select Apache Cassandra version 4.0.9.
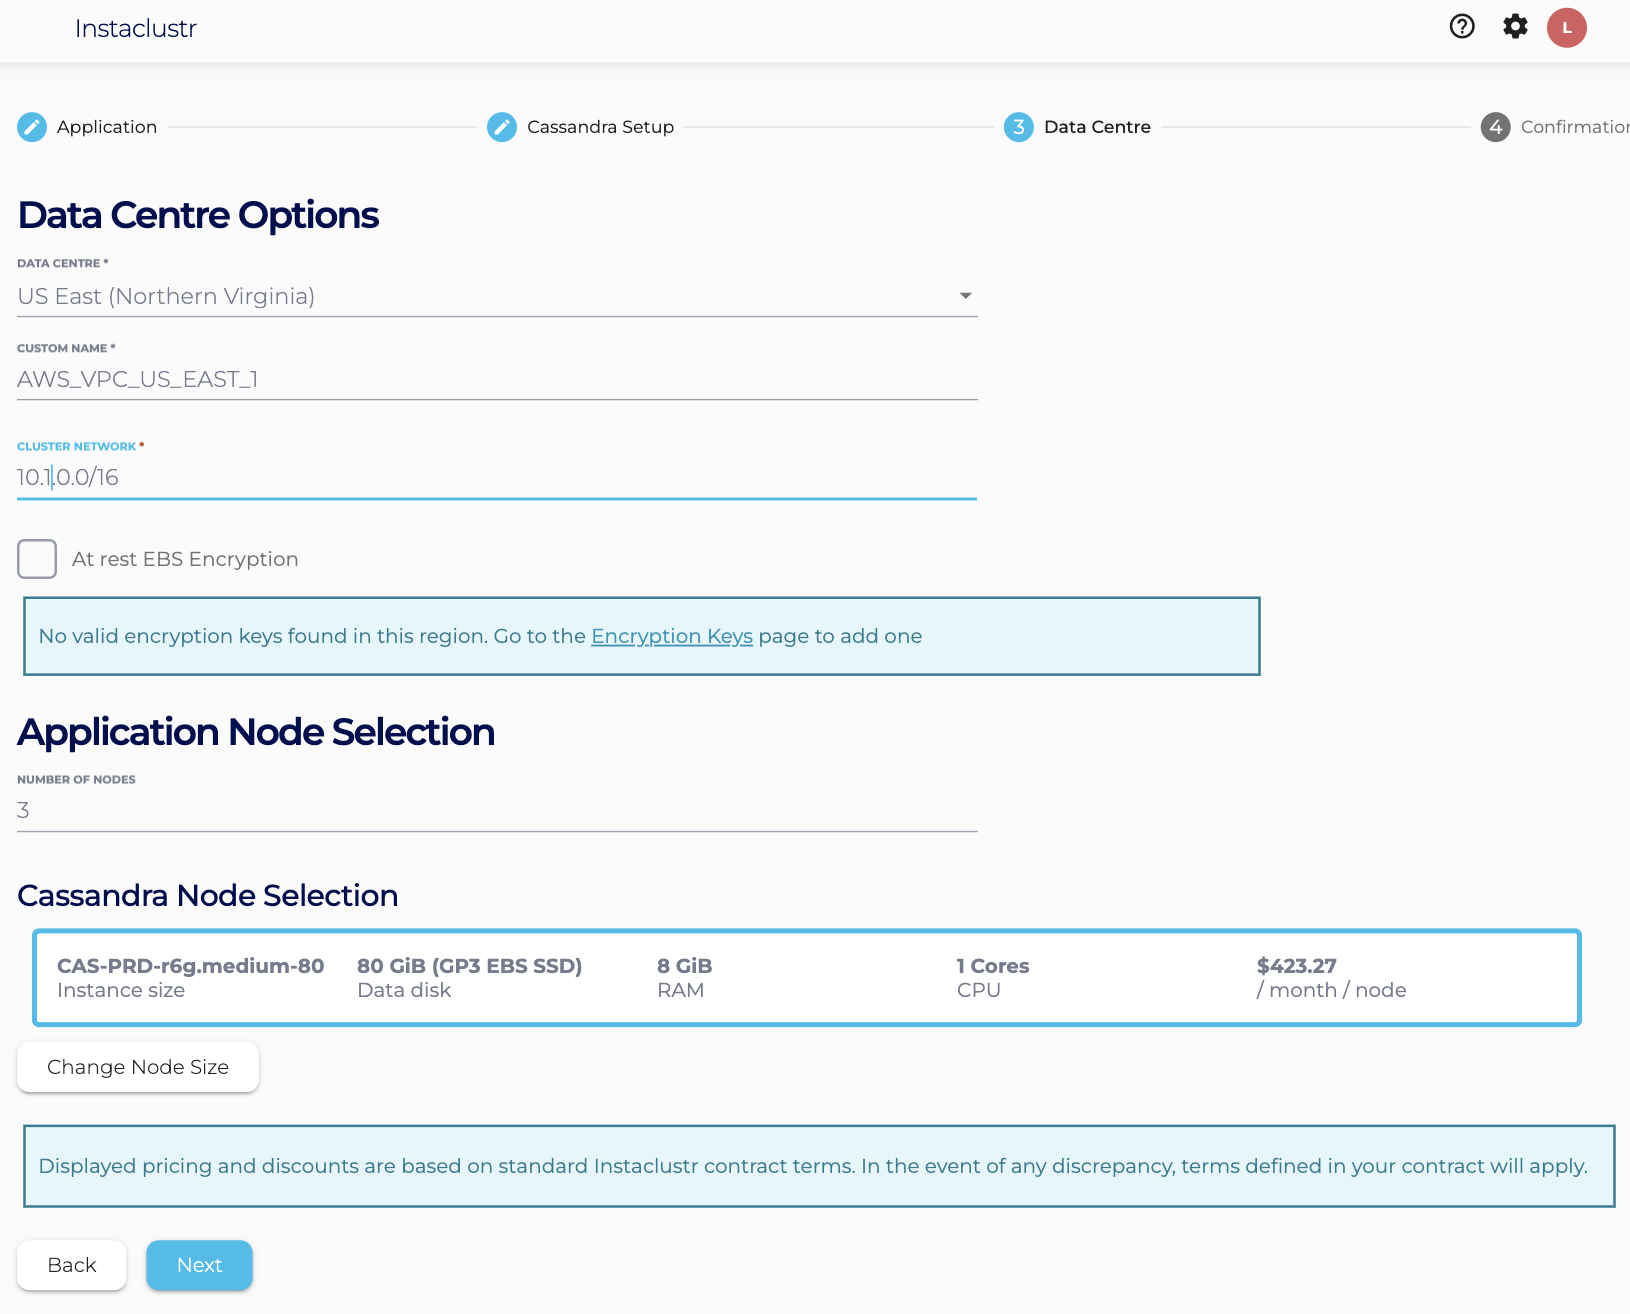
- Under the Data Centre options, select:
- Data Centre Region,
- Cluster Network address block,
- The number of nodes for your application,
- Your desired node size.
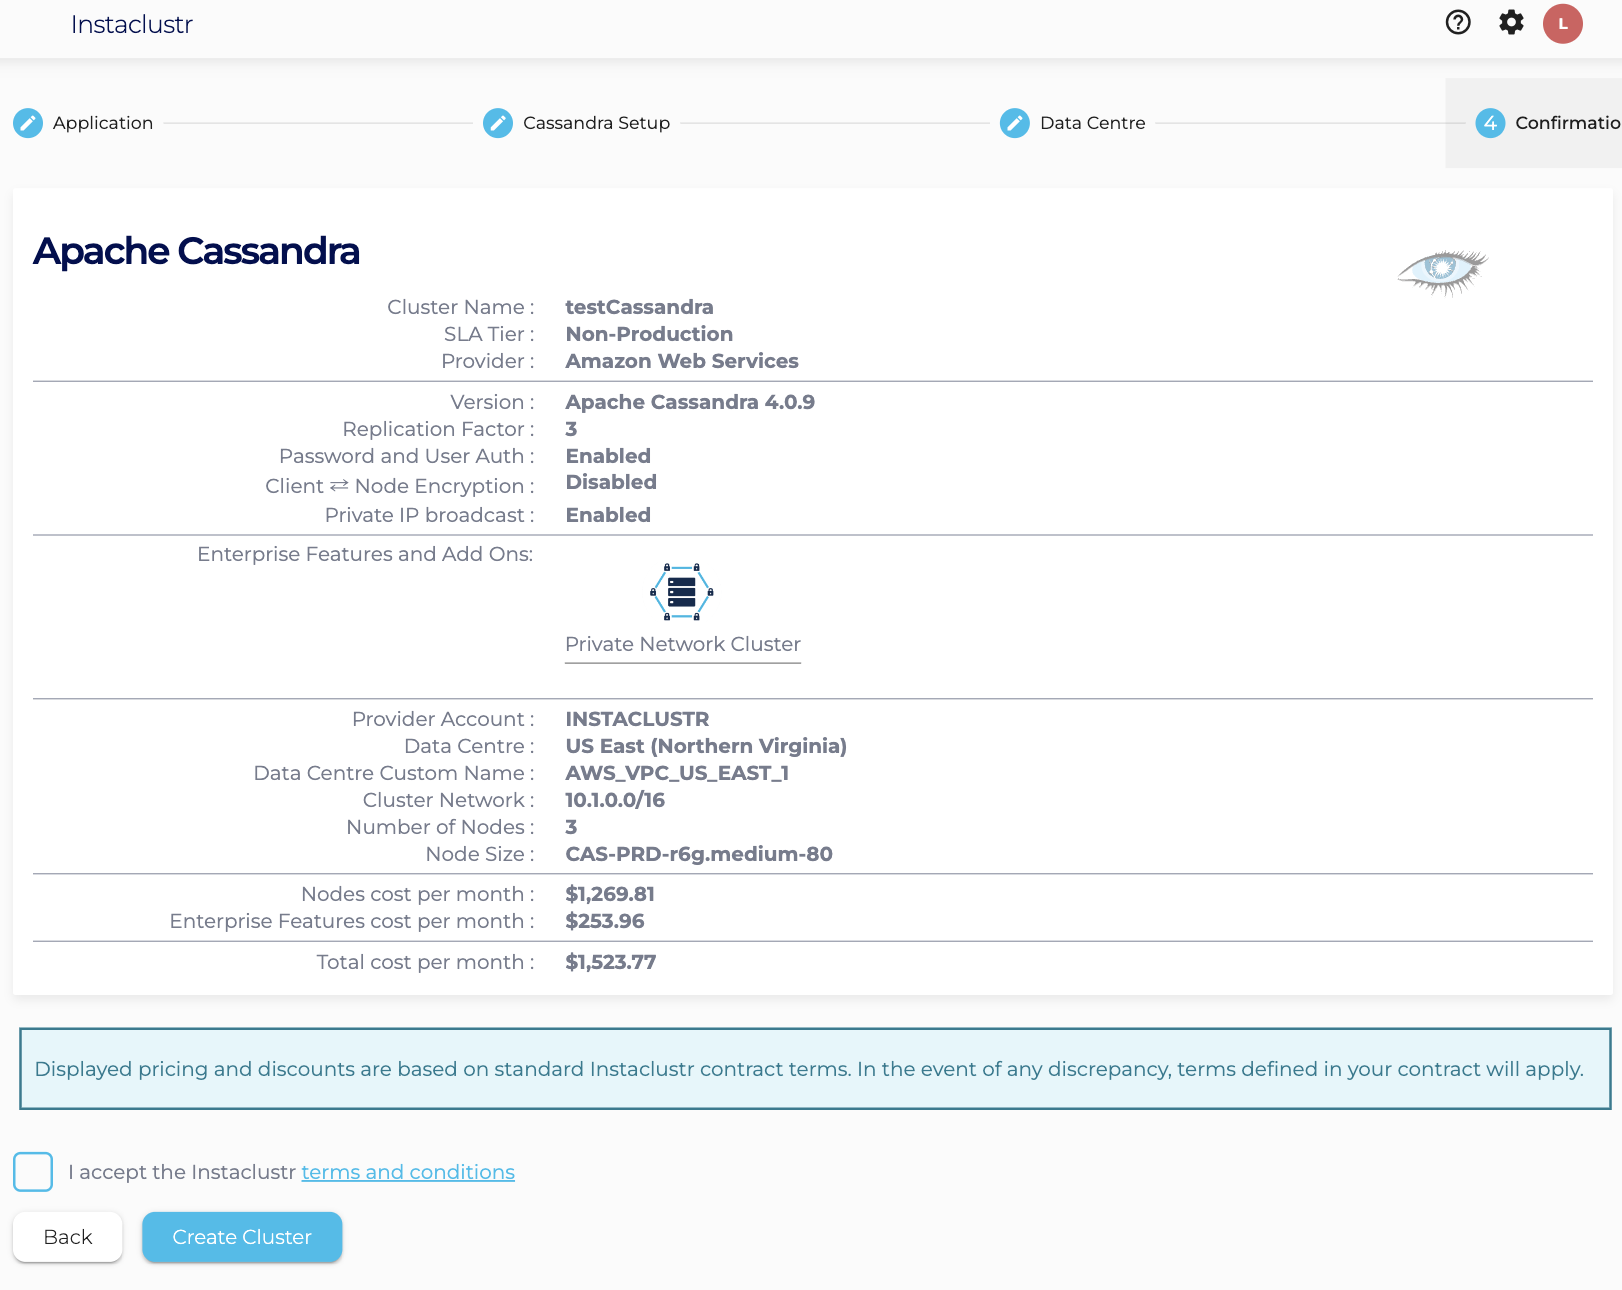
- The Confirmation section displays a brief summary of your cluster configurations and pricing details. If you are happy with the cluster configuration and have accepted the terms and conditions, click the Create Cluster button to start provisioning the cluster.
- Provisioning a cluster can take some time depending on the responsiveness of the underlying cloud provider. There are separate status indicators for the overall cluster provisioning state.
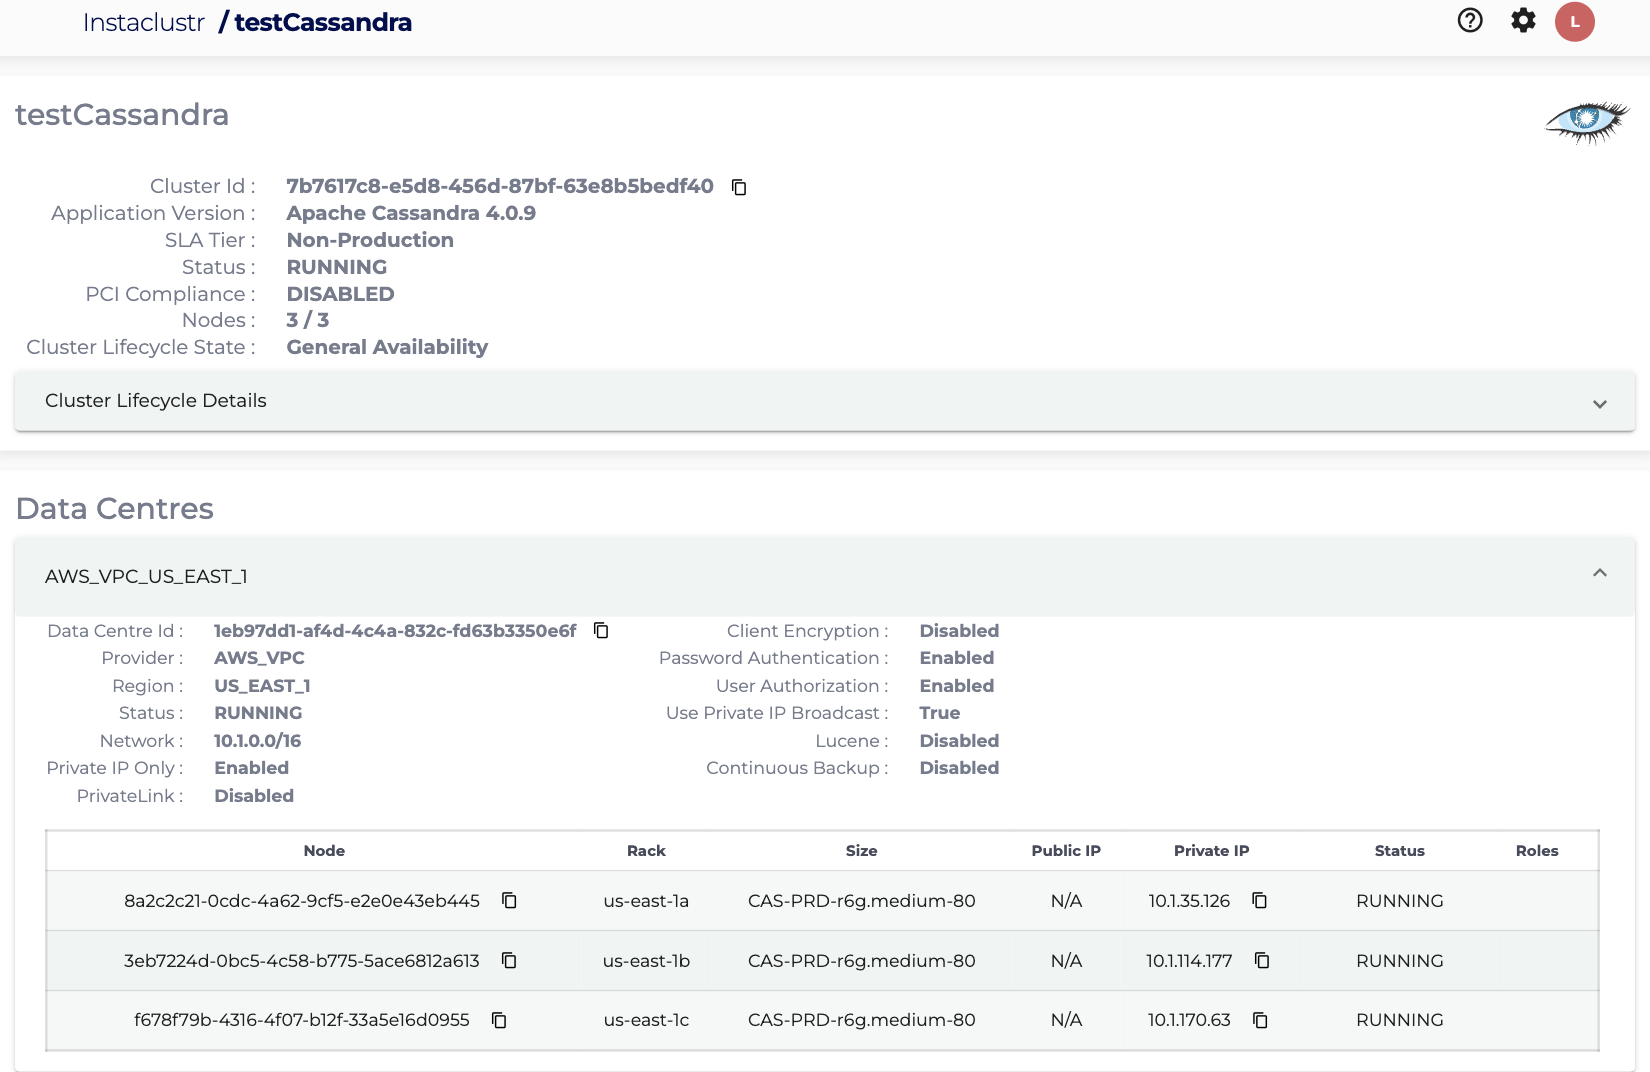
- You have now finished creating your Cassandra cluster, congratulations! All your clusters will be listed on the left sidebar of the console. You can view your cluster’s configuration details by navigating to the Details page.
Step 2 – Create a Cadence cluster
Now that we have a running Cassandra cluster, we can create a Cadence cluster and link them together:
- On the console, click the Create Cluster button again, this time we will select the Cadence application (mentioned before for Packaged Solution) and select AWS as the provider and the PrivateLink enterprise feature.
- On the Cadence Setup page, we can select the version of Cadence. Select “Cadence Cluster Only“ as the provisioning approach. Keep “Use Advanced Visibility“ option unchecked, we will demonstrate that option here. Fill Advertised HostName and IAM Principal ARNs and click next.
- On the Cadence Dependency Setup page, we can now select our previously created Cassandra cluster as the Cadence persistence store. If there are multiple Cassandra clusters running in your account, you can use the drop-down to select the one you want to use with Cadence.
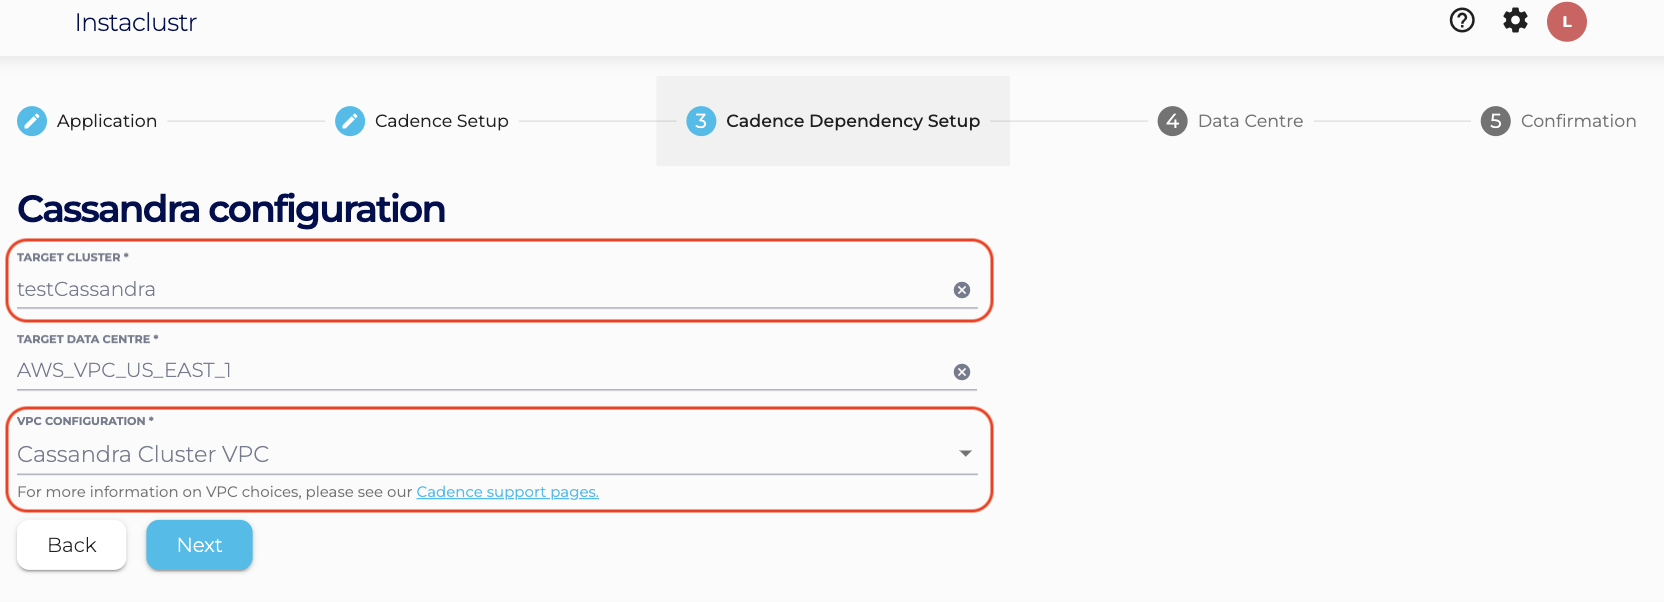 In addition to selecting which Cassandra cluster to link to, we can select how they are linked and communicate over the network, i.e. the Cadence VPC configuration. Configuring the Cadence VPC gives a detailed explanation about the different approaches to configuring the Cadence VPC.
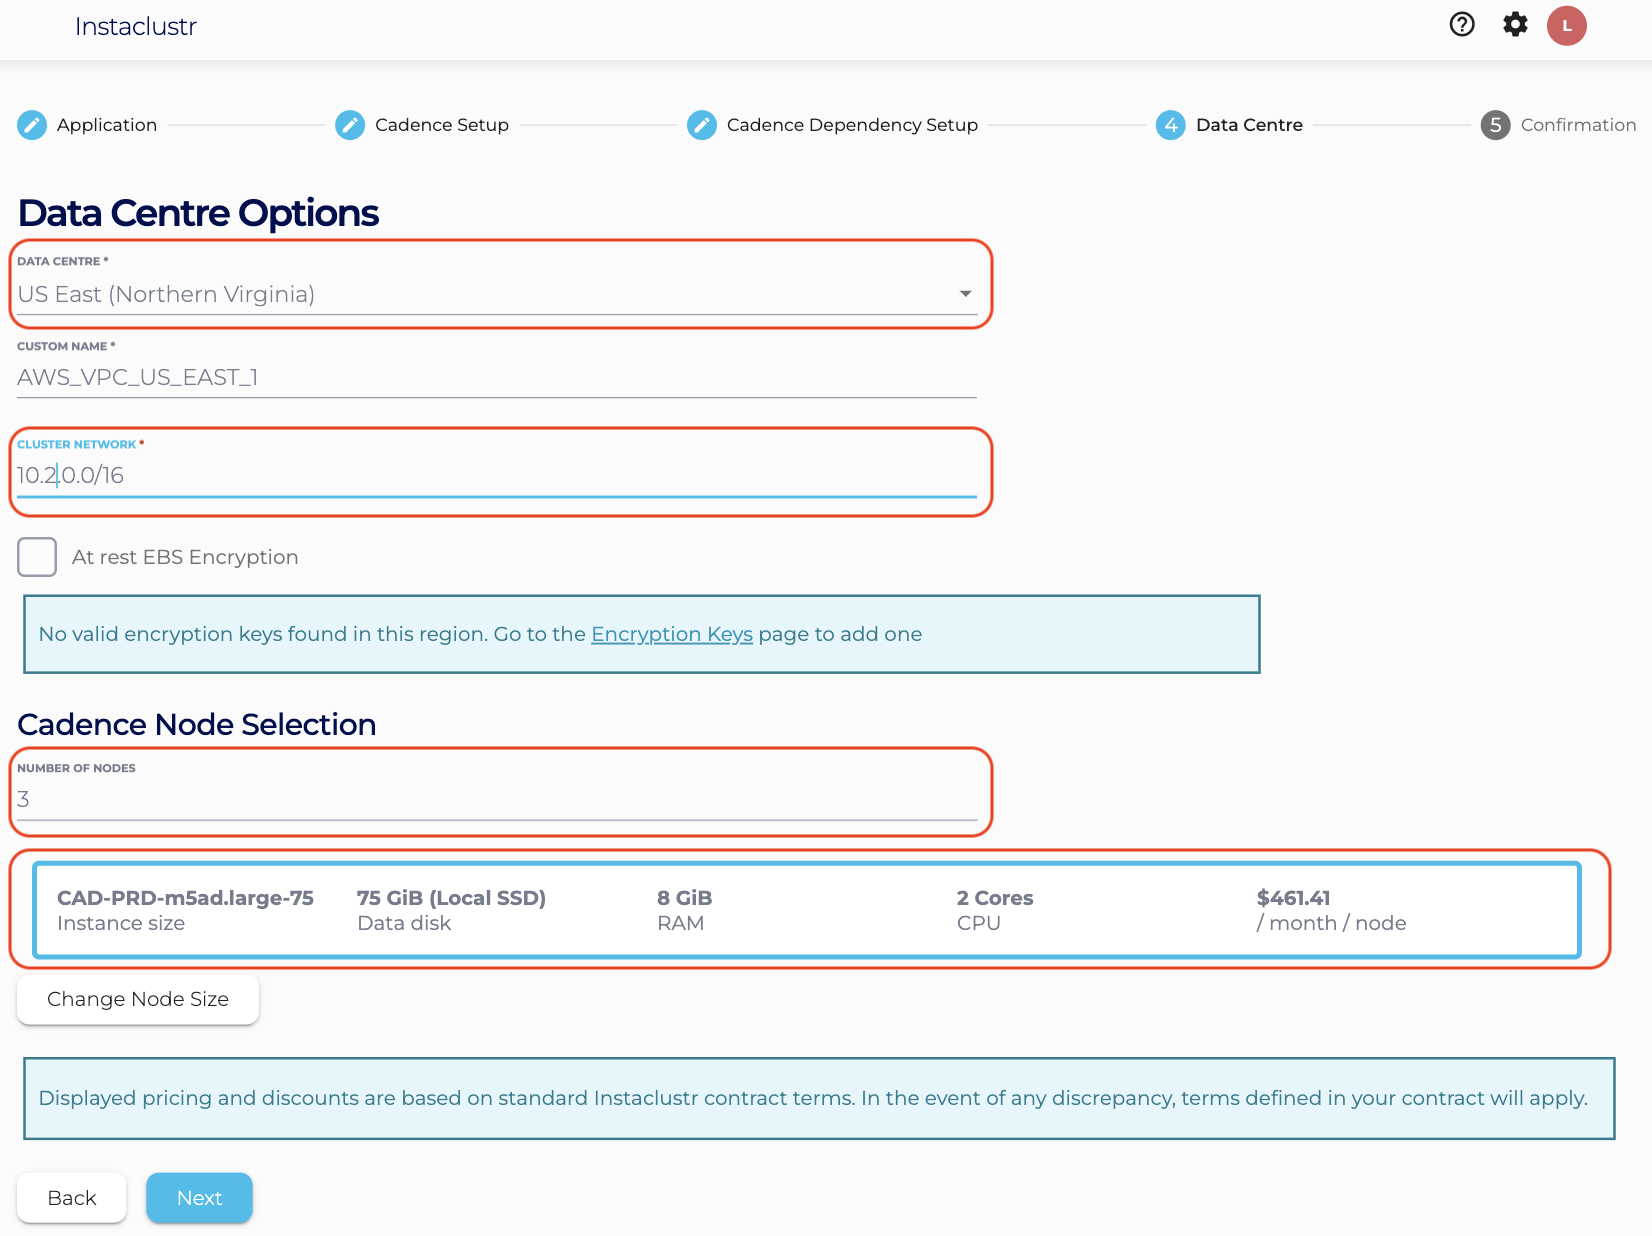
 - Under the Data Centre section,
- Select a Data Centre Region,
- A cluster network address block (Note: Provide a non-overlapping CIDR block for VPC Peering and Cassandra Cluster VPC option),
- The number of nodes for your application,
- The desired node size.
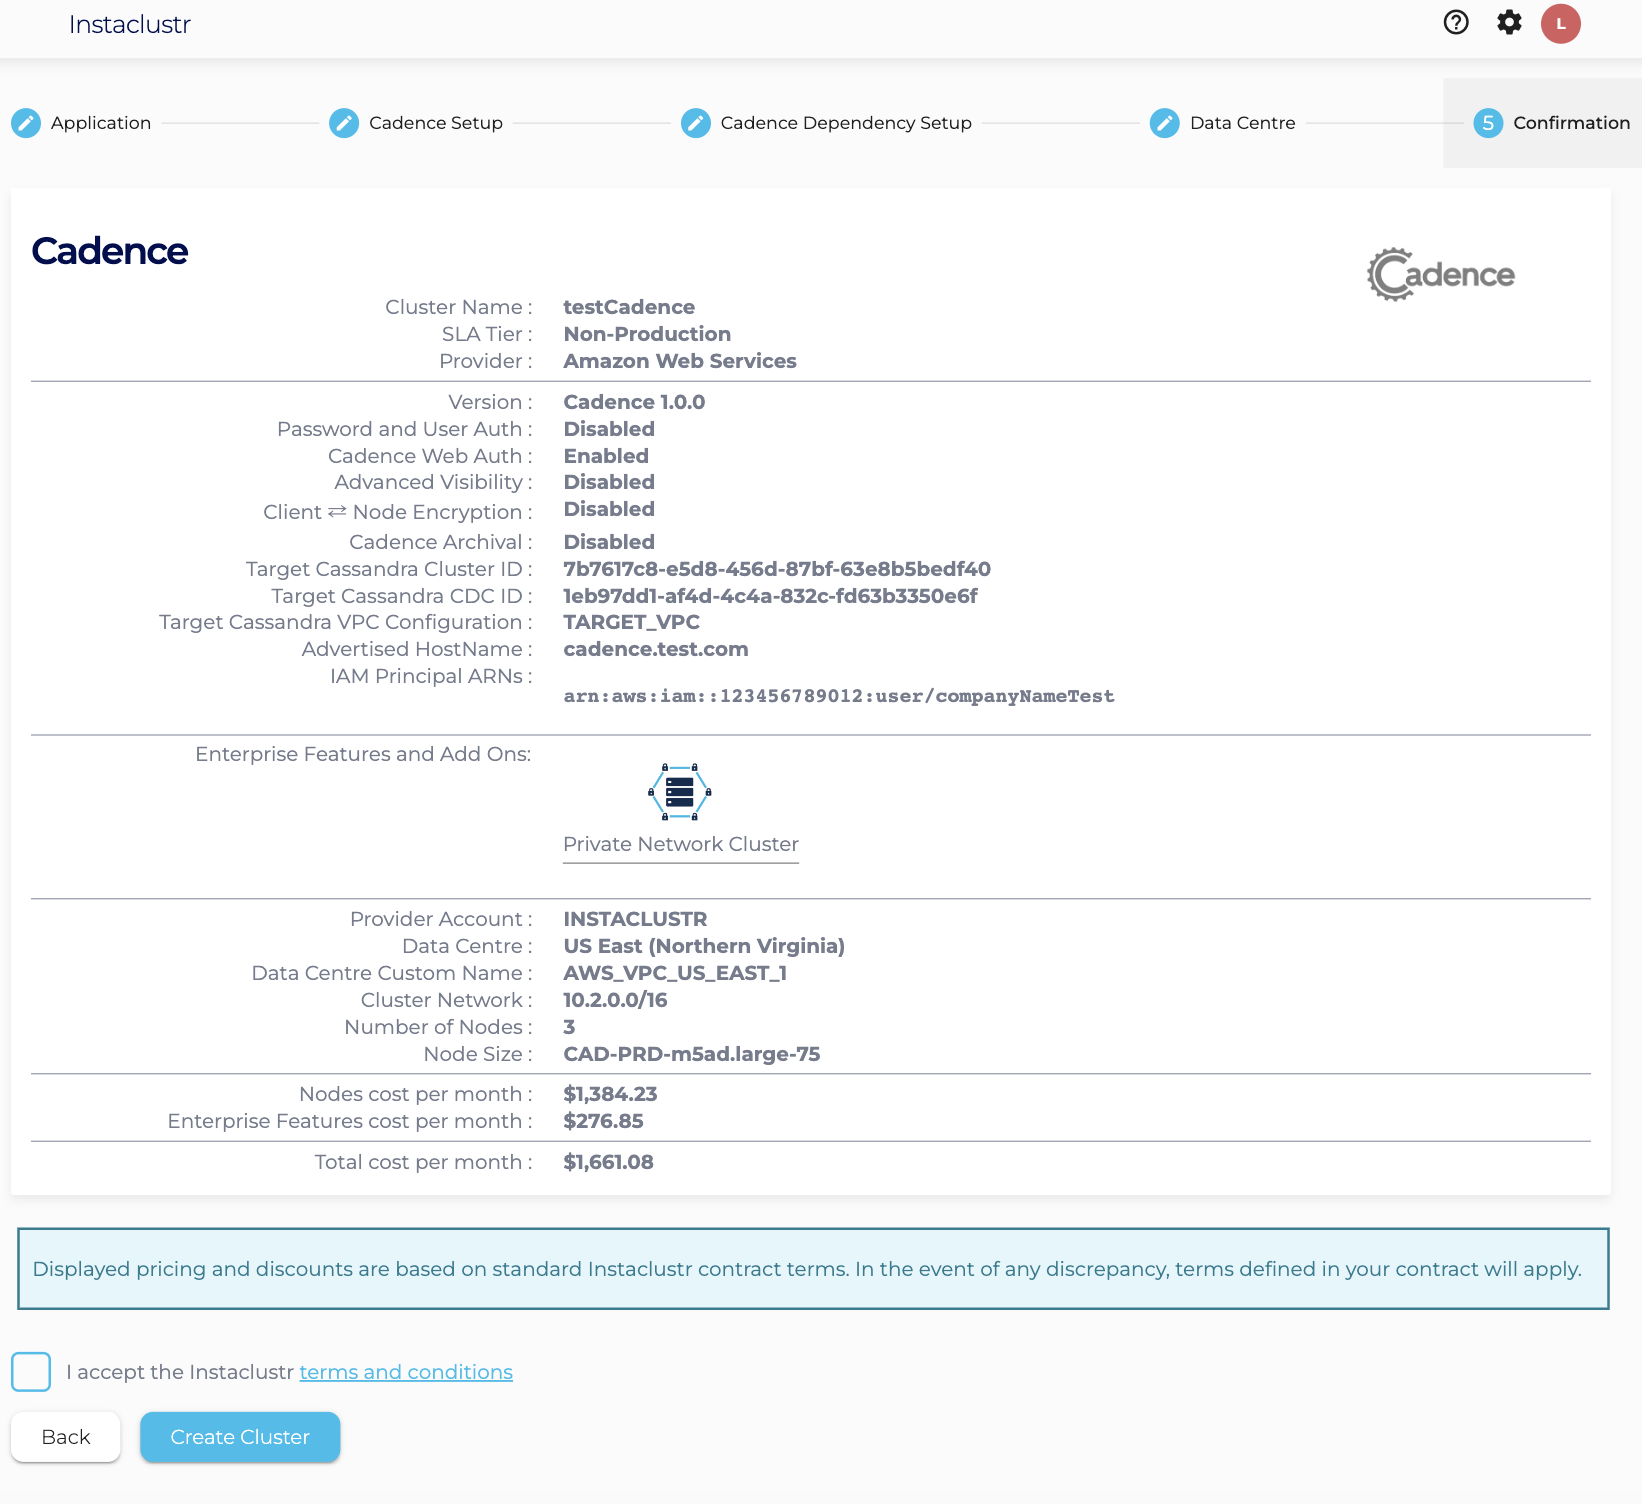
- The Confirmation section displays a brief summary of your cluster configurations and pricing details. If you are happy with the cluster configuration and have accepted the terms and conditions, click the Create Cluster button to start provisioning the cluster.
- Once your cluster is running, further steps will still be required to connect to it. Please refer to our support article on Connecting to a PrivateLink Cadence Cluster for a guide through this process.