Creating an Apache Kafka Cluster
This article describes how to provision an Apache Kafka Cluster using the Instaclustr Console. You can alternatively choose to provision an Apache Kafka Cluster via the Instaclustr Provisioning API.
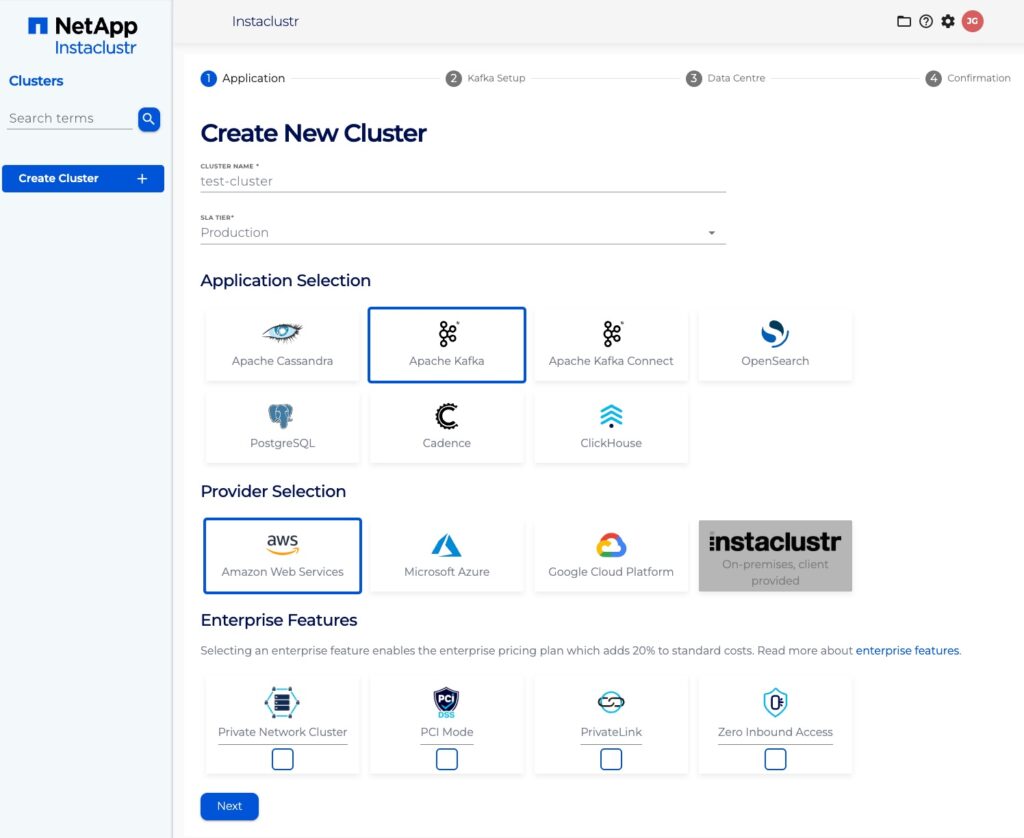
- To get started, after setting up your user account and logging into the console, click the Create Cluster button. This will take you to the wizard for creating a new cluster.

- Under the Application section, enter an appropriate name for your cluster, and select a base application and infrastructure provider. You will be able to customise specific configurations matching your performance and pricing requirements in the following sections of the wizard.
You also have the option to select an SLA Tier and add any additional enterprise features to your cluster. Read more about our supported SLA Tiers and Enterprise Features to decide what is most appropriate for your use case.
Subject Alternative Names are available for Kafka clusters hosted in AWS.
- On the Kafka Setup page, select a Kafka version, your Security and Topics settings, and any add-ons that you require. Enabling the topic auto-create option will cause a topic to be created automatically whenever a message is produced to a topic that doesn’t exist. Enabling the topic delete option will allow topics to be deleted via the official Kafka tool.
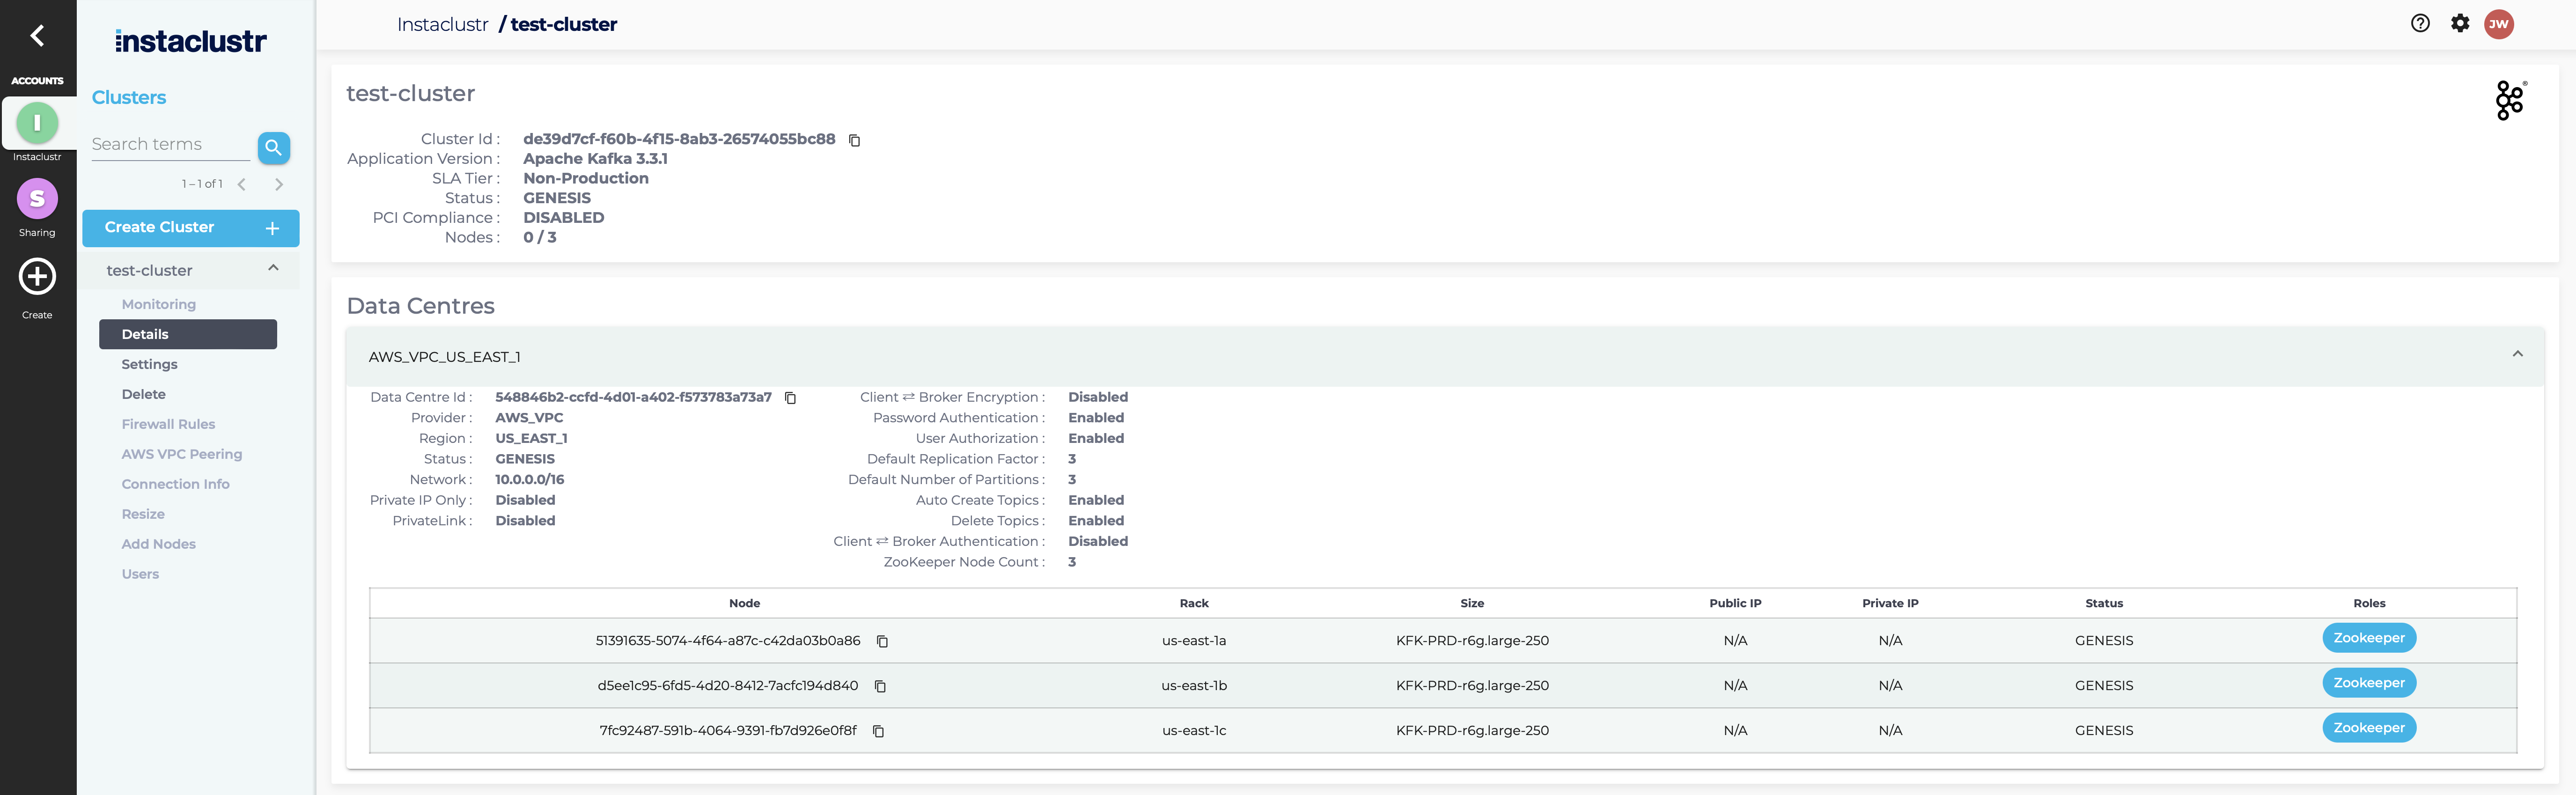
Enabling KRaft mode option creates a cluster where the metadata configuration is stored as a Kafka topic instead of in ZooKeeper. Therefore if KRaft mode is selected then ZooKeeper is disabled; the two are mutually exclusive.
Note that Instaclustr detects the IP address of the computer used to access the Dashboard and provides the option to add a firewall rule for your computer to connect to the cluster. Certain web proxies may interfere with this mechanism and Instaclustr will see their IP address instead. We suggest you verify the detected address.
To enable Tiered storage option for your cluster, tick the Tiered Storage option in the Enterprise addons. For more information on Tiered storage, refer to the support documentation here.
Another security option to consider is whether or not to encrypt traffic between clients and the cluster. Instaclustr recommends this option to be enabled if the data being communicated is sensitive and is being sent over the public network. If Client Broker Encryption is enabled, TLS will be used to encrypt traffic between clients and the cluster. It is important to note that using TLS increases CPU load causing a slight increase in latency.
Instaclustr enforces broker to broker encryption and client authentication using SCRAM on all Kafka clusters. - Under the Data Centre section, select your Data Centre region, Cluster Network address block, and the number of nodes for your application.
Refer to our support article on Network Address Allocation to understand how we divide up the specified network range to determine the node IP address.
If the data centre for your cluster is running on Amazon’s EBS infrastructure, you can choose to encrypt your data with an AWS KMS key.
If client encryption is enabled for the cluster, you can enter custom subject alternative names on this page.
- The Confirmation section displays a brief summary of your cluster configurations and pricing details. Click the Terms and Conditions link to open the Instaclustr Terms and Conditions. After going through the document, select the checkbox to accept the Terms and Conditions. Once you are happy with the cluster configuration and have accepted the terms and conditions, click the Create Cluster button to start provisioning the cluster.

If KRaft mode is enabled this will show as a configuration option instead of ZooKeeper.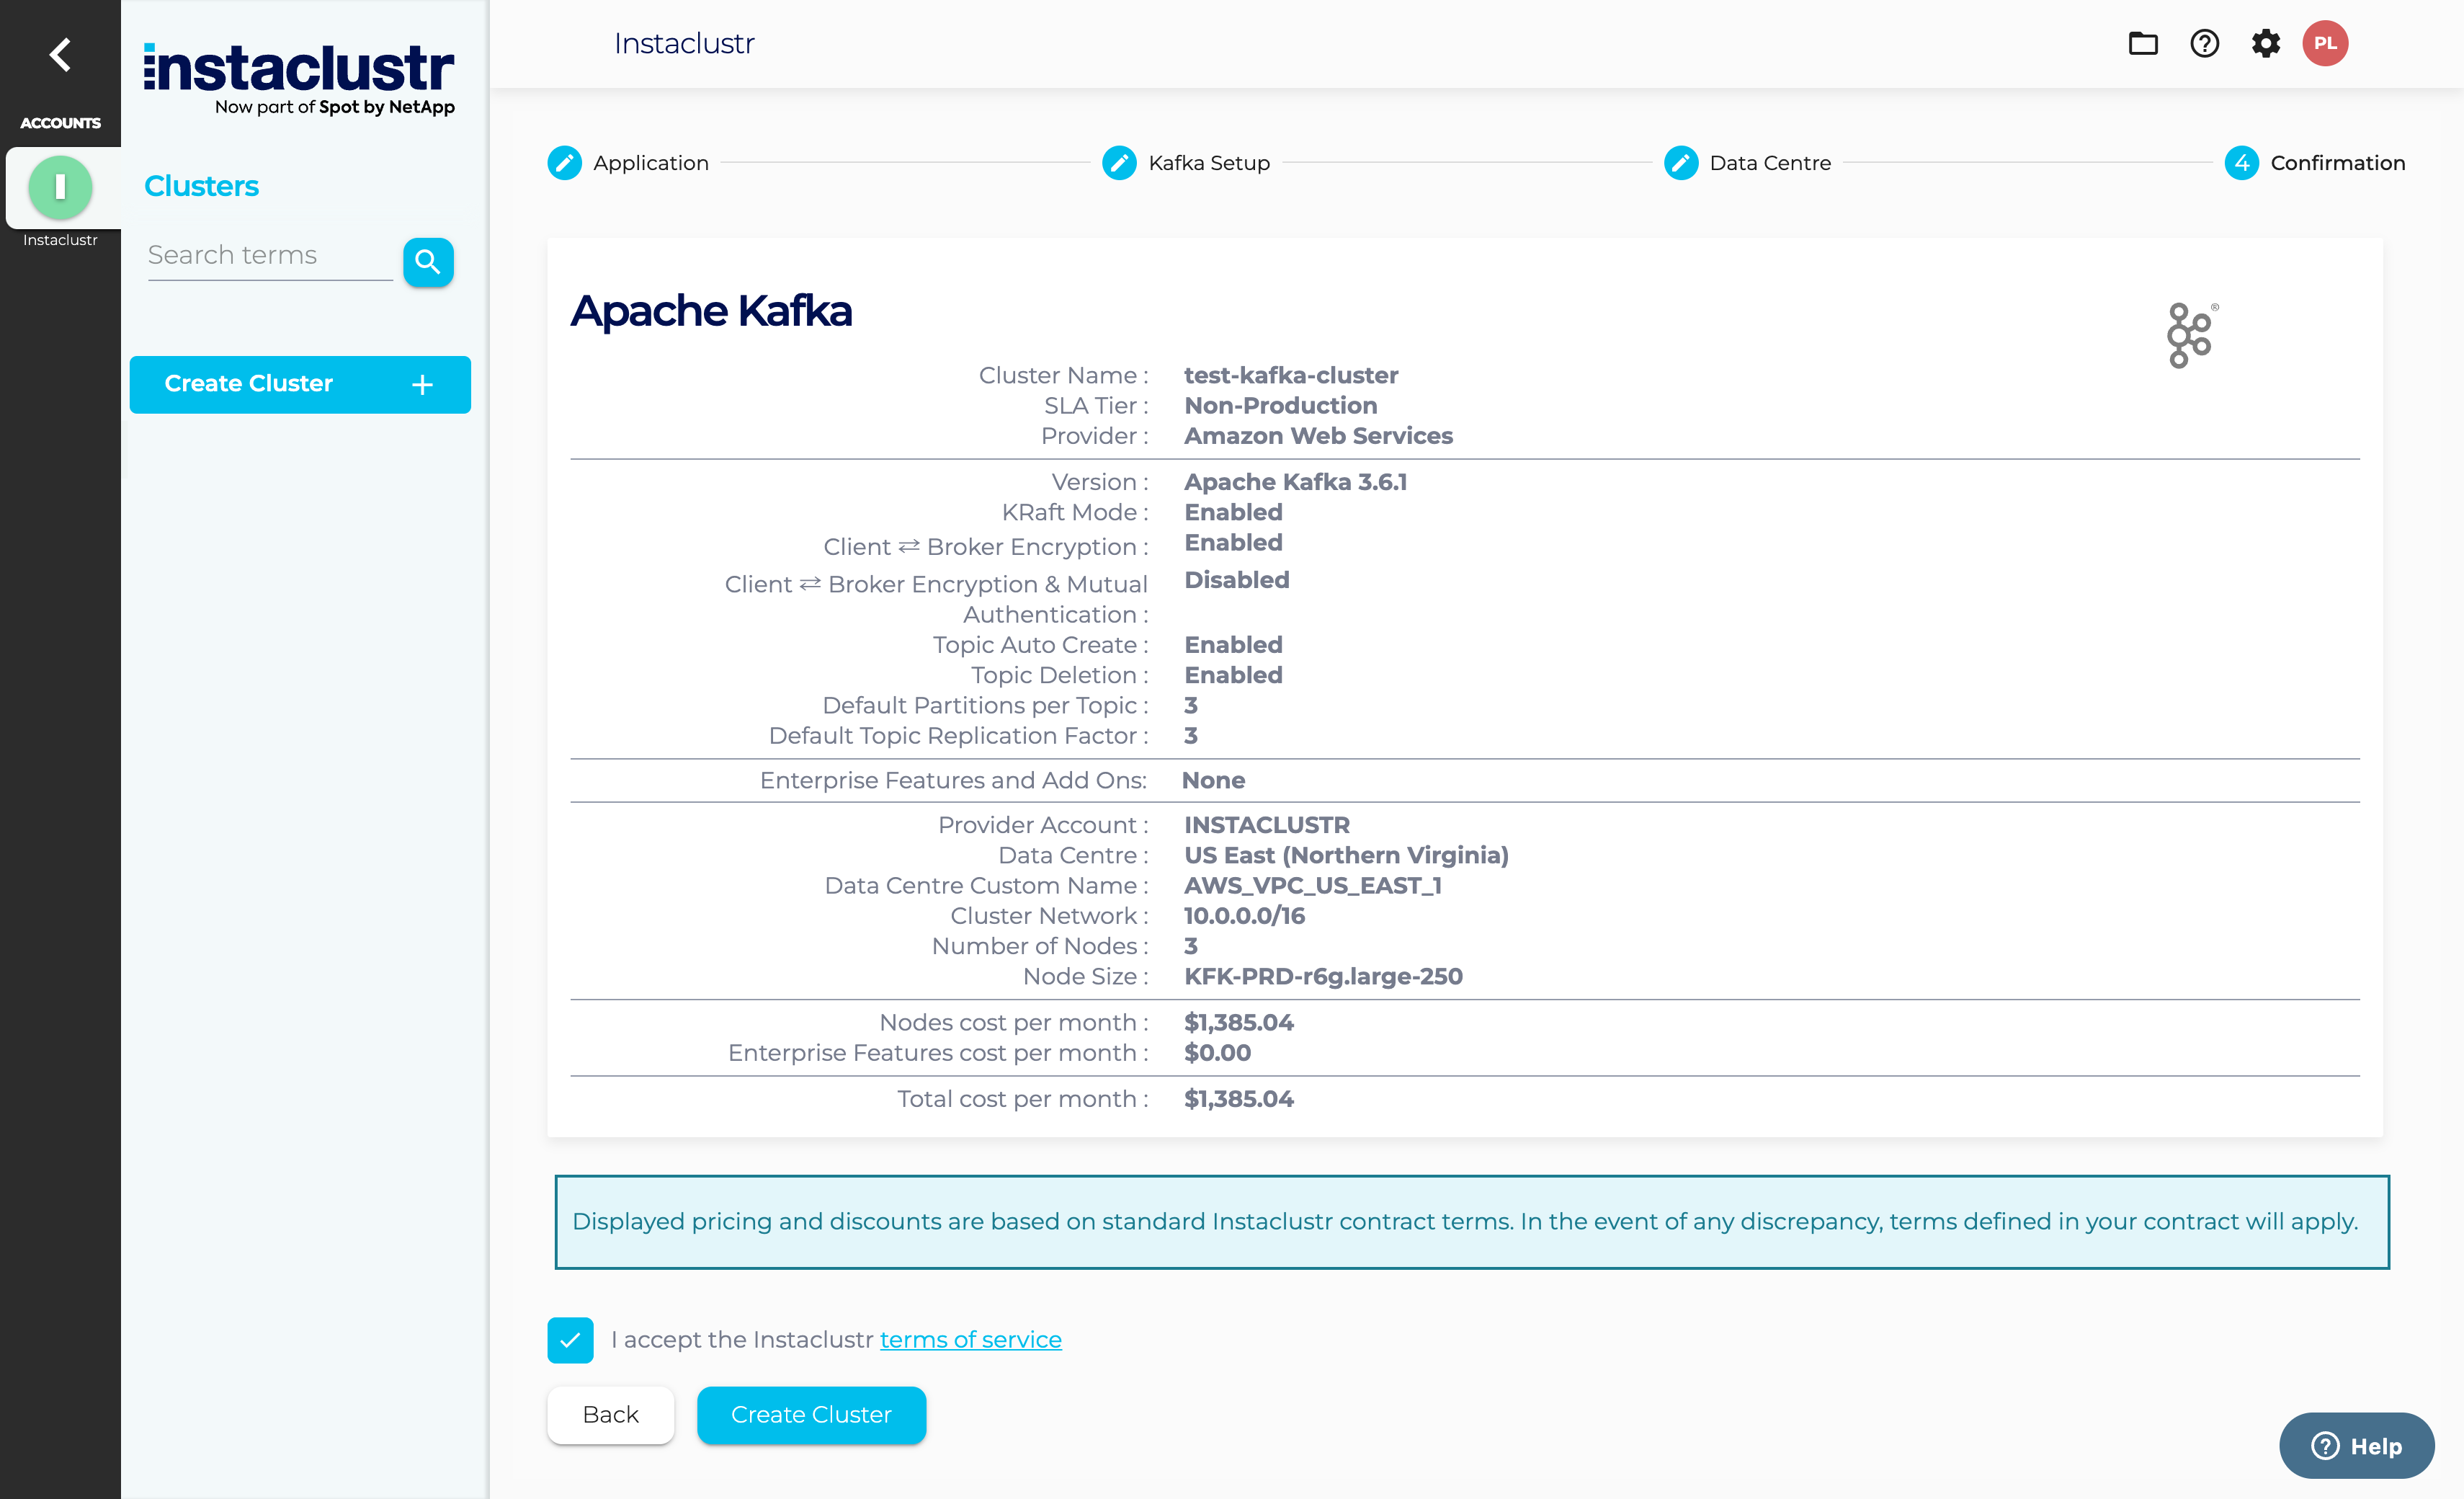
- Provisioning a cluster can take some time depending on the responsiveness of the underlying cloud provider. There are separate status indicators for the overall cluster provisioning state. Refer to our support article on The Provisioning Life Cycle to understand each of the different stages in more detail.
 If KRaft mode is enabled then the number of KRaft controller nodes will be displayed instead of ZooKeeper and a badge will be displayed in the role column against each KRaft Controller node
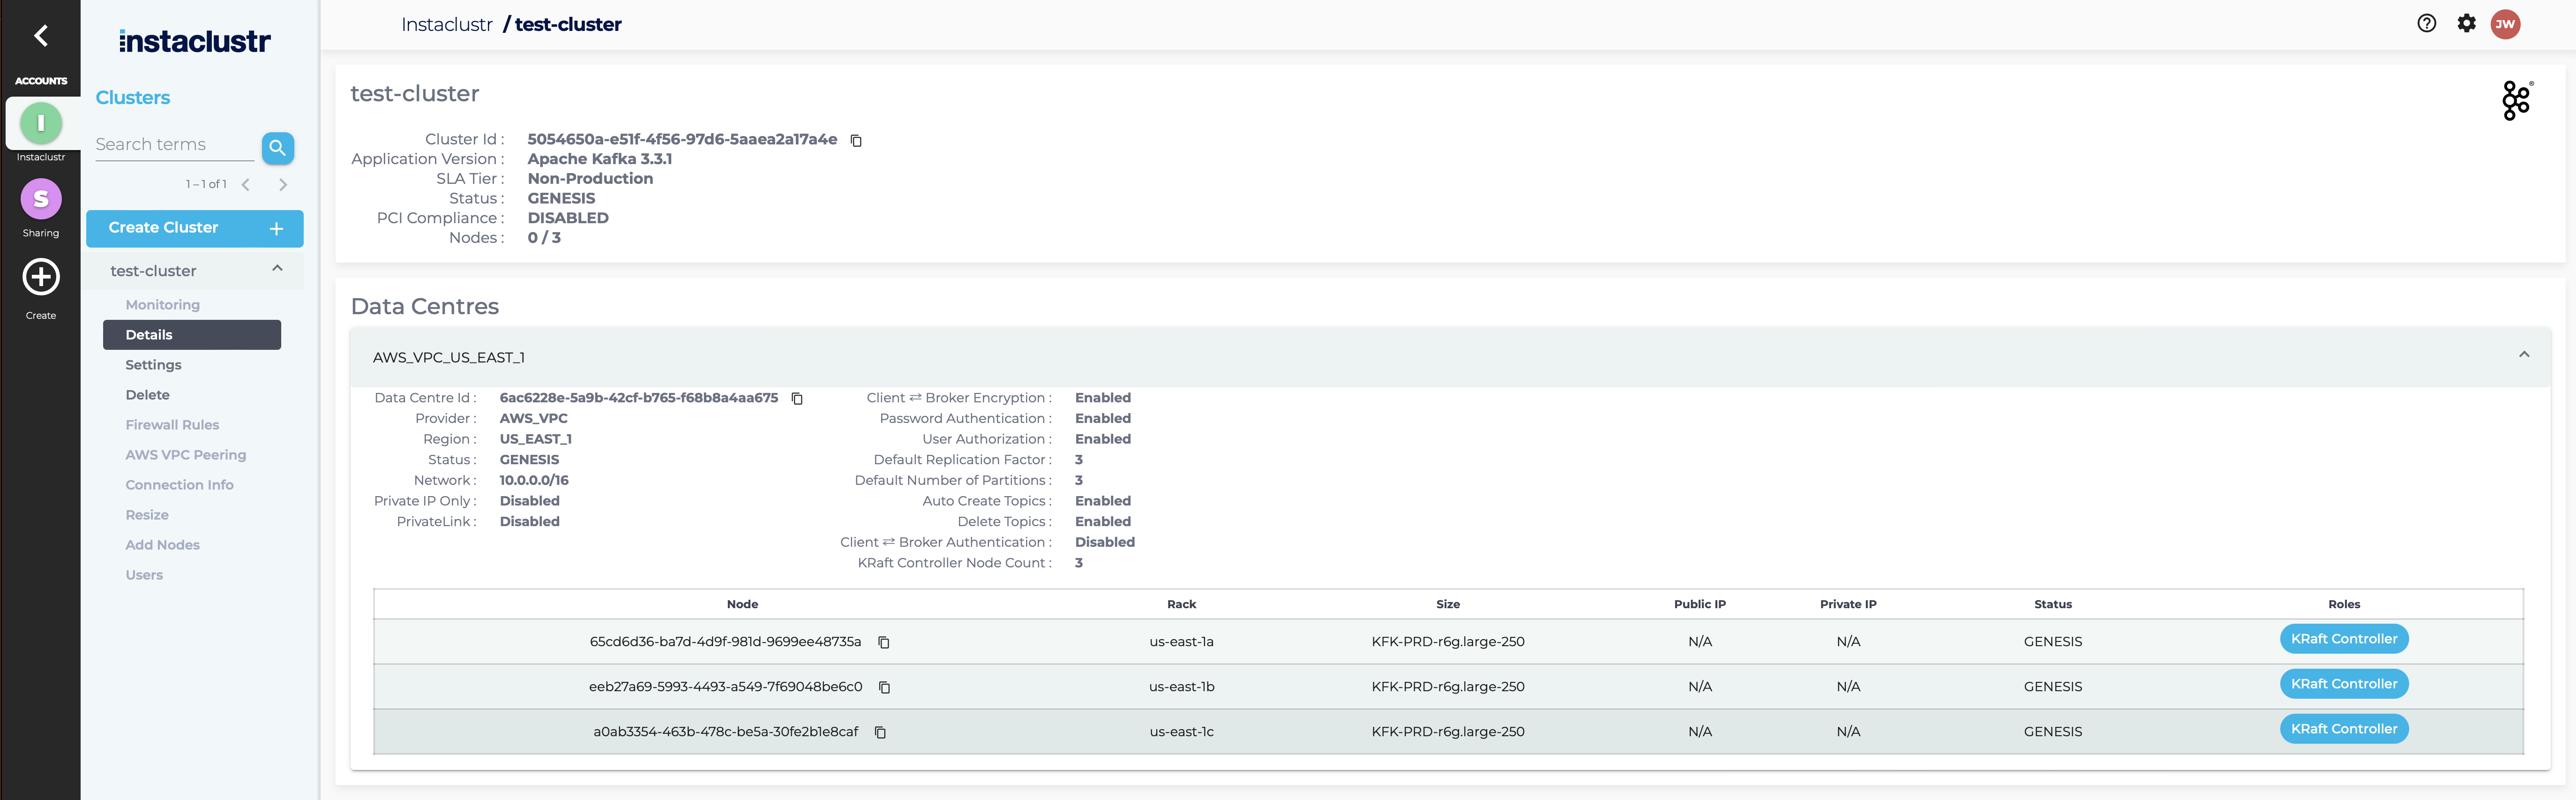
- You have now finished creating your cluster, congratulations! All your clusters will be listed on the left sidebar of the console. You can view your cluster’s configuration details by navigating to the Details tab.
We recommend reviewing our support article on Connecting to a Kafka Cluster as a next step.
Contact us at [email protected] if there is any issue in provisioning your cluster