JDBC Source and Sink Connector
Introduction
JDBC Source and Sink Connectors, built on the Kafka Connect, provide a solution for integrating relational databases with Apache Kafka. They are open-source connectors available under an Apache 2.0 license. More details on the connectors can be found at https://github.com/Aiven-Open/jdbc-connector-for-apache-kafka. We’re using JDBC connectors version v6.10.0.
The JDBC source connector allows for extracting data from a relational database into Apache Kafka. It can connect most of JDBC-compatible database, such as PostgreSQL, MySQL, Oracle, DB2, Sybase, SQLServer, Sqlite, Derby, SapHana or Vertical at the time of writting, and streams data changes or snapshots into Kafka topics.
The JDBC Sink connector allows for transferring data from Kafka into a relational database. It consumes messages from Kafka topics and writes them to a target database. Similar to the source connector, it support connecting to most of database, such as PostgreSQL, MySQL, Oracle, DB2, Sybase, SQLServer, Sqlite, Derby, SapHana or Vertical at the time of writting .
Cluster Requirements
- Kafka cluster with the Karapace Schema Registry add-on enabled.
- Kafka connect cluster with version 3.7.2 or greater, set up to interact with the above Kafka cluster..
- PostgreSQL cluster.
Cluster Preparation and Configuration
To begin, please refer to the Karapace Schema Registry guide for detailed instructions on how to create a Kafka cluster with the Karapace Schema Registry add-on enabled, the PostgreSQL guide for creating a PostgreSQL cluster, and the Kafka Connect guide for creating a Kafka Connect cluster. Note that for the purposes of this document, we are going to use PostgreSQL as the relational database to demonstrate the use of these connectors, but you can use another compatible relational database if you choose.
After completing the cluster creation steps, you will need to keep the following details handy for further configurations.
- PG_CONNECTION_URL: PostgreSQL connection URL (e.g., jdbc:postgresql://HOST:PORT,HOST:PORT/postgres?sslmode=require&targetServerType=any&loadBalanceHosts=true)
- PG_USERNAME: PostgreSQL username
- PG_PASSWORD: PostgreSQL password
- SCHEMA_REGISTRY_HOST: Kafka schema registry hostname
- SCHEMA_REGISTRY_PORT: Kafka Schema Registry port
- SCHEMA_REGISTRY_USER: Schema Registry username
- SCHEMA_REGISTRY_PASSWORD: Schema Registry password
- KAFKA_CONNECT_USER: Kafka Connect username (with connector creation privileges)
- KAFKA_CONNECT_PASSWORD: Kafka Connect user password
These details can be found on the Connection Info tab of the respective clusters.
For both the source and sink connectors, we need to allow Kafka Connect to access the Karapace Schema Registry and PostgreSQL source clusters.
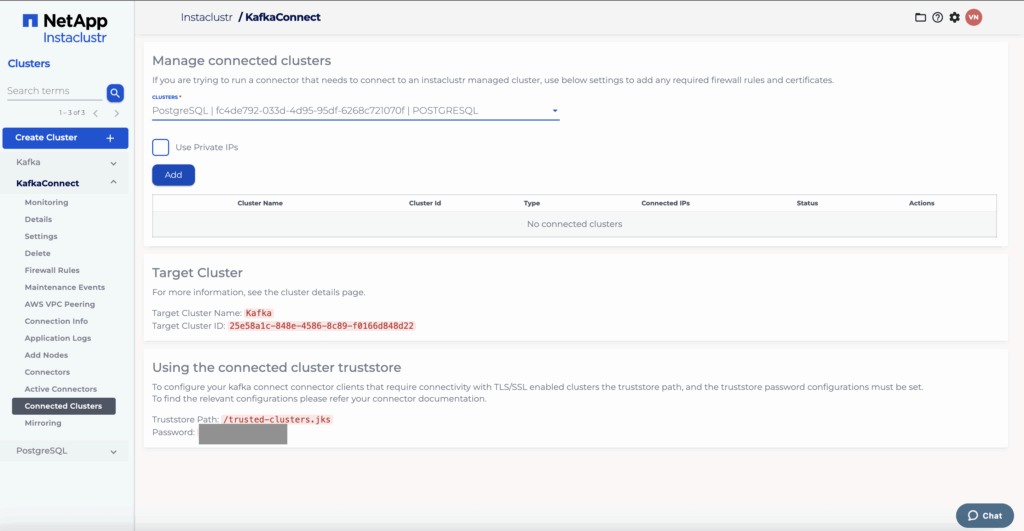
To allow Kafka Connect to access PostgreSQL, you can either use the Connected Clusters tab to add the necessary IPs with the click of a button or manually add Kafka Connect IPs to the firewall allow list on the PostgreSQL cluster. Refer to the PostgreSQL connection guide for detailed instructions.
From the connected clusters tab, select the source PostgreSQL cluster and add it.
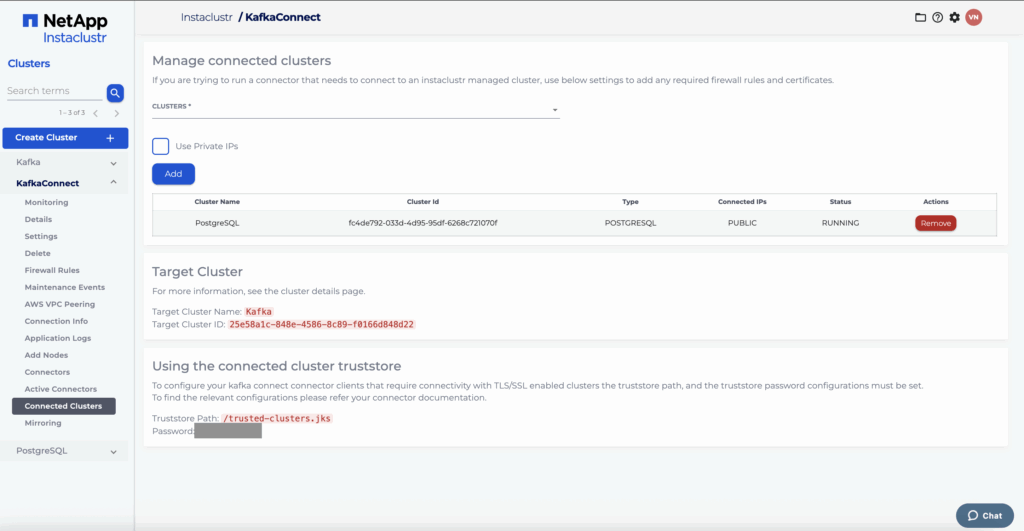
Once you have done so, the PostgreSQL cluster will be shown as a connected cluster.
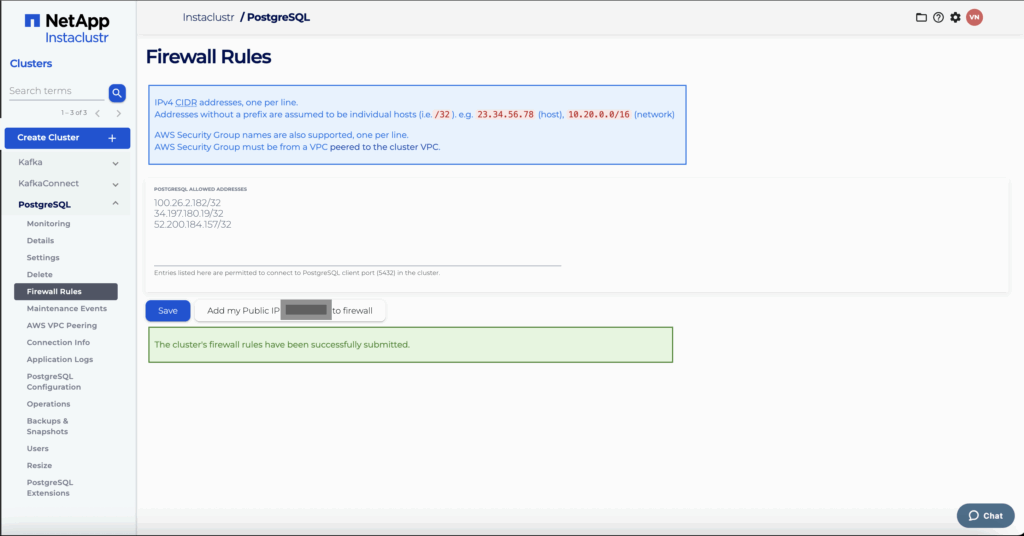
The PostgreSQL firewall rules should display the Kafka Connect cluster’s IPs.
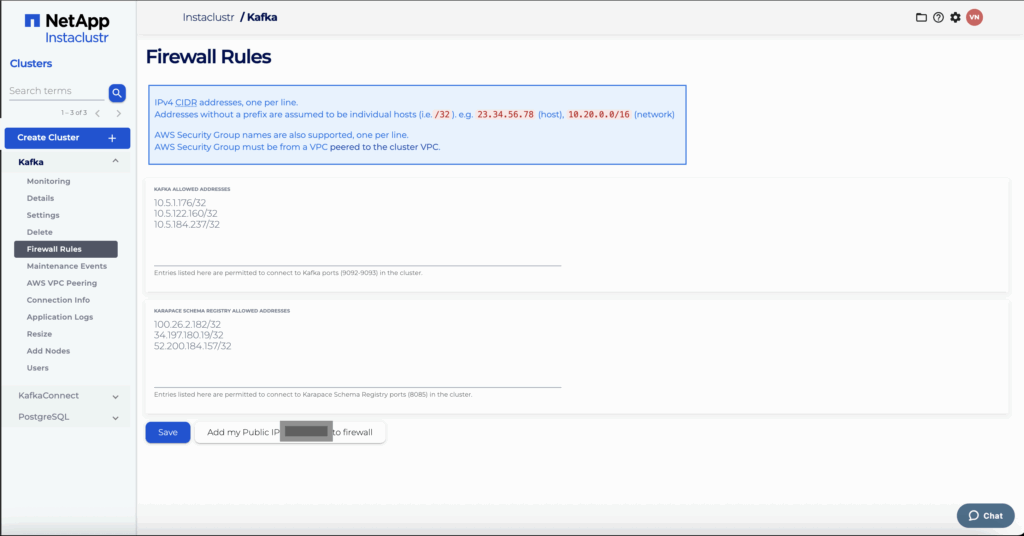
To allow Kafka Connect to access the Kafka cluster, the Kafka Connect cluster’s IPs need to be added to the firewall allow list on the Kafka cluster. Refer to the Karapace Schema Registry guide for detailed instructions.
For this guide, we have used public IPs; however, if you’re using VPC-peered clusters, private IPs can be used instead of public IPs. Kafka Connect can easily be VPC-peered to the Kafka cluster during the creation of the Kafka Connect cluster if both are in the Instaclustr Managed Service. See the manual VPC peering guide for more details.
How to configure the JDBC Source Connector for Apache Kafka
Step 1: Create testing schema and table
This is required for testing purposes. You can skip this step if you already have a predefined schema and table from which data needs to be extracted. The following sample schema and test will be used for the rest of source connector guide. In the PostgreSQL cluster, create a schema and table to serve as the data source for the JDBC Source Connector.
Connect to the PostgreSQL cluster—refer to the PostgreSQL connection guide for detailed instructions—and execute SQL commands to create a schema, for example:
|
1 |
CREATE SCHEMA source_connector; |
Next, create a table within this schema to store test data.
|
1 2 3 4 5 6 7 |
CREATE TABLE source_connector.students ( id SERIAL PRIMARY KEY, first_name VARCHAR(50) NOT NULL, last_name VARCHAR(50) NOT NULL, last_modified TIMESTAMP DEFAULT CURRENT_TIMESTAMP NOT NULL, is_deleted BOOLEAN DEFAULT FALSE NOT NULL ); |
Step 2: Create source connector configuration file
Prepare the configuration for the JDBC Source Connector to connect to the PostgreSQL database and stream data from the specified schema and table. The configuration is defined as a JSON object that specifies connection details, data capture settings, and the target Kafka topic. The example below uses org.apache.kafka.connect.json.JsonConverter to easily demonstrate the output in a nice format; you can change key.converter and value.converter as you wish, to io.confluent.connect.avro.AvroConverter. More details on the source connector configuration can be found at source connector documentation from Github.
|
1 2 3 4 5 6 7 8 9 10 11 12 13 14 15 16 17 18 19 20 21 22 23 24 |
{ "name": "jdbc-source-connector", "config": { "connector.class": "io.aiven.connect.jdbc.JdbcSourceConnector", "connection.url": "PG_CONNECTION_URL", "connection.user": "PG_USER", "connection.password": "PG_PASSWORD", "table.whitelist": "source_connector.students", "mode": "timestamp+incrementing", "incrementing.column.name": "id", "timestamp.column.name": "last_modified", "topic.prefix": "jdbc_source_pg_increment.", "tasks.max": "1", "poll.interval.ms": "5000", "key.converter": "org.apache.kafka.connect.json.JsonConverter", "key.converter.schema.registry.url": "SCHEMA_REGISTRY_HOST:SCHEMA_REGISTRY_PORT", "key.converter.basic.auth.credentials.source": "USER_INFO", "key.converter.schema.registry.basic.auth.user.info": "SCHEMA_REGISTRY_USER:SCHEMA_REGISTRY_PASSWORD", "value.converter": "org.apache.kafka.connect.json.JsonConverter", "value.converter.schema.registry.url": "SCHEMA_REGISTRY_HOST:SCHEMA_REGISTRY_PORT", "value.converter.basic.auth.credentials.source": "USER_INFO", "value.converter.schema.registry.basic.auth.user.info": "SCHEMA_REGISTRY_USER:SCHEMA_REGISTRY_PASSWORD" } } |
Save this configuration to a file, such as jdbc_source_config.json.
Step 3: Create source connector
Use the curl command to send a request to submit the configuration and start the connector.
|
1 |
curl https://<kafka-connect node ip>:8083/connectors -X POST -H 'Content-Type: application/json' -d @jdbc_source_config.json -k -u <KAFKA_CONNECT_USER:KAFKA_CONNECT_PASSWORD> |
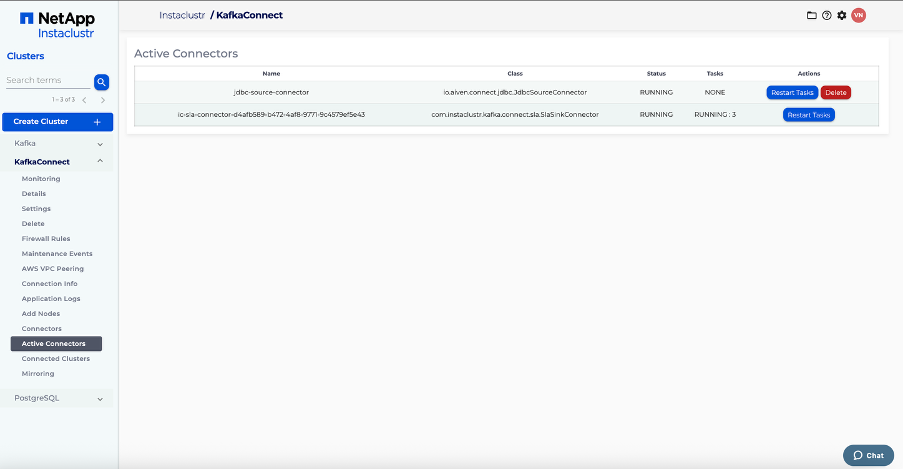
Check that the connector has started successfully and is connected to both the PostgreSQL database and the Kafka cluster in the Kafka Connect Active Connectors tab.
Step 4: Subscribe topic on consumer
Use a Kafka consumer to subscribe to the Kafka topic populated by the Source Connector. The example below uses the Kafka Consumer CLI tool to consume messages.
|
1 |
./kafka-console-consumer.sh --bootstrap-server <KAFKA_NODE_IP>:9092 –topic jdbc_source_pg_increment.students --consumer.config kafka.properties |
Step 5: Perform SQL command and verify the messages appear on the consumer
Execute an SQL command to insert data into the PostgreSQL table.
|
1 |
INSERT INTO source_connector.students (first_name, last_name) VALUES ('John', 'Doe'); |
Check the output on the consumer to ensure the data is correctly received.
|
1 |
{"schema":{"type":"struct","fields":[{"type":"int32","optional":false,"field":"id"},{"type":"string","optional":false,"field":"first_name"},{"type":"string","optional":false,"field":"last_name"},{"type":"int64","optional":false,"name":"org.apache.kafka.connect.data.Timestamp","version":1,"field":"last_modified"},{"type":"boolean","optional":false,"field":"is_deleted"}],"optional":false,"name":"students"},"payload":{"id":1,"first_name":"John","last_name":"Doe","last_modified":1748431397027,"is_deleted":false}} |
Execute an SQL command to update the data.
|
1 |
UPDATE source_connector.students SET last_name="Carter", last_modified=now() WHERE id=1; |
Check the output on the consumer to ensure the data has been updated correctly.
|
1 |
{"schema":{"type":"struct","fields":[{"type":"int32","optional":false,"field":"id"},{"type":"string","optional":false,"field":"first_name"},{"type":"string","optional":false,"field":"last_name"},{"type":"int64","optional":false,"name":"org.apache.kafka.connect.data.Timestamp","version":1,"field":"last_modified"},{"type":"boolean","optional":false,"field":"is_deleted"}],"optional":false,"name":"students"},"payload":{"id":1,"first_name":"John","last_name":"Carter","last_modified":1748431558681,"is_deleted":false}} |
Execute an SQL command to mark the data as soft-deleted.
|
1 |
UPDATE source_connector.students SET last_modified=now(), is_deleted=true WHERE id=1; |
The consumer should yield a similar output
|
1 |
{"schema":{"type":"struct","fields":[{"type":"int32","optional":false,"field":"id"},{"type":"string","optional":false,"field":"first_name"},{"type":"string","optional":false,"field":"last_name"},{"type":"int64","optional":false,"name":"org.apache.kafka.connect.data.Timestamp","version":1,"field":"last_modified"},{"type":"boolean","optional":false,"field":"is_deleted"}],"optional":false,"name":"students"},"payload":{"id":1,"first_name":"John","last_name":"Carter","last_modified":1748431624841,"is_deleted":true}} |
How to configure the JDBC Sink Connector for Apache Kafka
Step 1: Create testing schema
Create a schema to organize the target tables for the JDBC Sink Connector. This step prepares the database to receive and store data streamed from Kafka. If the schema already exists, you can reuse it.
|
1 |
CREATE SCHEMA sink_connector; |
The following demonstrates that the table will be automatically created by the sink connector, so we don’t need to create it manually. It is also fine if you already have the table created beforehand.
Step 2: Create sink connector configuration file
Prepare a configuration file for the JDBC Sink Connector to define how it connects to the PostgreSQL database and processes data from Kafka topics. This file specifies connection details, target tables, and data mapping rules. Create a file named, for example, jdbc_sink_config.json, and populate it with the following sample configuration.:
|
1 2 3 4 5 6 7 8 9 10 11 12 13 14 15 16 17 18 19 20 21 |
{ "name": "jdbc-sink-connector", "config": { "connector.class": "io.aiven.connect.jdbc.JdbcSinkConnector", "topics": "order", "connection.url": "PG_CONNECTION_URL", "connection.user": "PG_USER", "connection.password": "PG_PASSWORD", "tasks.max": "1", "table.name.format": "sink_connector.${topic}", "auto.create": "true", "auto.evolve": "true", "insert.mode": "upsert", "pk.mode": "record_value", "pk.fields": "id", "value.converter": "io.confluent.connect.avro.AvroConverter", "value.converter.schema.registry.url": "SCHEMA_REGISTRY_HOST:SCHEMA_REGISTRY_PORT", "value.converter.basic.auth.credentials.source": "USER_INFO", "value.converter.schema.registry.basic.auth.user.info": "SCHEMA_REGISTRY_USER:SCHEMA_REGISTRY_PASSWORD" } } |
The example above uses io.confluent.connect.avro.AvroConverter, you can change the value.converter to org.apache.kafka.connect.json.JsonConverter , as you prefer. More details on the sink connector configuration can be found at sink connector documentation from Github.
Step 3: Create sink connector
Use the curl command to send a request to submit the configuration and start the connector.
|
1 |
curl https://<kafka-connect node ip>:8083/connectors -X POST -H 'Content-Type: application/json' -d @jdbc_sink_config.json -k -u <KAFKA_CONNECT_USER:KAFKA_CONNECT_PASSWORD> |
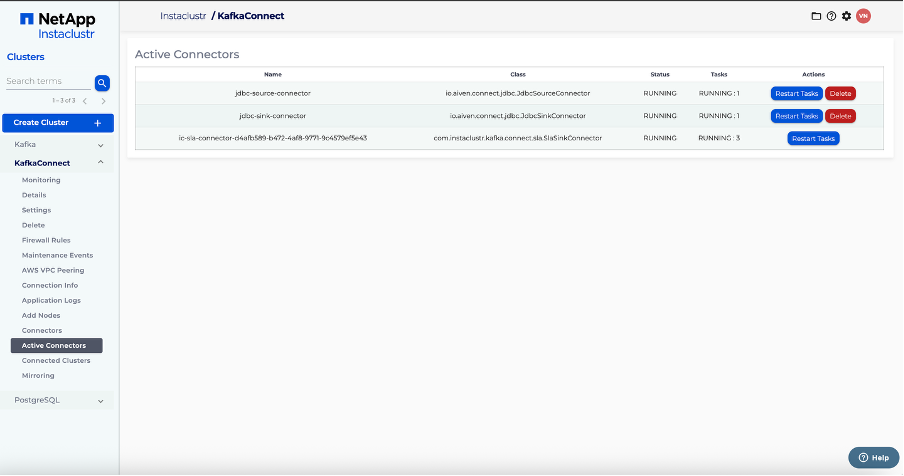
Verify that the sink connector has started successfully and is connected to both the PostgreSQL database and the Kafka cluster by checking the Kafka Connect Active Connectors tab.
Step 4: Produce message to a Kafka topic on producer
At this stage, the JDBC sink connector is active, but the configured Kafka topic (e.g., order) may not yet exist or contain any messages. You can start producing messages to the Kafka topics by following the guidelines provided at Karapace Schema Registry guide. After following the guideline, start the AvroProducer, and you should see the following messages on the CLI.
|
1 2 3 |
sent ProducerRecord(topic=order, partition=null, headers=RecordHeaders(headers = [], isReadOnly = true), key=null, value={"id": 1, "timestamp": "2025-05-30 17:49:20.193", "product": "Black Gloves", "price": 12.0}, timestamp=null) sent ProducerRecord(topic=order, partition=null, headers=RecordHeaders(headers = [], isReadOnly = true), key=null, value={"id": 2, "timestamp": "2025-05-30 17:49:20.194", "product": "Black Hat", "price": 30.0}, timestamp=null) sent ProducerRecord(topic=order, partition=null, headers=RecordHeaders(headers = [], isReadOnly = true), key=null, value={"id": 3, "timestamp": "2025-05-30 17:49:20.194", "product": "Gold Hat", "price": 35.0}, timestamp=null) |
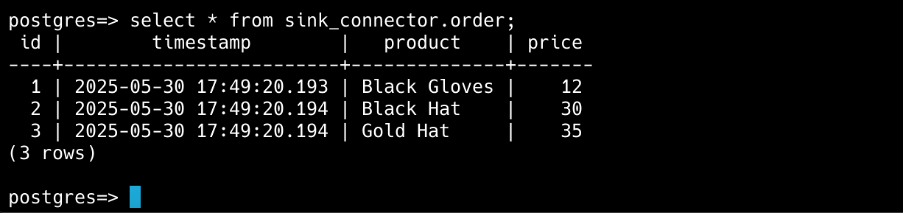
Step 5: Perform SQL command to verify the output
Execute SQL command to verify that the sink_connector.order table is created and that there’re new records.
Troubleshooting
If data cannot be extracted to the Kafka topic by the source connector or transformed to the relational database by the sink connector, first check the active connectors tab to see if the connector has failed. If it has, you can review application logs to identify configuration issues. To find the application logs, refer to this guide. If you require further assistance, contact Instaclustr support.