Creating an OpenSearch Cluster
This article describes how to provision an OpenSearch cluster using the Instaclustr Console. You can alternatively choose to provision an OpenSearch cluster via the Instaclustr Provisioning API.
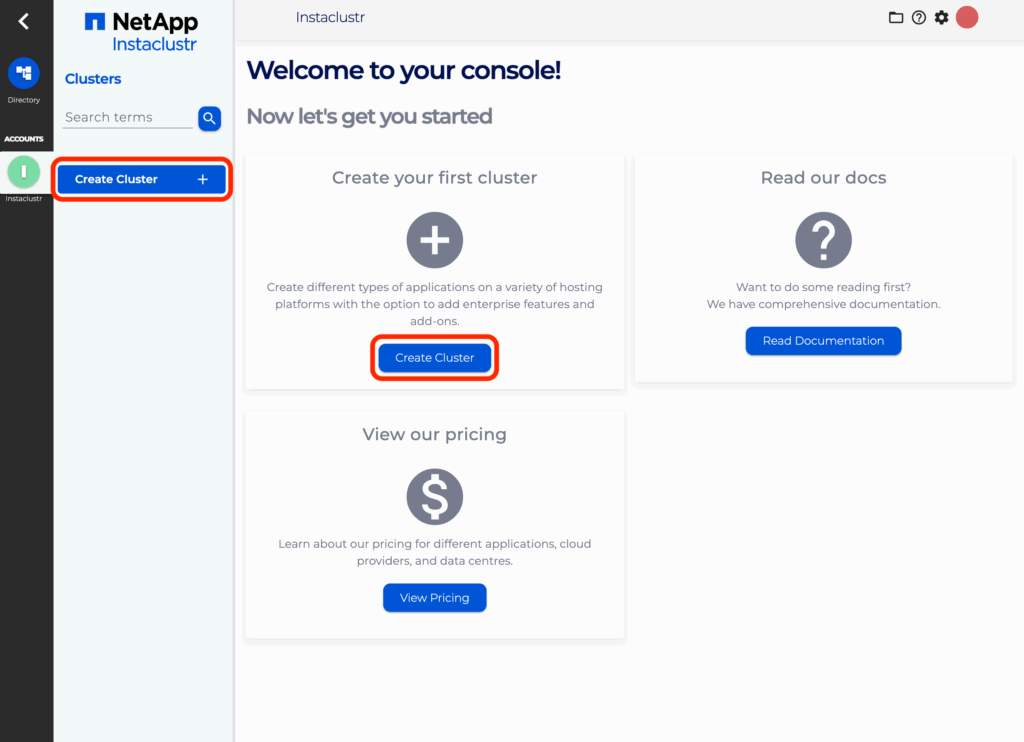
- To get started, after setting up your user account, click the Create Cluster button on the page (on the left hand side bar or in the middle of the page). This will take you to the Create Cluster page.
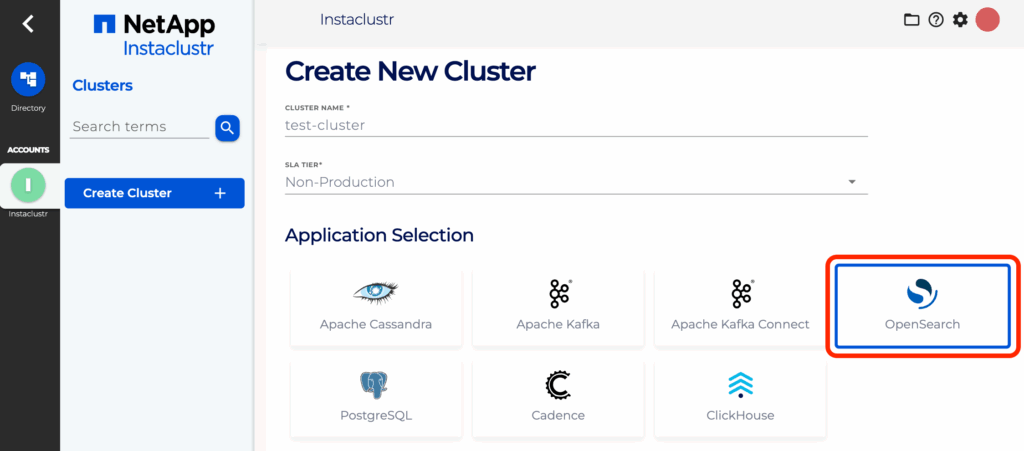
- On the Create Cluster page, choose a cluster name and configuration matching your performance and pricing requirements. Instaclustr recommends that cluster nodes are allocated across all racks within a data centre and that the allocation be evenly distributed. This ensures stability, fault tolerance and consistent performance. Enter an appropriate name for your cluster. Select the SLA Tier you want to tag your cluster with. Non-production clusters may receive lower priority support and reduced SLAs. The production tier is not available when using Developer class nodes. You can find more information here.

- Under the Applications section, select OpenSearch.
- Under the Provider Selection section, choose your desired infrastructure to provide to provision the cluster into.

- Under the Enterprise Features section, choose any add-on features you want to add to the cluster.

- Click Next to go to the next page.
- In the Cluster Setup section, choose the version of the OpenSearch bundle you want to use with any additional Master (Prior to OpenSearch 2.0.0 Cluster Manager nodes were called Master nodes) or OpenSearch Dashboards nodes. You can also add the detected IP address to the firewall rules but make sure you check it’s correct.
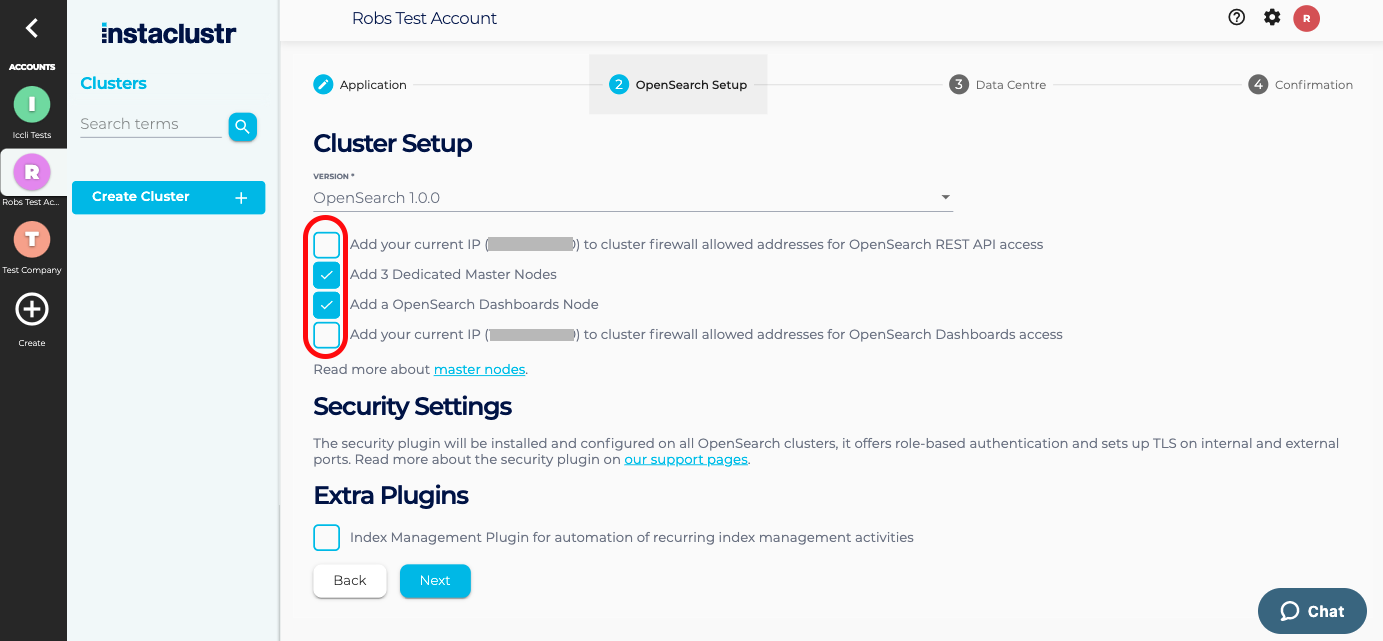
- Choose extra plugin if desired and click Next to go to the next page

- In the Data Centre Options section, select your Infrastructure Provider, Region, Custom Name, Data Centre Network address block, Node Size, and a number of nodes. If you choose AWS as your provider you will also need to select your EBS Encryption preference. Refer to our support article on Network Address Allocation to understand how we divide up the specified network range to determine the node IP addresses.
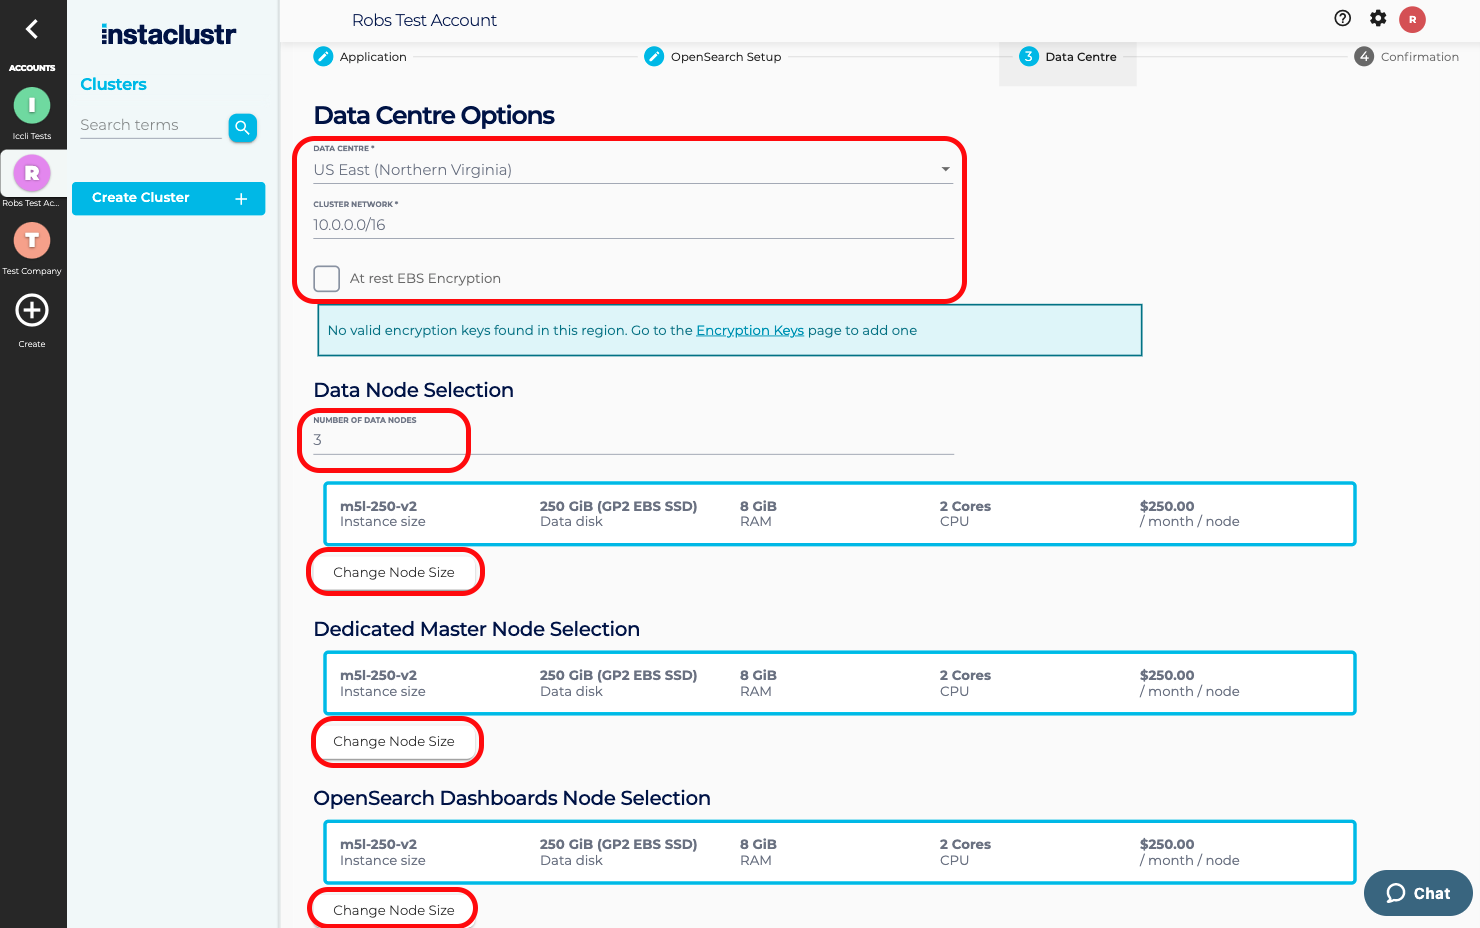
- Click Next to go to the next page
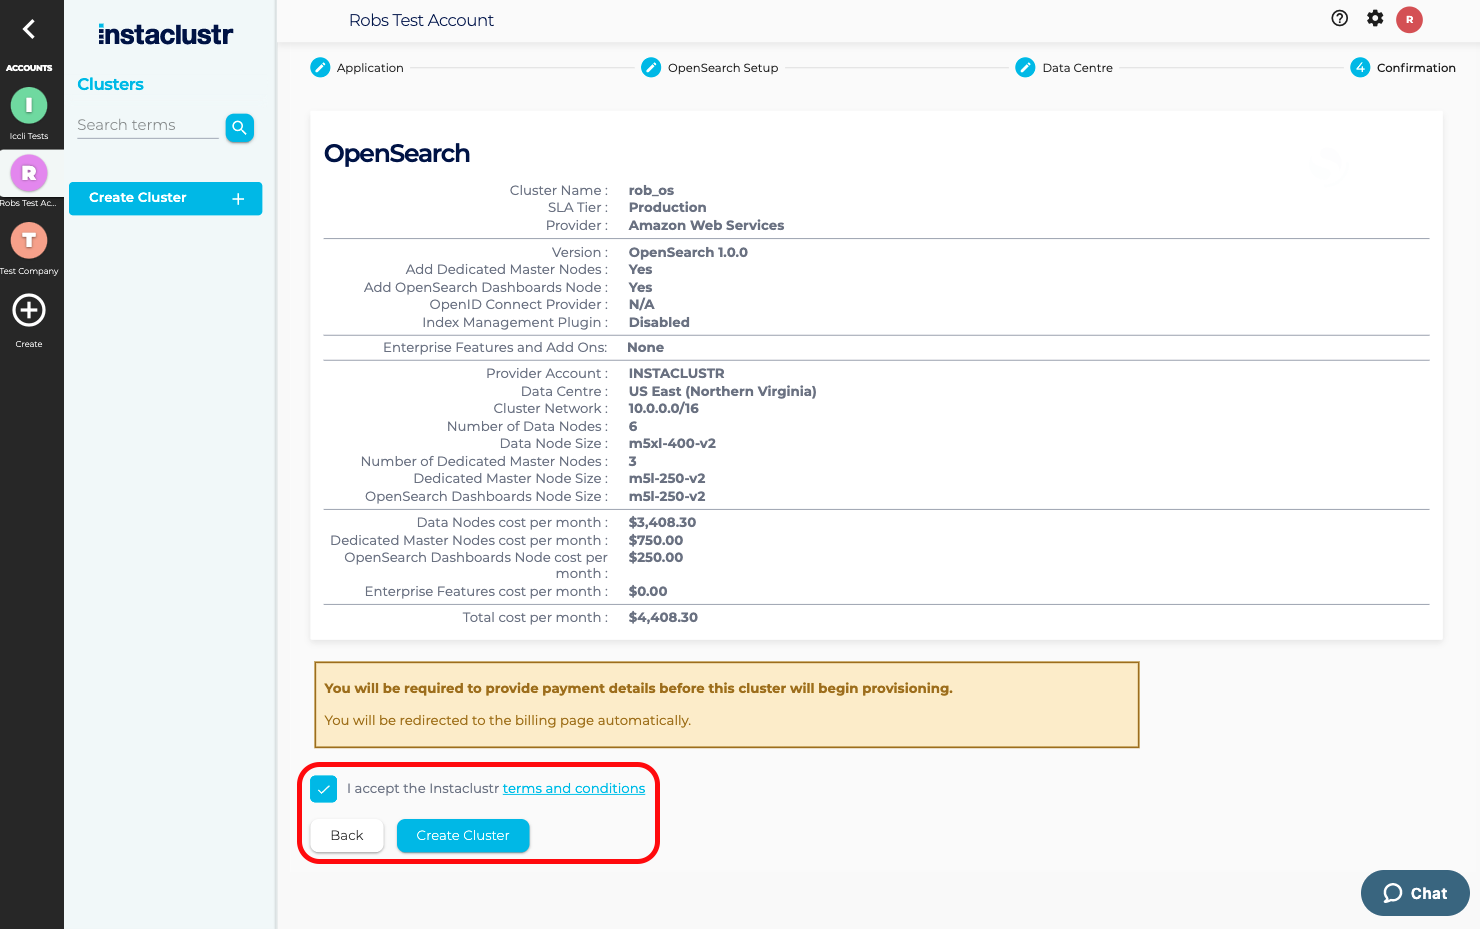
- Review your choice of cluster provisioning and accept the terms and conditions. You can now submit the request by clicking the Create Cluster button.
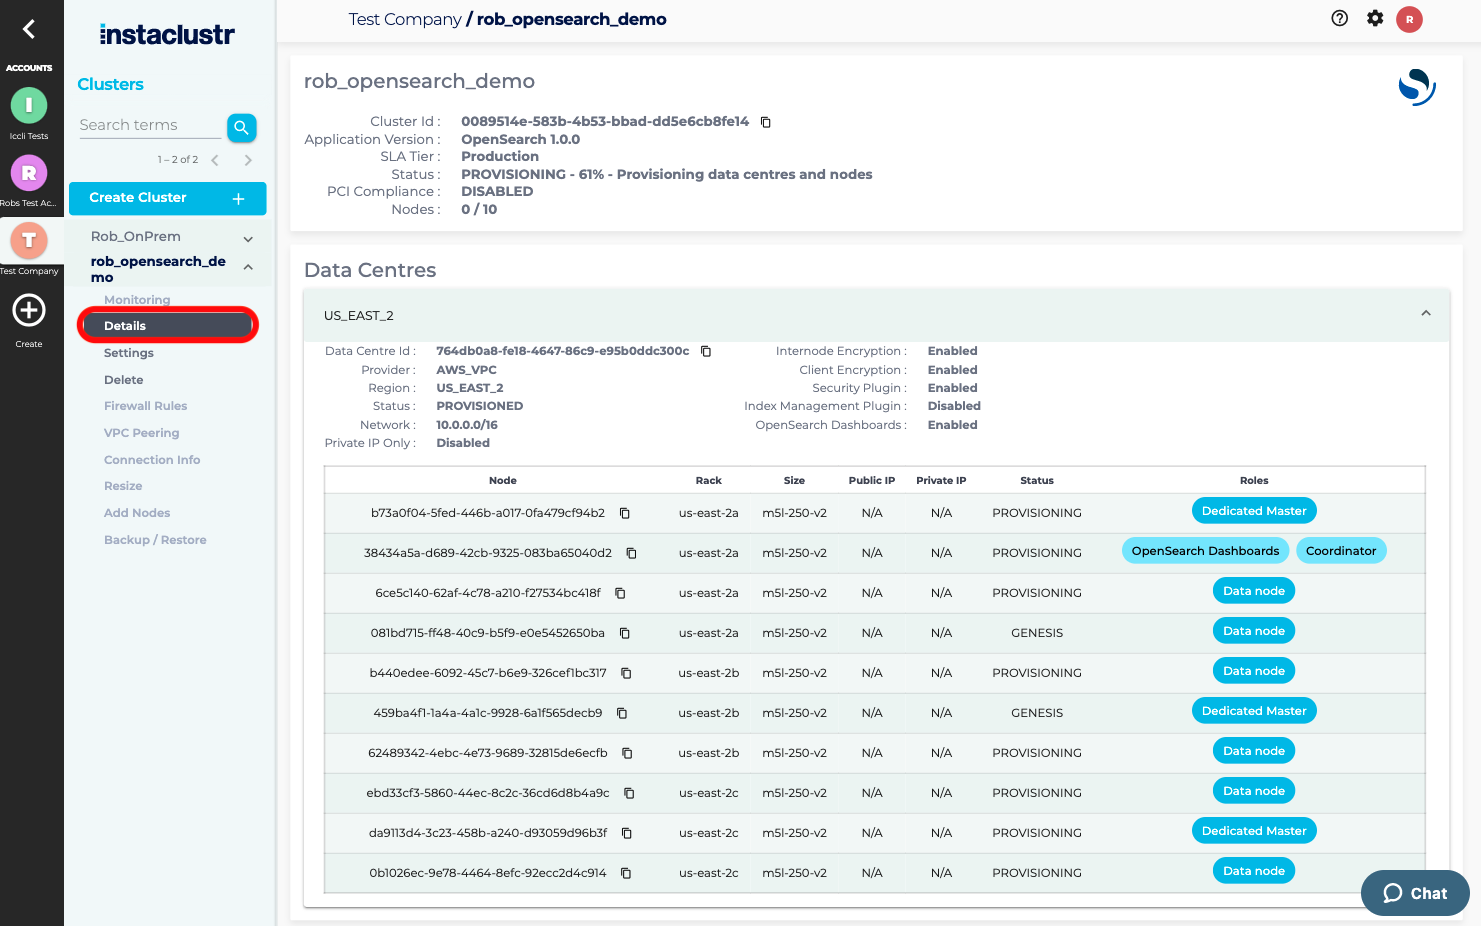
- Provisioning a cluster can take some time depending on the responsiveness of the underlying cloud provider. All status messages will be displayed along with the progress of the cluster creation on the Clusters’ page.

- You have now finished creating your OpenSearch cluster, congratulations! All your clusters will be listed on the left-hand-side status bar. You can view details of your cluster by clicking the Cluster Details button.
- We recommend reviewing the following support articles as a next step:
Contact Instaclustr Support if there is any issue in provisioning your cluster.