Auth0 example configuration
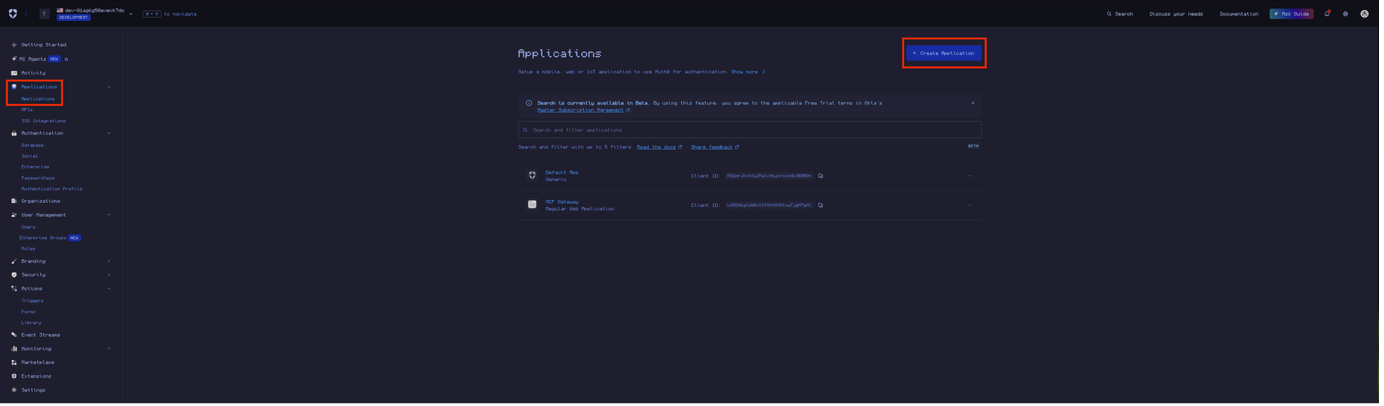
Go to the applications section and create a new application in your tenant.
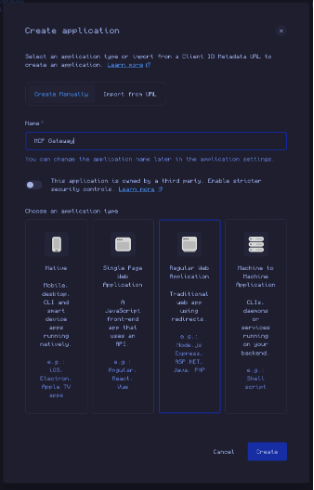
Give it a name and select Regular Web Application as the type
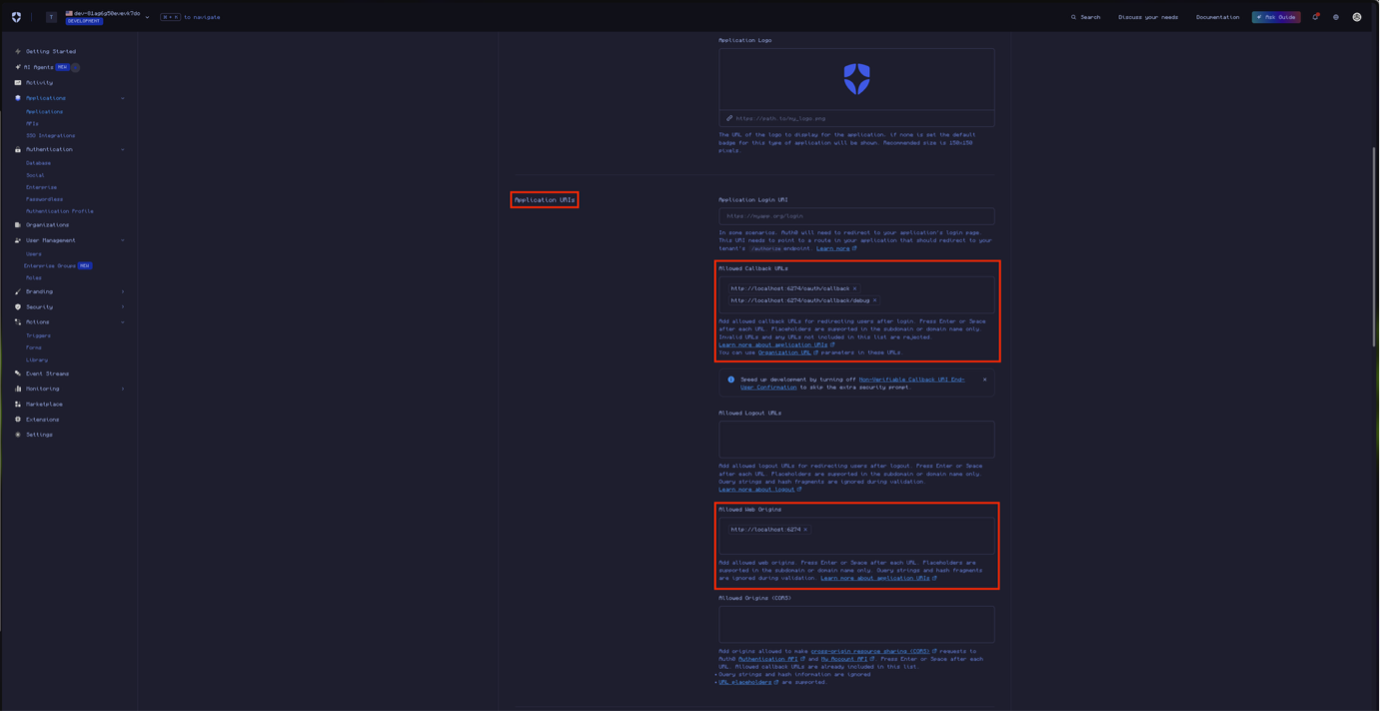
Go to your application and scroll down to the Application URIs section. Specify your application’s callback URI in Allowed Callback URIs (i.e. http://your.app.com/oauth/callback). Add your application’s base URI into Allowed Web Origins (i.e. http://your.app.com), save the changes.
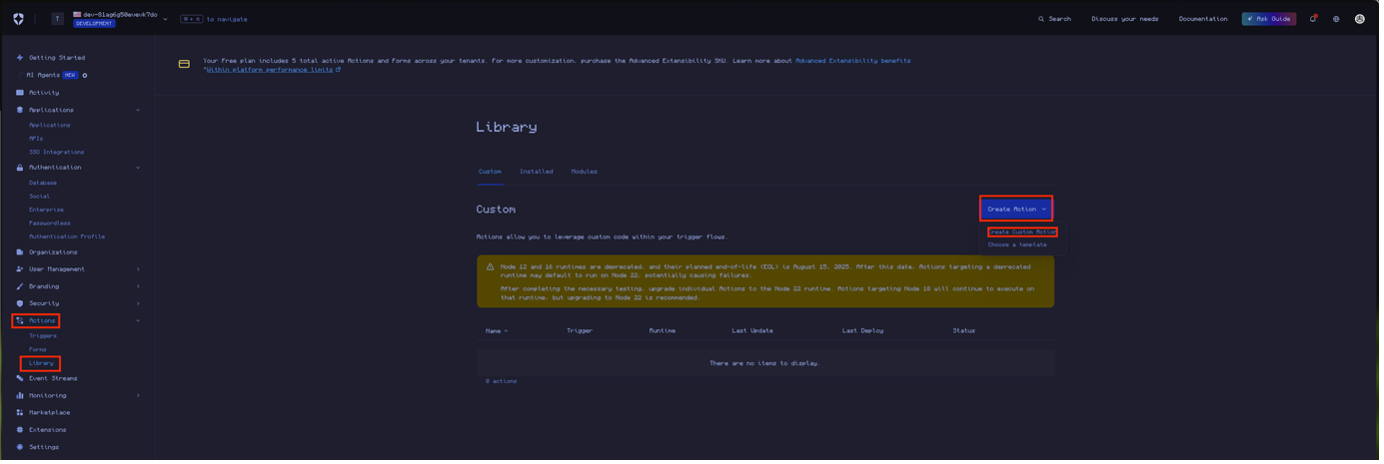
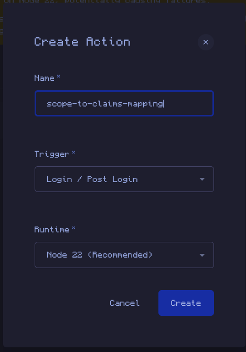
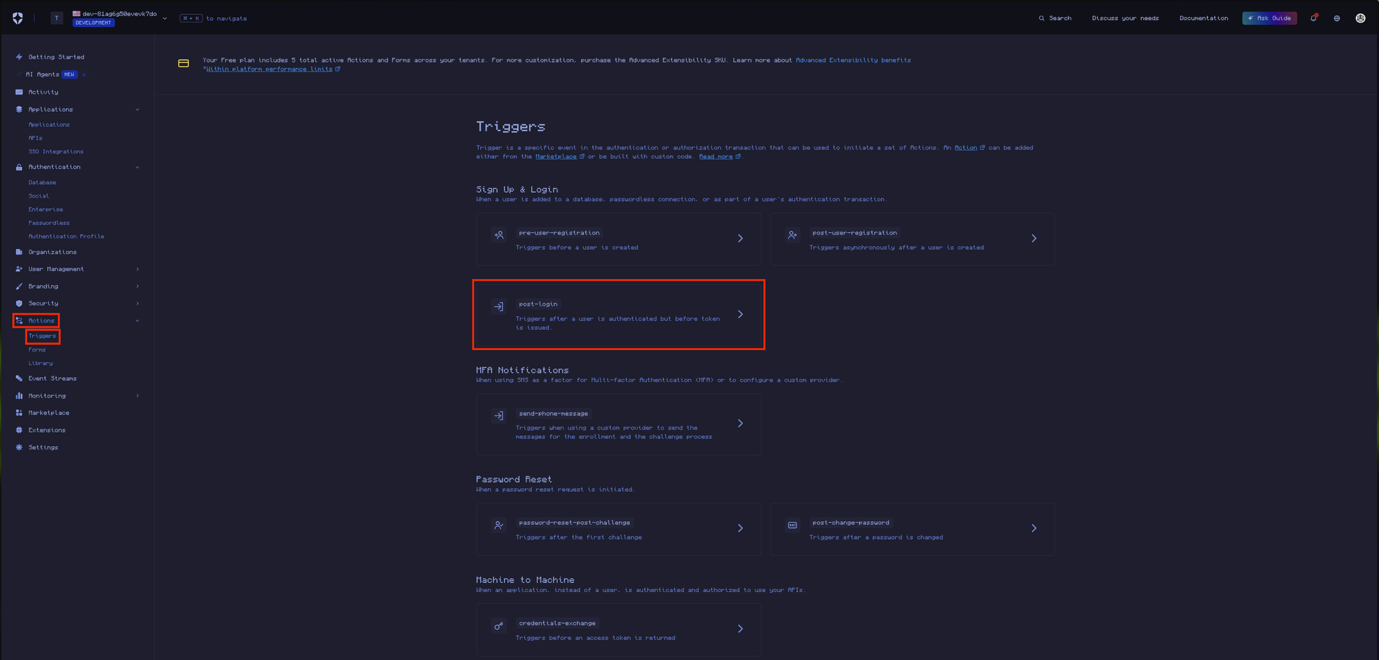
Authorization of IdP users to specific MCP Virtual Servers and tools requires the use of JWT claims issued by requested scopes that map to personas on the MCP Gateway. Here we will create a scope that supplies the user’s groups via a custom claim when requested. Go to Actions > Library > Create Action > Create Custom Action.
Specify a name and Node runtime of your choosing a select Login / Post Login as the trigger.
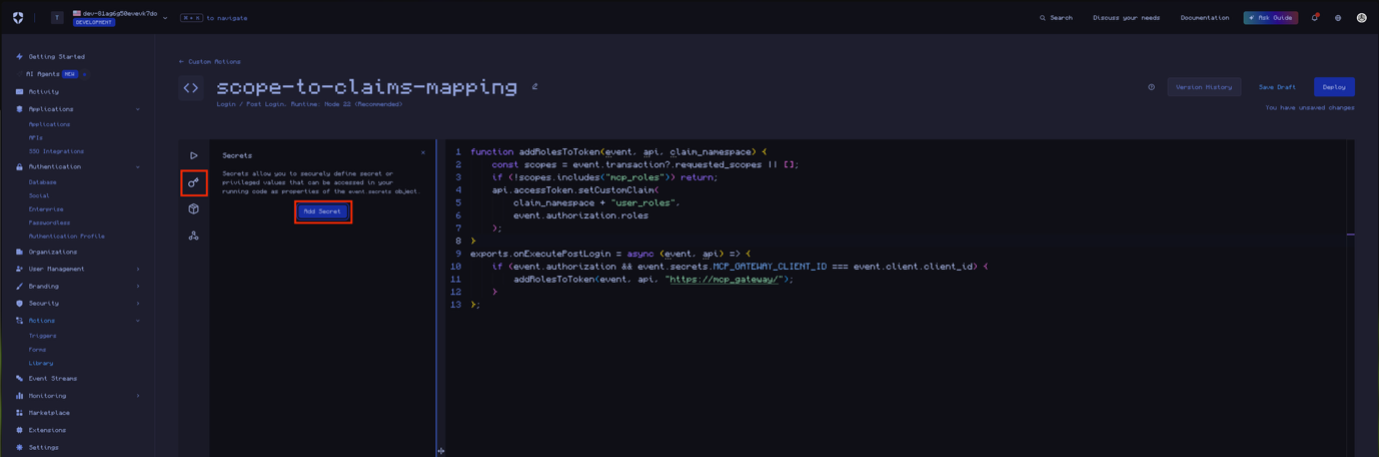
Replace the template code with the following snippet. Replace mcp_roles with your desired scope name and replace user_roles with your desired claim name. The scope and claim will be used later when creating a virtual server with OAuth2 authentication and authorization.
Note that if your client is using the default Auth0 Management API, then you are required to prefix claims with a namespace of the format https://<name> (https://auth0.com/docs/troubleshoot/product-lifecycle/past-migrations/custom-claims-migration#restricted-token-audience). Here the example uses https://mcp_gateway as the prefix, change this as you see fit. If you are using a custom API, this restriction does not apply, and you can drop the prefix. It is suggested to use one regardless though.
|
1 2 3 4 5 6 7 8 9 10 11 12 13 14 |
function addRolesToToken(event, api, claim_namespace) { const scopes = event.transaction?.requested_scopes || []; if (!scopes.includes("mcp_roles")) return; api.accessToken.setCustomClaim( claim_namespace + "user_roles", event.authorization.roles ); } exports.onExecutePostLogin = async (event, api) => { if (event.authorization && event.secrets.MCP_GATEWAY_CLIENT_ID === event.client.client_id) { addRolesToToken(event, api, "https://mcp_gateway/"); } }; |
In the right-hand side bar, go to Secrets and add a new secret.
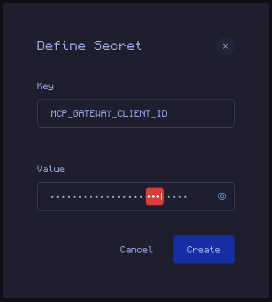
Name the secret MCP_GATEWAY_CLIENT_ID and fill the value with the client id for the client you are using for the MCP Gateway cluster. This is used to determine which client is being authorized to, allowing you to have different scopes for different clients.
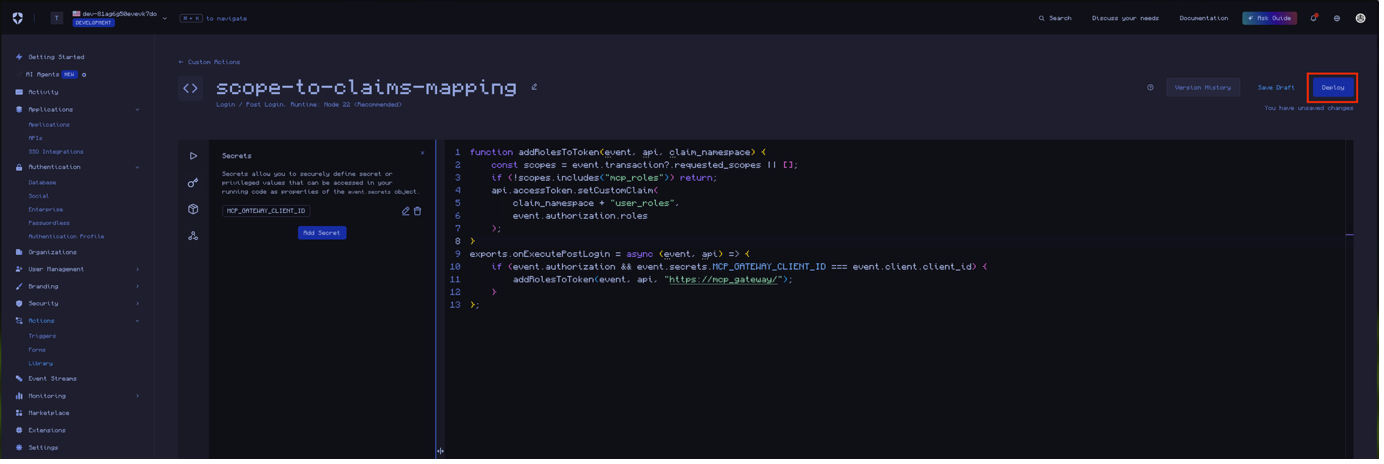
Save the action by clicking deploy.
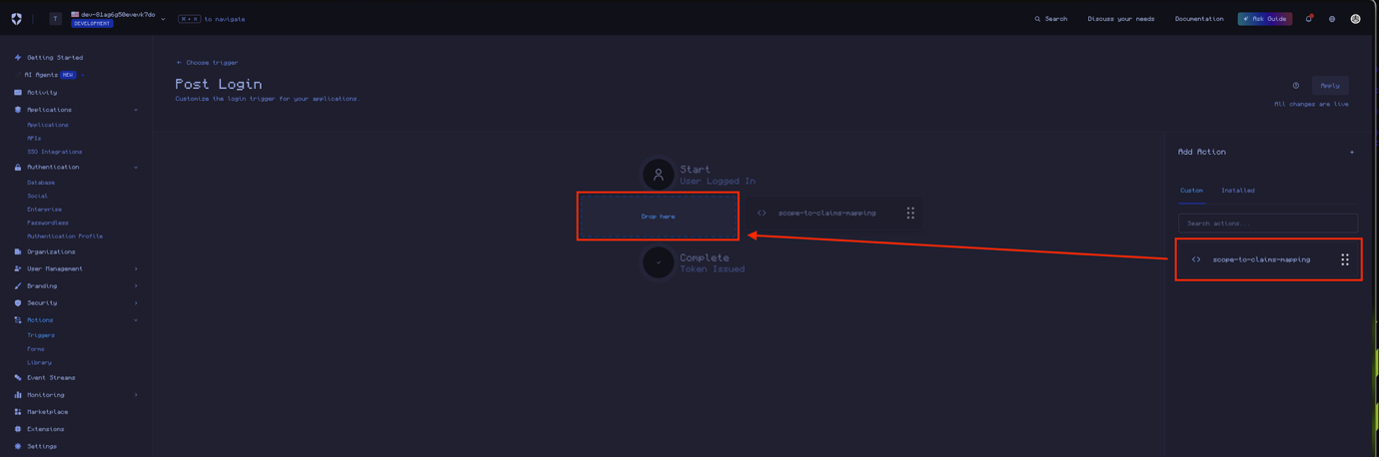
Now go to Actions > Triggers > post-login, where we will apply our action.
Drag your action from the right-hand side in-between the Start and Complete nodes on the graph.
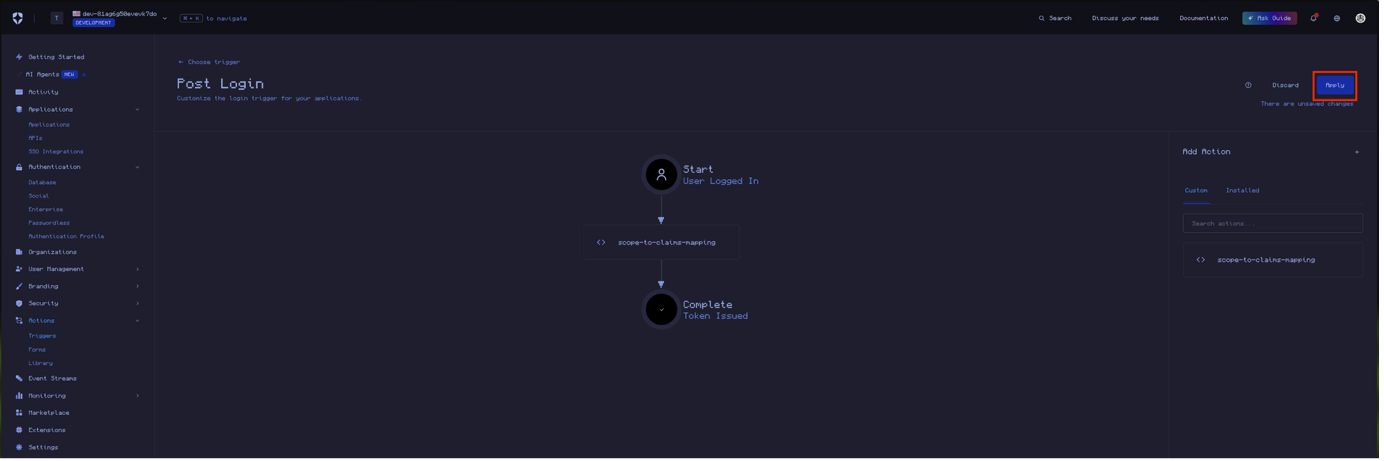
Apply the changes.
Go to Applications > Your Application > API Access, then copy/take note of the API audience URI for the API managing user access. By default, this will be the built-in Auth0 Management API, if you are using a custom API then chose that instead. This URI is the audience value that must be supplied when creating the MCP Virtual Server later.

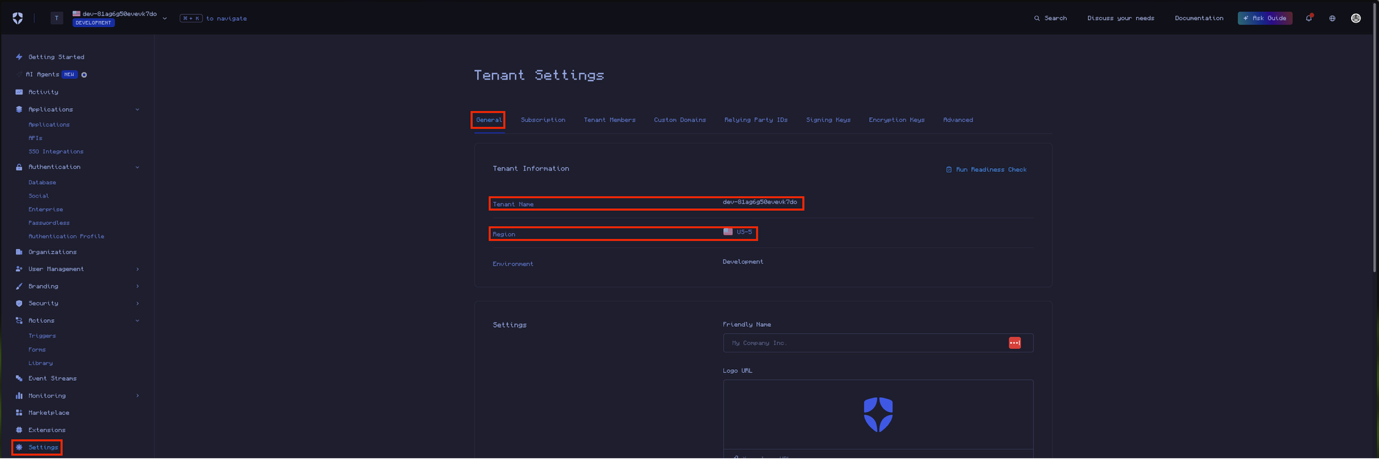
If you are using a custom domain for your tenant, the issuer used later will be that domain (i.e. https://example.com/) and the JWKS URI is the same domain suffixed with .well-known/jwks.json (i.e. https://example.com/.well-known/jwks.json). If you are not using a custom domain, then go to Settings > General for your tenant and copy the tenant ID and region prefix (ignore the integer suffix, i.e. US-5 is just us). This is used to form the issuer as https://<TENANT ID>.<REGION>.auth0.com/ and subsequently the JWKS URI is https://<TENANT ID>.<REGION>.auth0.com/.well-known/jwks.json.
In the MCP Gateway Virtual Server configuration user the issuer and JWKS URI you copied before, the audience value should be the one you got from the client API access, put the name of the scope in the Scopes Supported section and specify the resulting claim name for the scope in the Roles Claim Name section.
We recommend reviewing the following support articles as a next step: