Okta example configuration
Go to the applications section and create a new application in your tenant.

Make sure to specify the Sign-In Method as OIDC and the Type as Web Application.
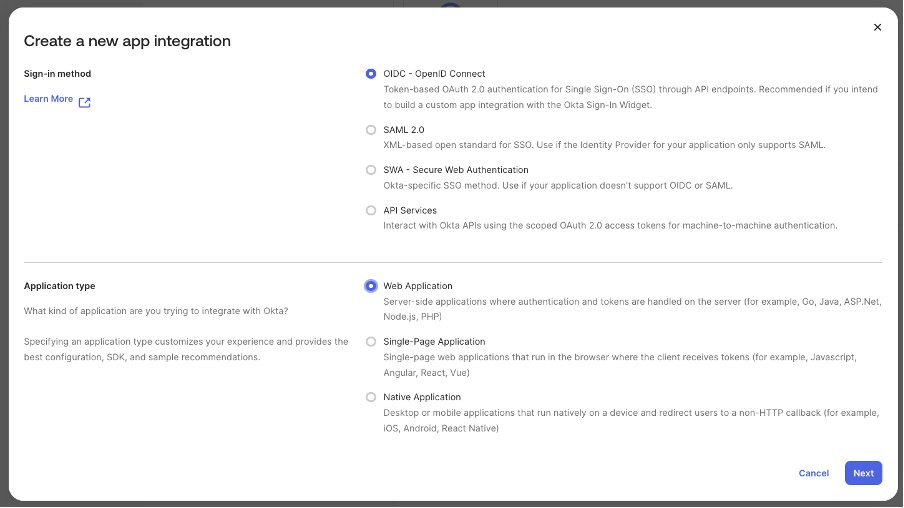
Click next, ensure the Grant Type is Client Credentials, add your redirect URLs and the base URL of your application.

Finalise the application creation. Now head to Security > API to manage the authorization server for scopes and claims.
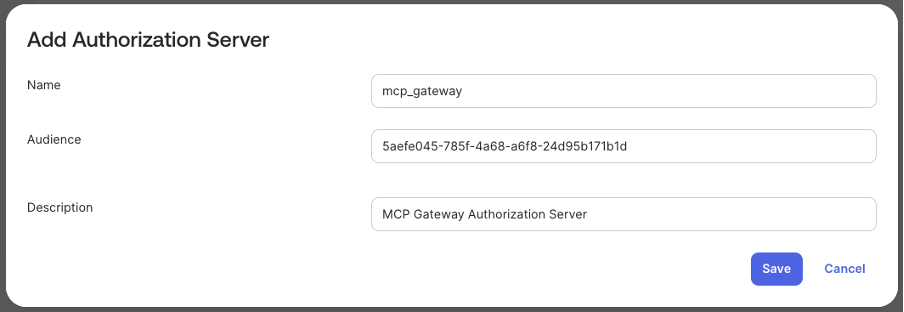
If you already have an authorization server you wish to use, skip this step. Otherwise, create a new server. We recommend using the MCP Gateway cluster ID as the audience, whichever value you choose to use, this will be used later during the creation of an MCP Virtual Server on the gateway.
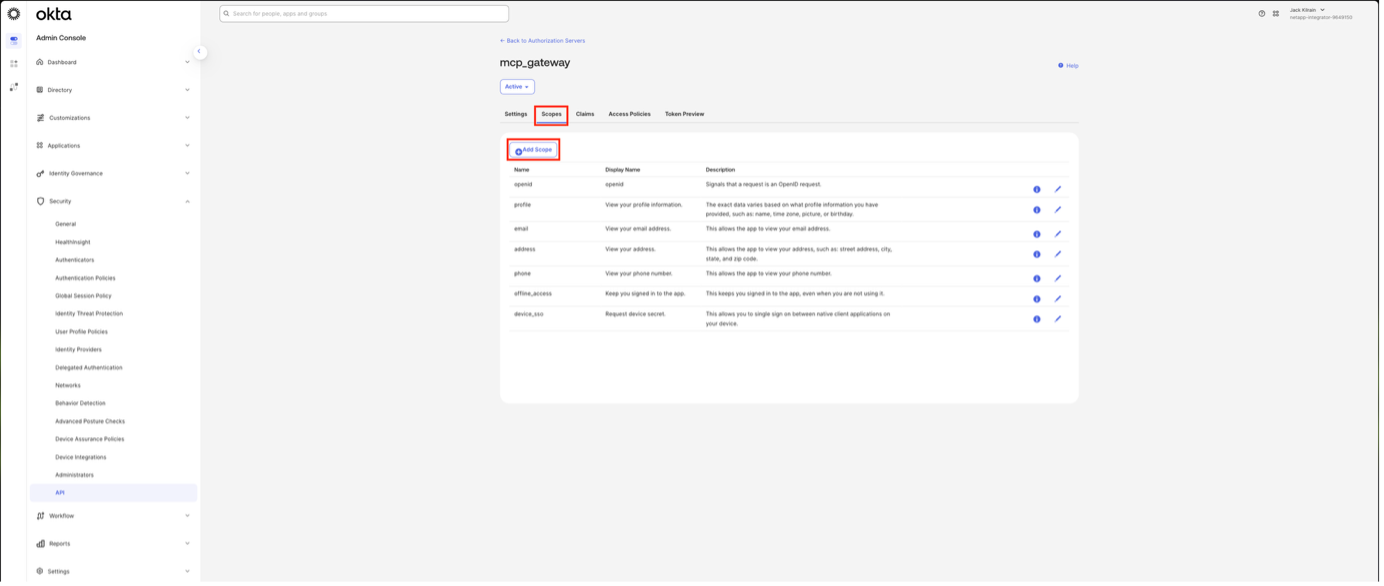
Go to your authorization server and then to the Scopes section.
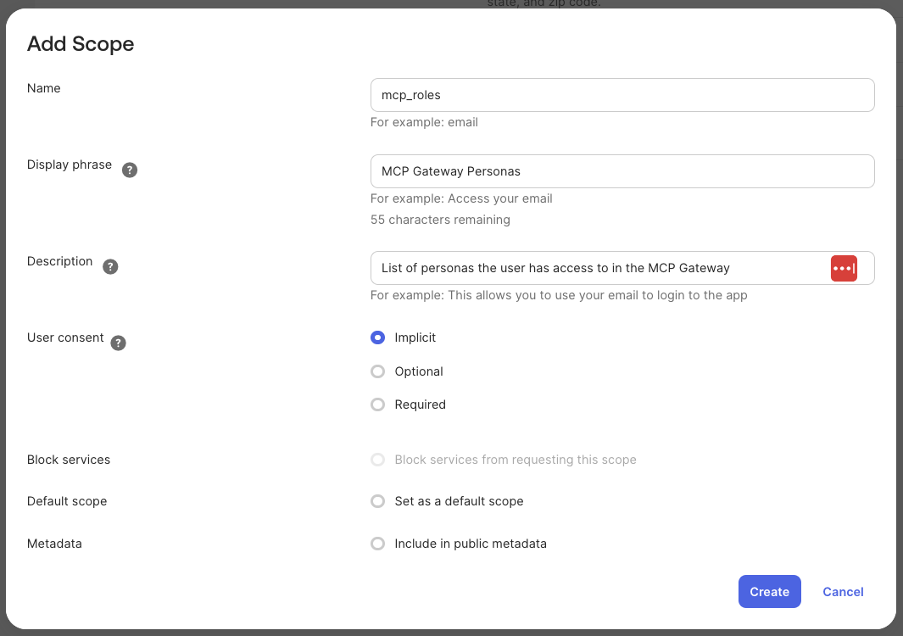
Create a new scope, or skip this if you are re-using an existing one. The name of the scope will be what you need to specify later when creating an MCP Virtual Server, so keep note of this. Replace mcp_roles with your desired scope name.
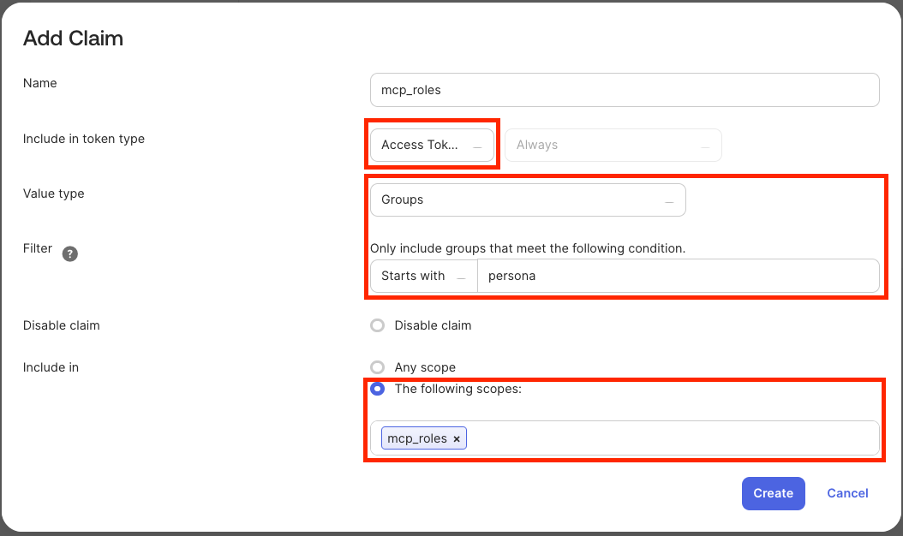
Finish creating the scope, then head to the Claims section and create a claim mapping.

Specify a name for the claim, changing mcp_roles to whatever you desire, which will be the JWT claim field returned when requesting your previously created scope. Keep track of this for later when creating the MCP Virtual Server. Make sure the claim is included on Access Tokens and the scopes it is included in contains your scope name. The value of this claim needs to be a list of personas, in this example all groups the user belongs to that start with “persona” are included in the list. You can customise where these are stored and how they are retrieved in other ways using the Expression value type if you desire.
Finish creating your claim, then head to the Settings section of the authorization server. Here you will find the Metadata URL.
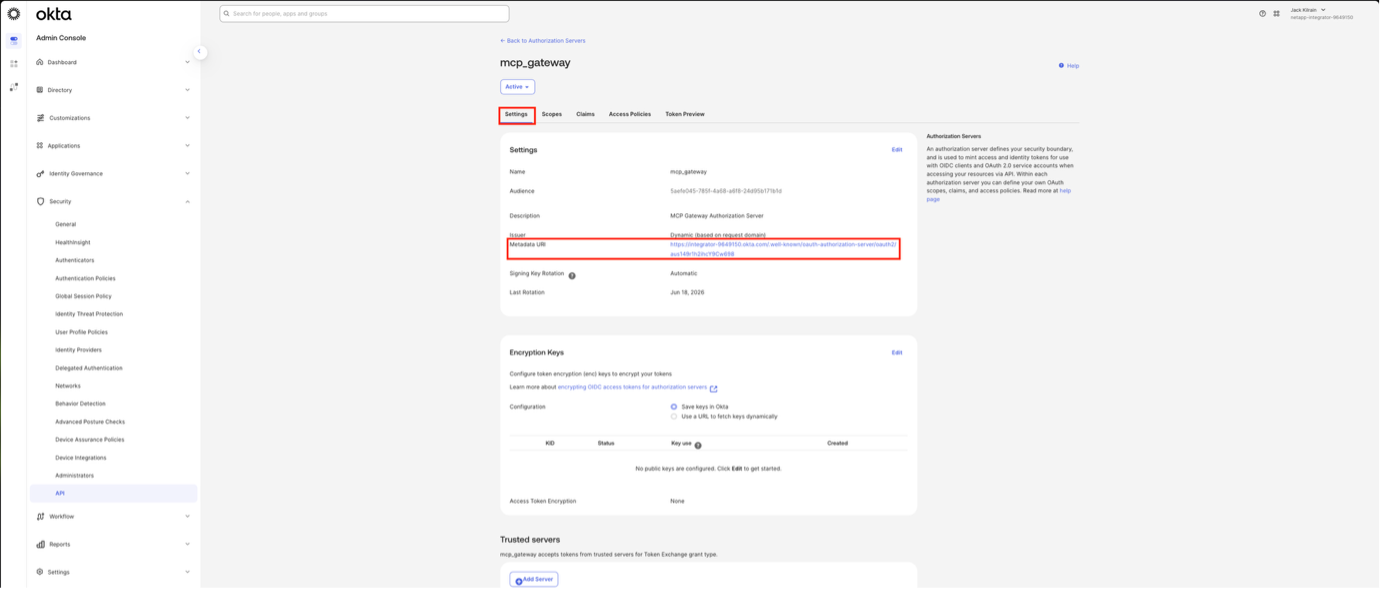
Open this URL and take note of the issuer and jwks_uri values for later when creating the MCP Virtual Server.

In the MCP Gateway Virtual Server configuration user the issuer and JWKS URI you copied before, the audience value should be the one you chose when creating the authorisation server, put the name of the scope in the Scopes Supported section and specify the resulting claim name for the scope in the Roles Claim Name section.
We recommend reviewing the following support articles as a next step: