Entra ID example configuration
Go to Azure’s Entra ID Administration Centre > App Registrations.
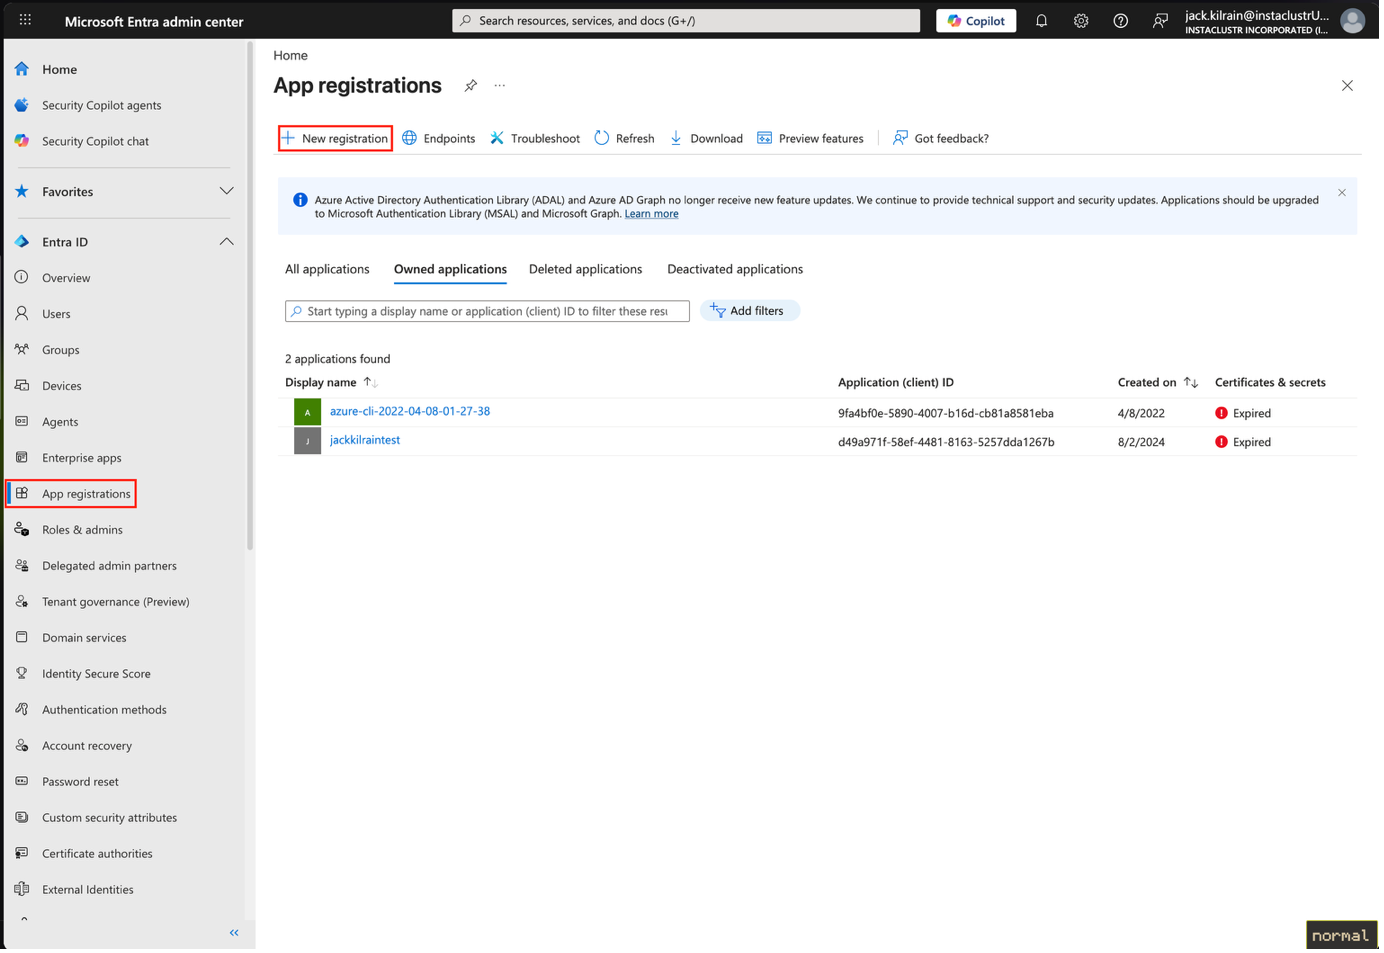
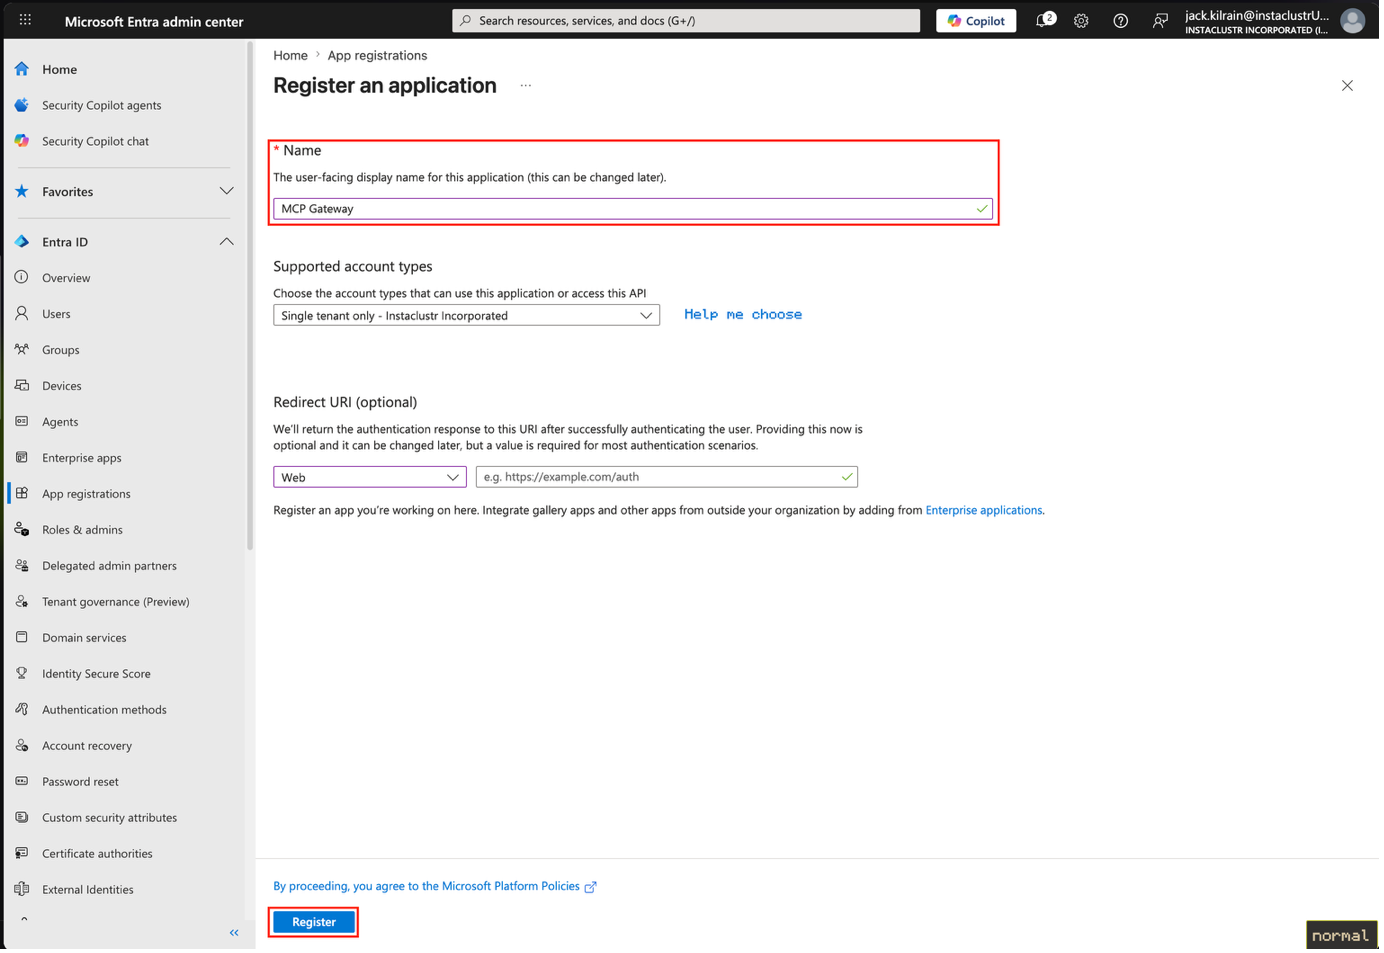
Create a new registration ignoring redirect URI for now.
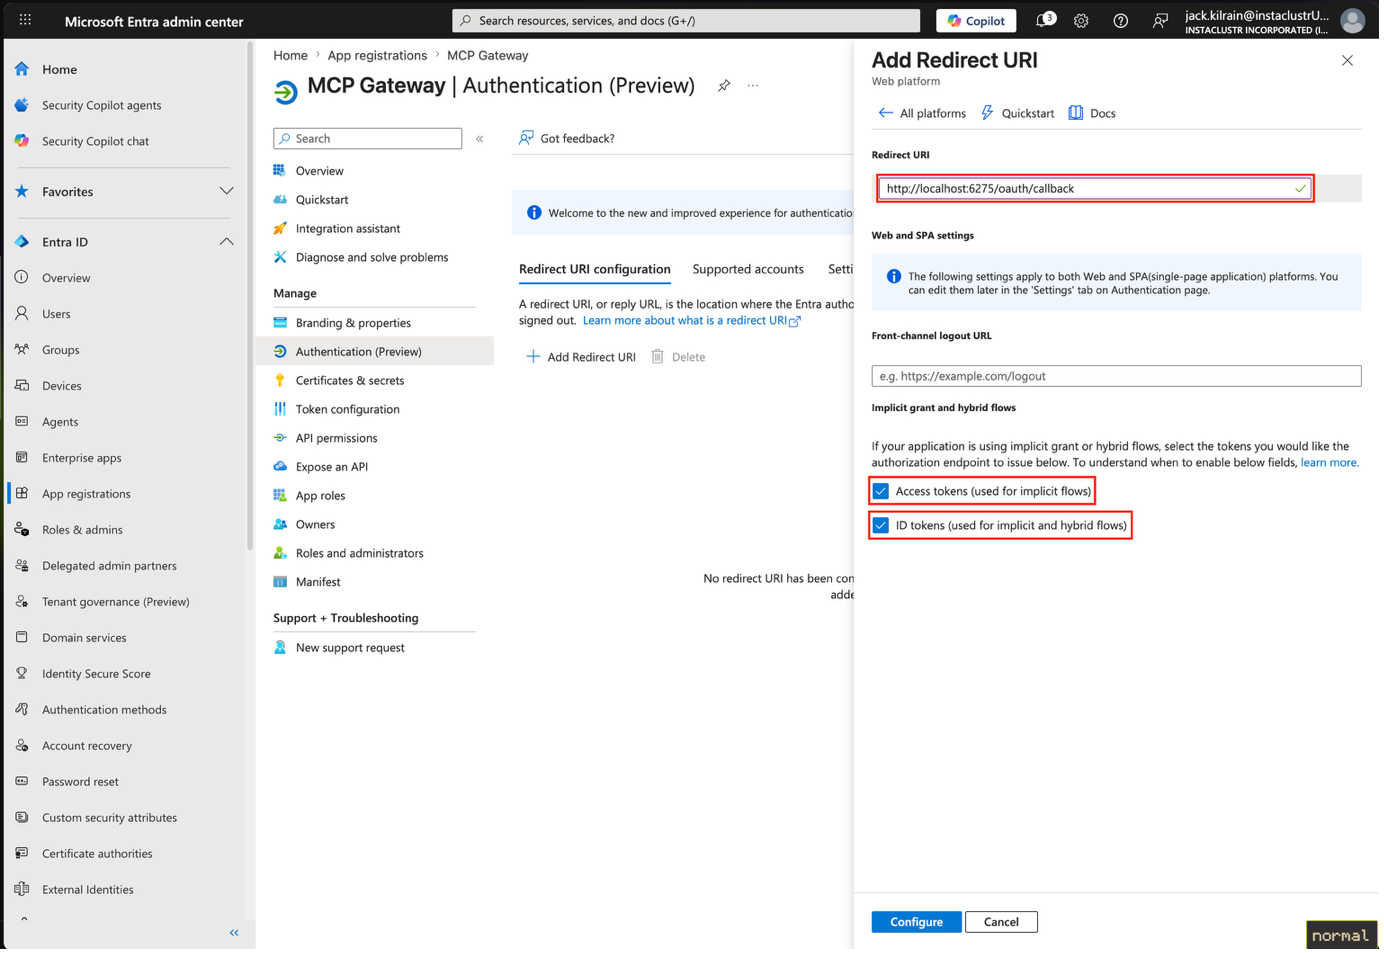
Go to Authentication, then to Redirect URI Configuration, and add a new client redirect.
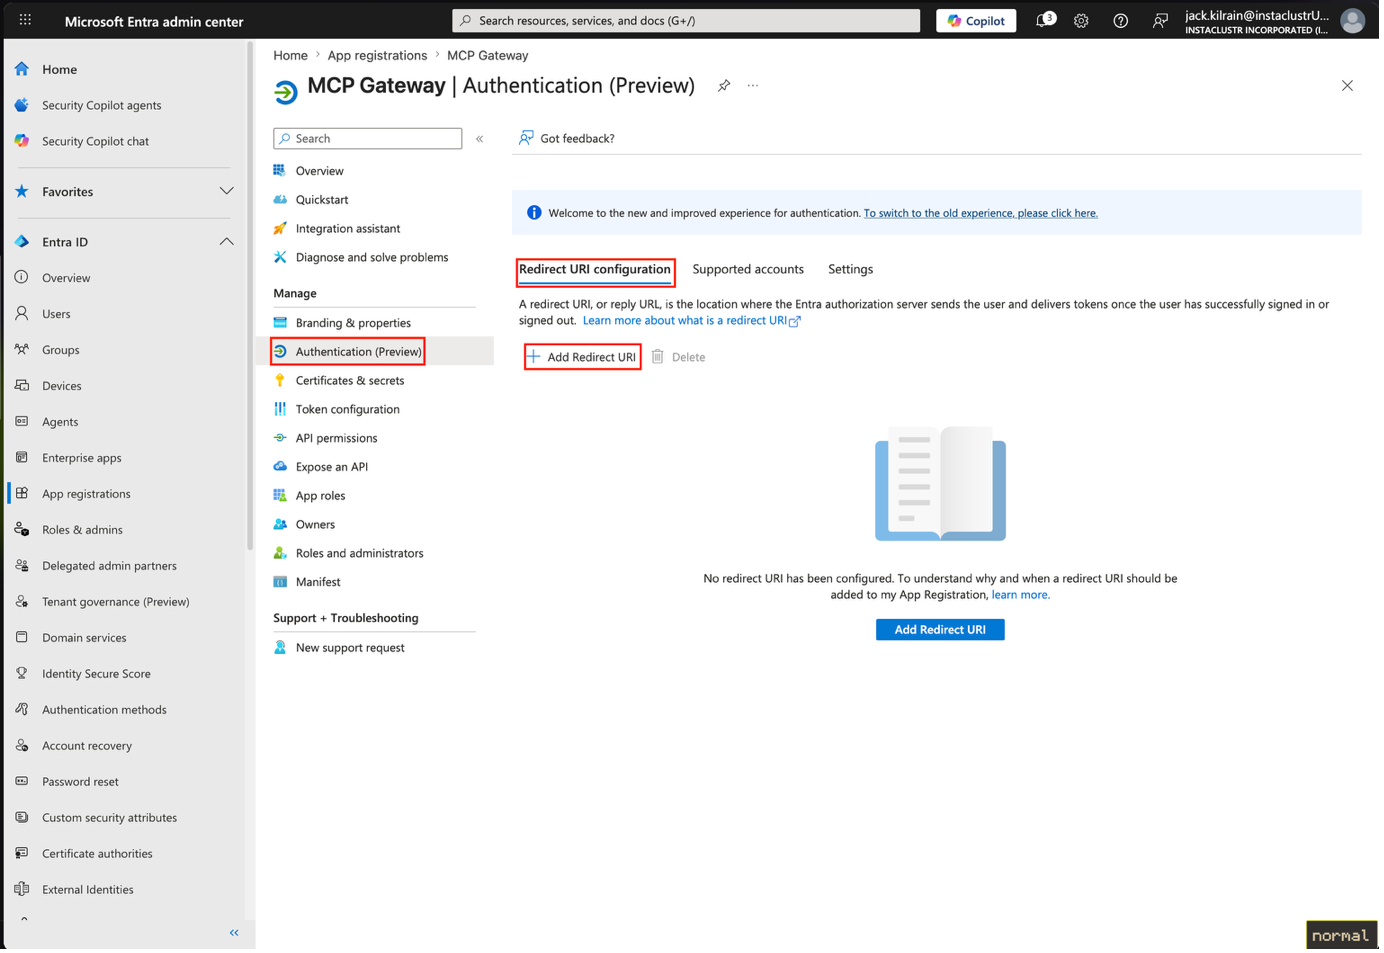
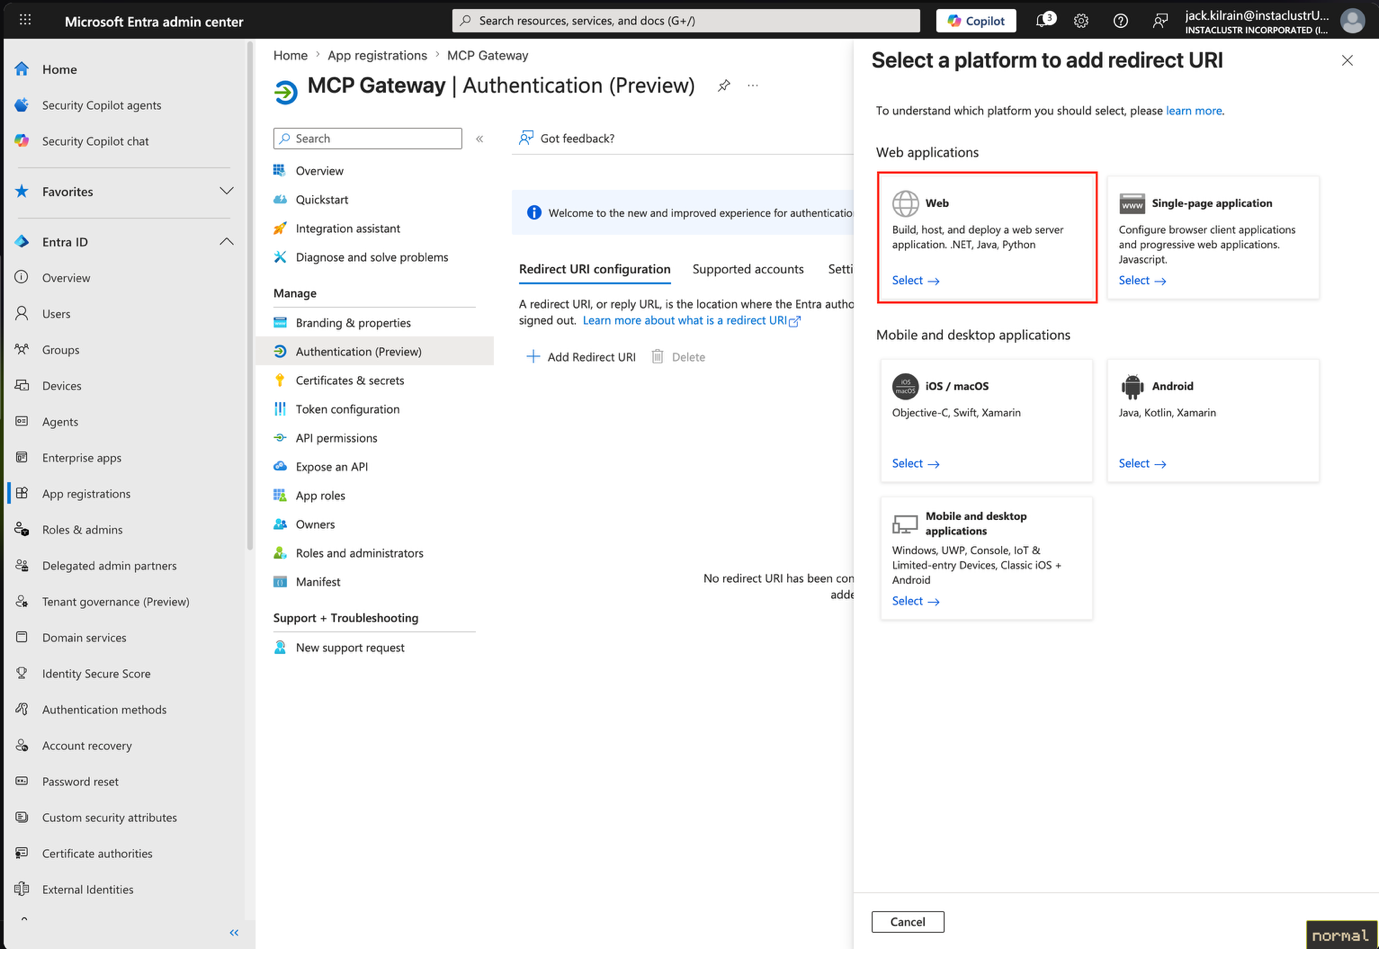
Choose the Web type.
Next specify your redirect URI, enable Access Tokens and ID Tokens, then create it.
Next, head to Expose an API and add a scope.
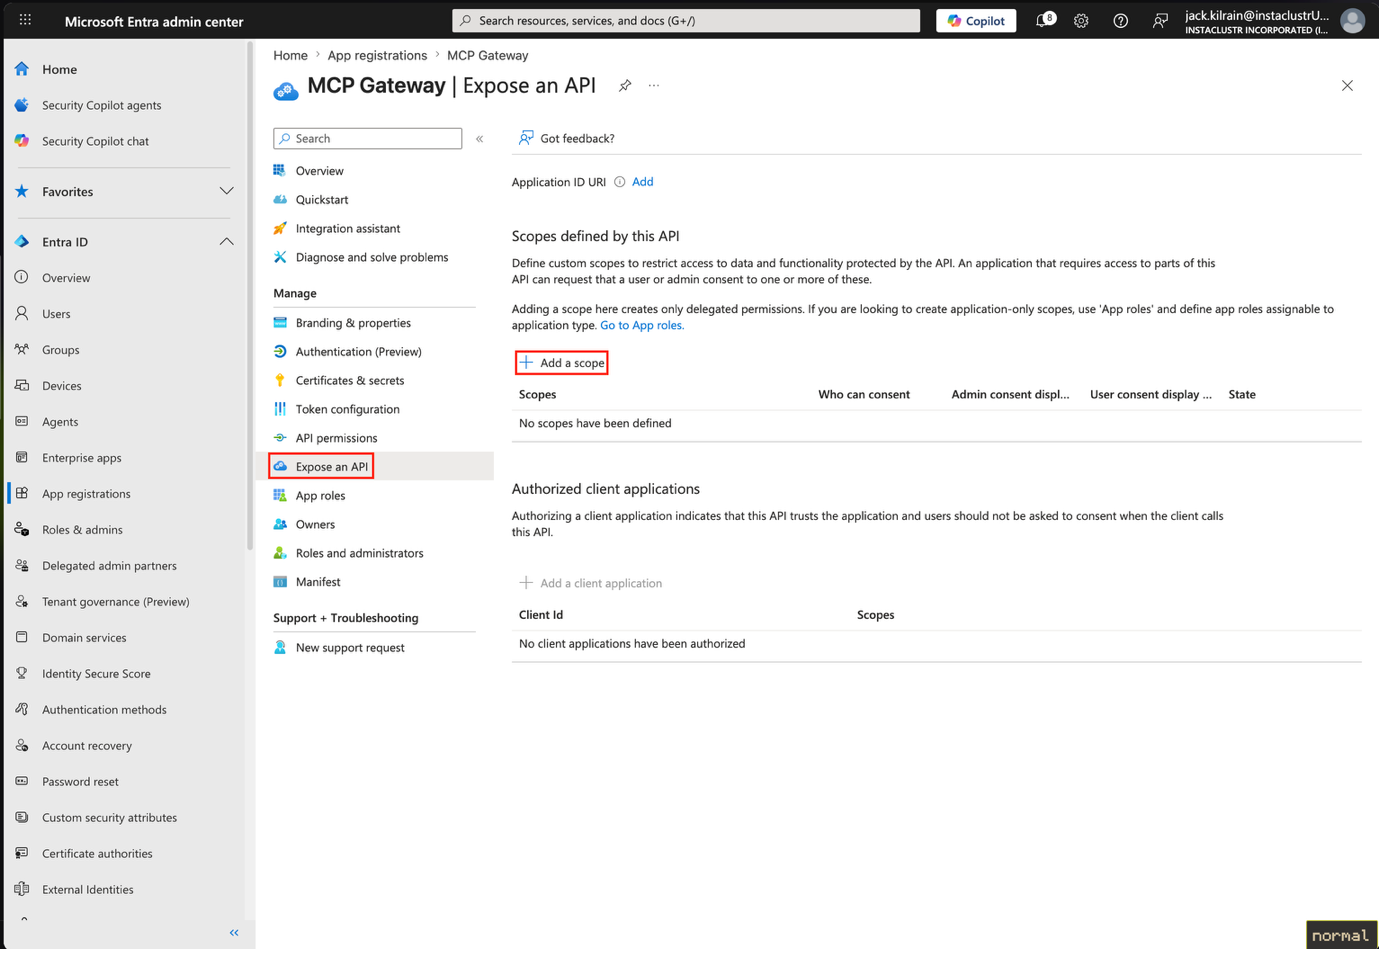
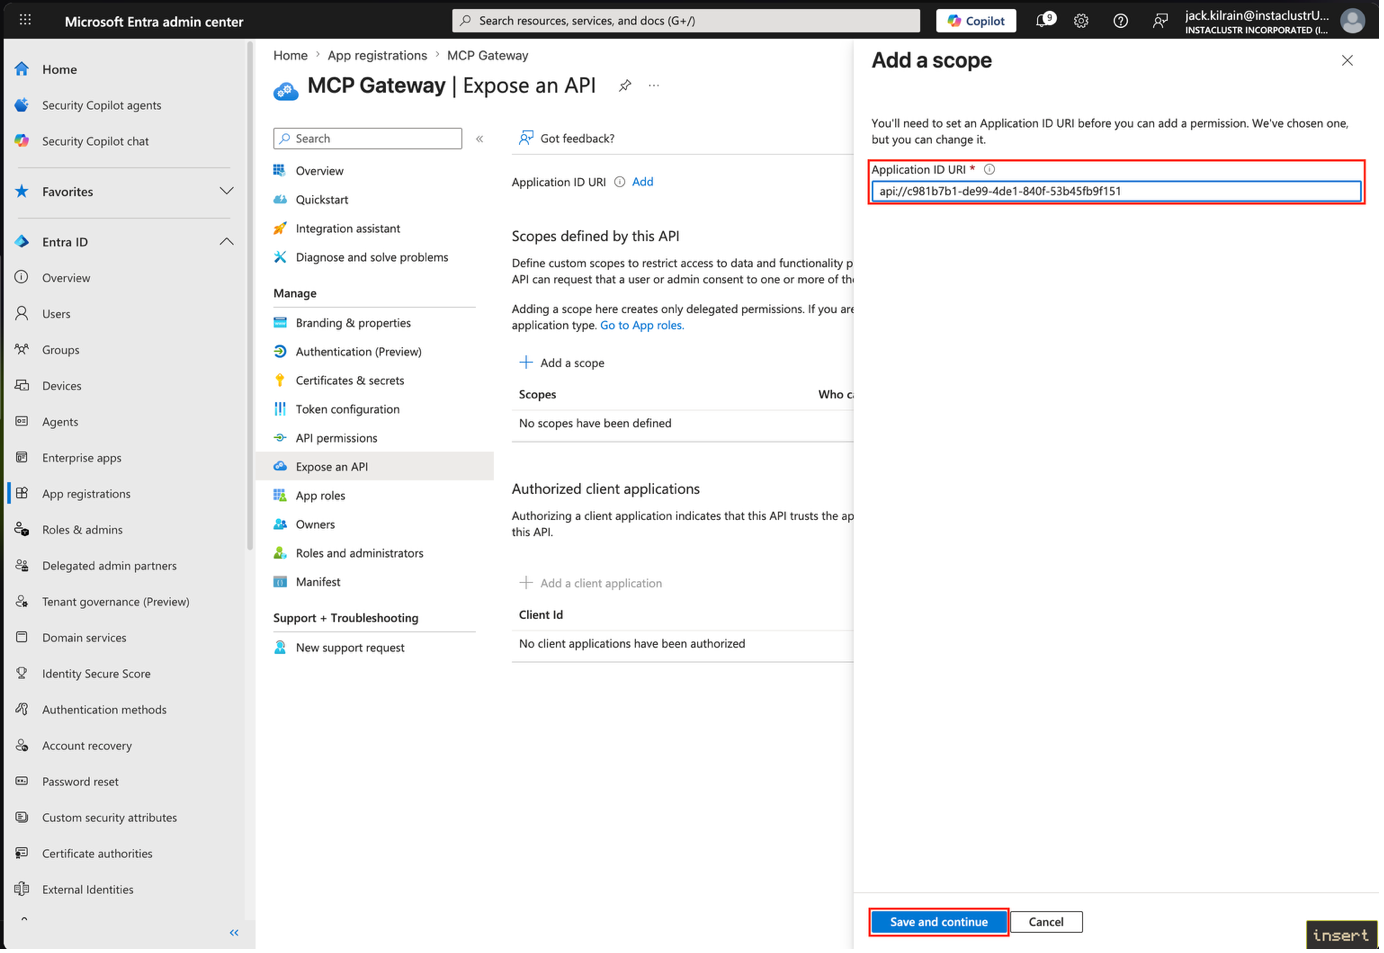
Choose an application URI, which will be the prefix for all scopes. This must be of the format api://<name>. There may be additional restrictions on this imposed by your tenant and/or organization.
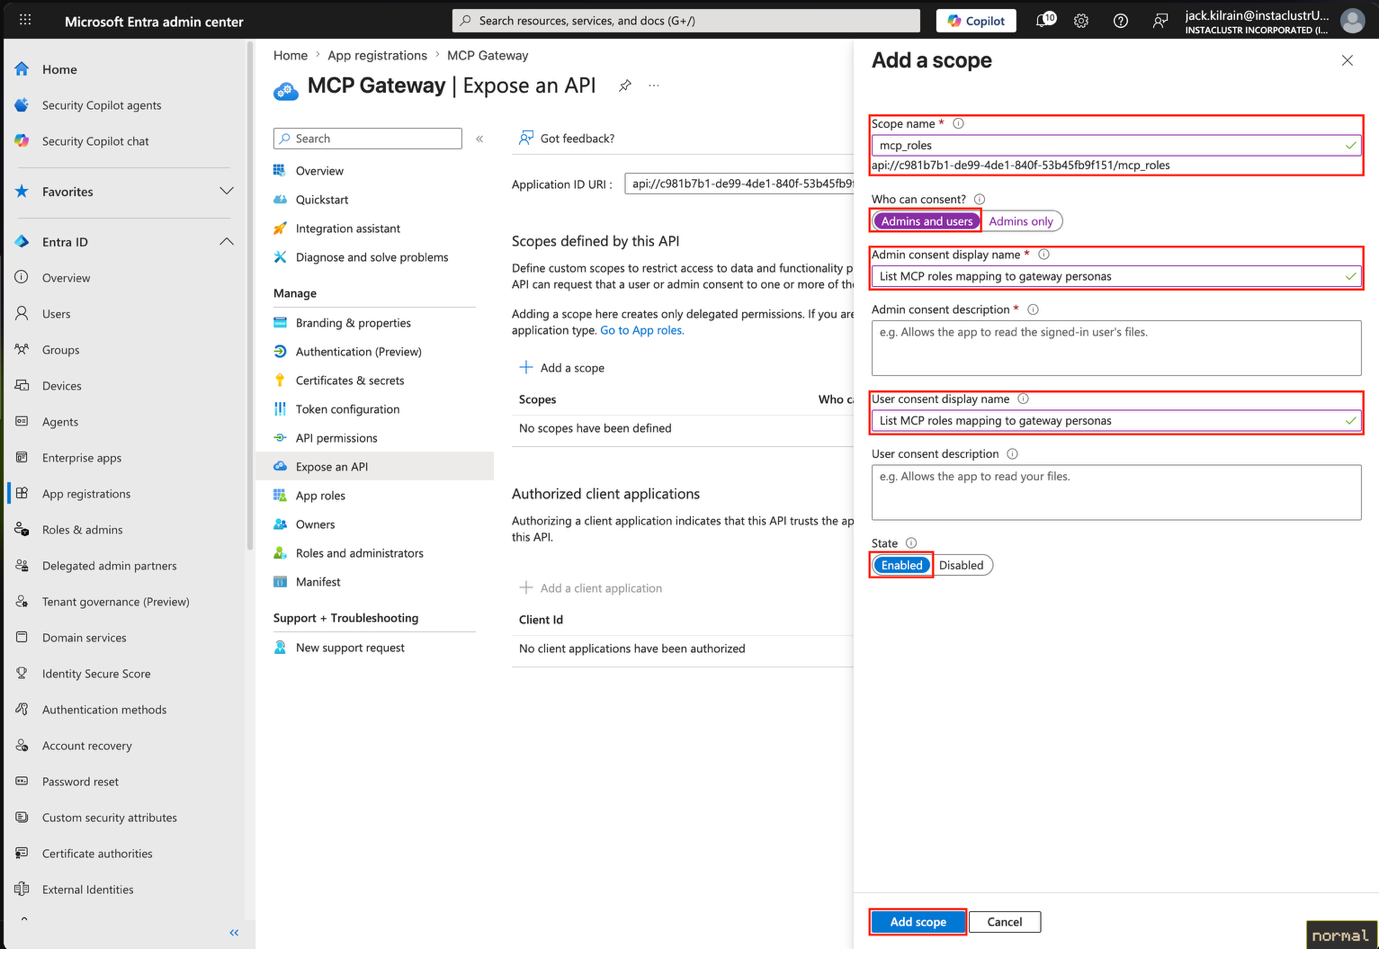
Create a scope, replacing mcp_roles with whatever you desire as the scope name, ensure both admins and users can consent, then enable it and finish creating.
Go to API Permissions
Add permissions for Microsoft APIs > Microsoft Graph > Delegated Permissions, selecting openid.
Add permissions for My APIs > This App Registration > Delegated Permissions, selecting your scope you just created, i.e. mcp_roles.
In the Overview section, take note of the Application (client) id.
Head to the Endpoints section on your application and open the OpenID Connect metadata document.
Take note of the issuer and jwks_uri values.
In the MCP Gateway Virtual Server configuration user the issuer and JWKS URI you copied before, the audience value should be the one you chose when creating the authorisation server, put the name of the scope (Microsoft requires you to format it like so api://<CLIENT ID>/<SCOPE NAME>) in the Scopes Supported section and specify the claim name in the Roles Claim Name section.
We recommend reviewing the following support articles as a next step: