Creating a PrivateLink Redis Cluster
Overview
This article describes how to provision a Redis cluster with PrivateLink using the Instaclustr Console. PrivateLink is a networking feature provided by Amazon Web Services (AWS) that provides direct and secure connectivity between AWS VPCs. Refer to our support documentation page on PrivateLink to learn more about the details of the feature, and our support for it.
Limitations
In addition to the general limitations referred to in the PrivateLink documentation page, please note:
- The Enterprise Feature called Private Network Cluster is a prerequisite to PrivateLink, and enabling PrivateLink will automatically enable Private Network Cluster.
- Multiple Data Centres and Redis mirroring are not supported for Redis PrivateLink clusters.
- PrivateLink Clusters are restricted to non-developer node sizes
- PrivateLink Redis clusters are restricted to Redis 7 and above.
- A managed Instaclustr for Redis cluster on the Instaclustr platform with PrivateLink enabled is limited to 48 nodes . This limitation comes from the AWS limitation of only allowing 50 listeners per Network Load Balancer.
Creating a Cluster
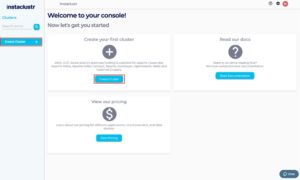
Log into the console and click the Create Cluster button.
Under the Applications page, select Redis as the application and AWS as the provider. You should see a checkbox under Enterprise Feature called PrivateLink.
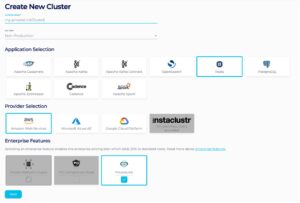
Note: The Instaclustr platform currently only supports PrivateLink for AWS.
On the Redis Setup page, select a version of Redis 7.
Under the PrivateLink Configuration Settings section, there are 2 fields: Advertised Hostname is a required field and IAM Principal ARNs is optional.
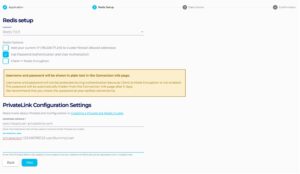
Advertised Hostname is required for PrivateLink as it is used by clients to connect to the cluster. For details on how to connect to the cluster see Connecting to a Redis PrivateLink Cluster.
IAM Principal ARNs is optional for PrivateLink and can be adjusted later by following the details in managing Principal ARNs. IAM Principal ARNs are used to allow connection from your endpoint to the created cluster’s endpoint service. For instance, if arn:aws:iam::123456789012:user/companyNameTest is a real AWS Principal ARN, and is added to this field, you will be able to create an endpoint with the provided endpoint service name. Fill those fields and click Next.
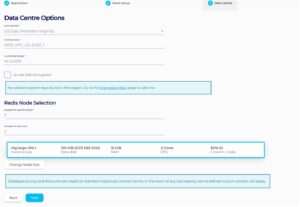
Under the Data Centre page, confirm the selected Data Centre is correct. Click Next.
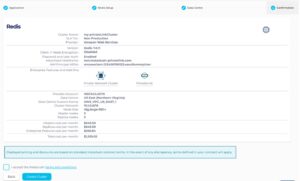
Under the Confirmation page, check that the configurations such as Advertised HostName and IAM Principal ARNs are properly configured, accept the Instaclustr terms and conditions, and click Create Cluster.
Once your cluster is running, further steps will be required to connect to it.
Please refer to our support page on Connecting to a PrivateLink Instaclustr for Redis Cluster for a guide through this process.
For more information on PrivateLink, please refer to our support documentation page.
Please contact Instaclustr Support for any further inquiries.