


Connecting to a PrivateLink OpenSearch Cluster
Overview
This page describes the steps that need to be taken to connect clients in one VPC to a PrivateLink enabled OpenSearch cluster in another VPC. In short, users need to create an endpoint with the endpoint service name of the created PrivateLink OpenSearch cluster.
Retrieve Required Cluster Connection Information
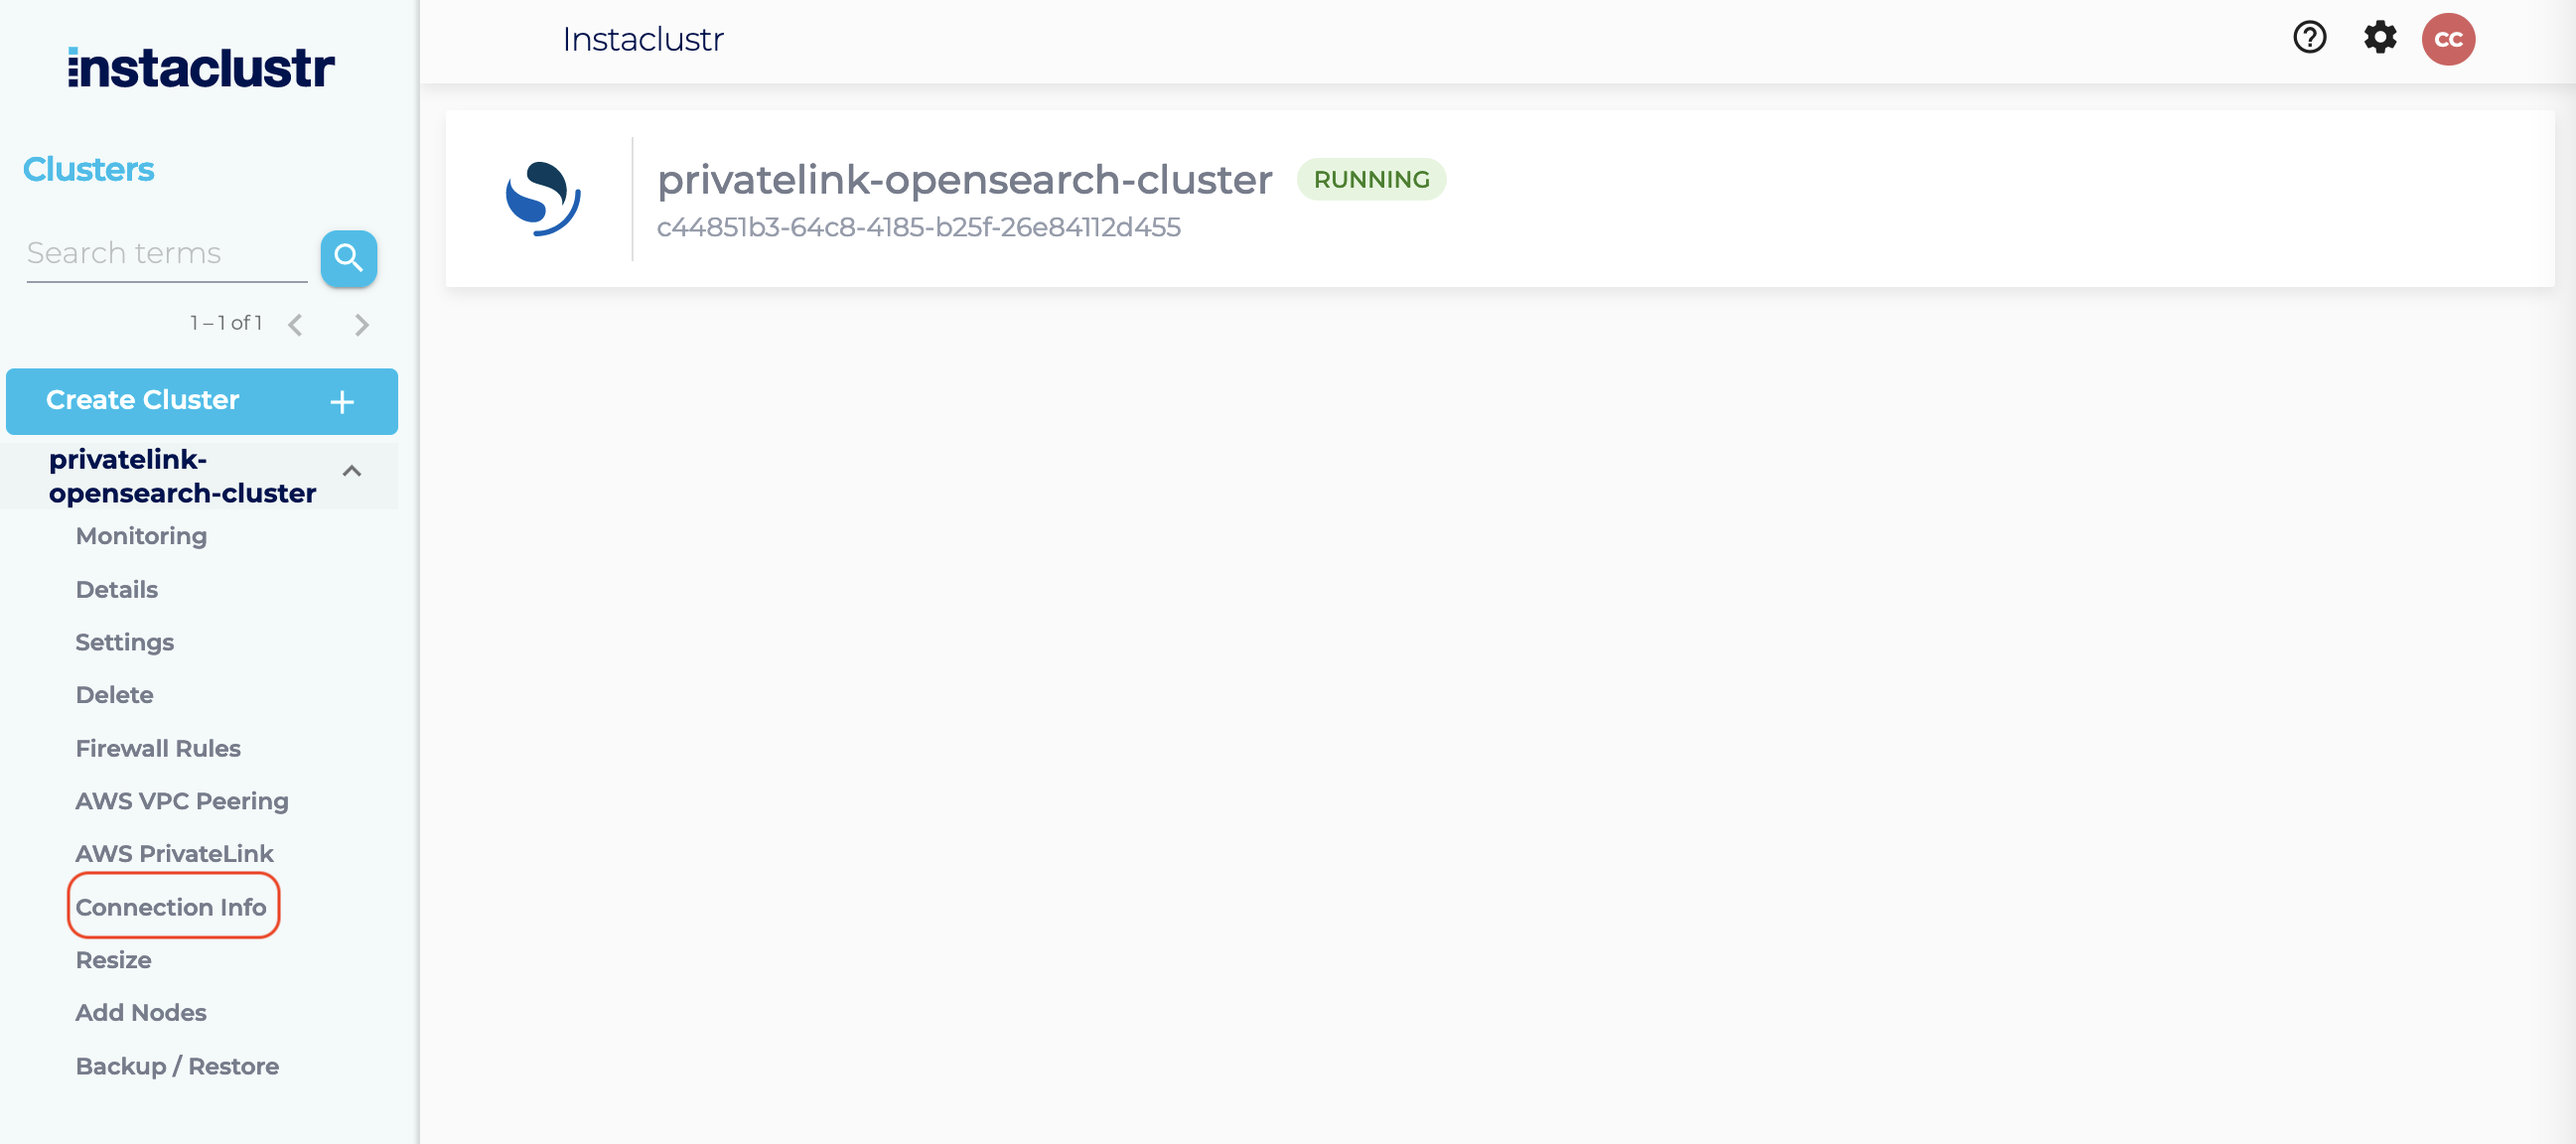
- Log into the console, click the created cluster and enter the Connection Info page.
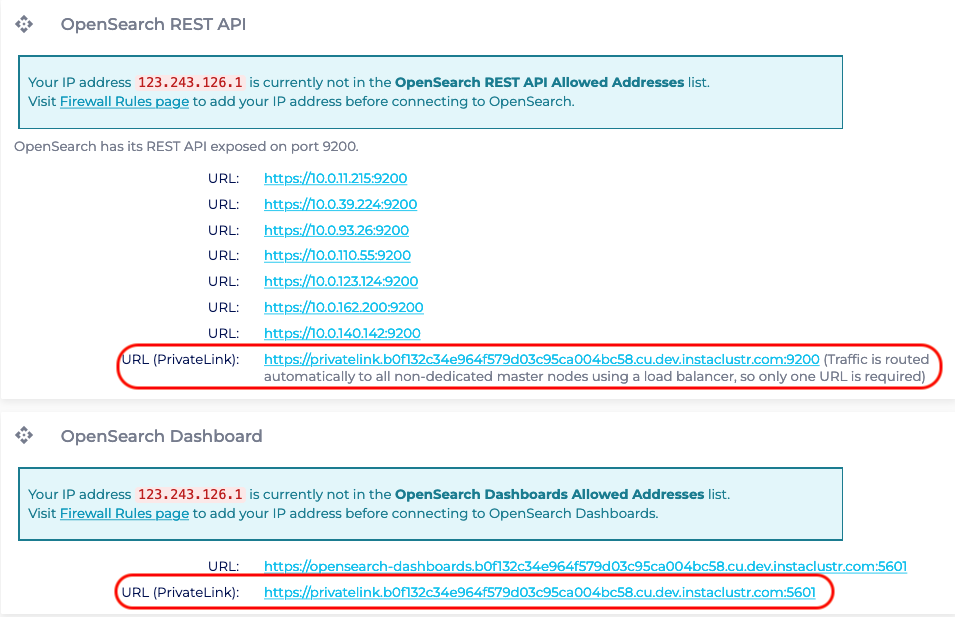
- The Connection Info page contains the specific connection details for PrivateLink. The endpoint created in the next section uses the endpoint service name shown below.
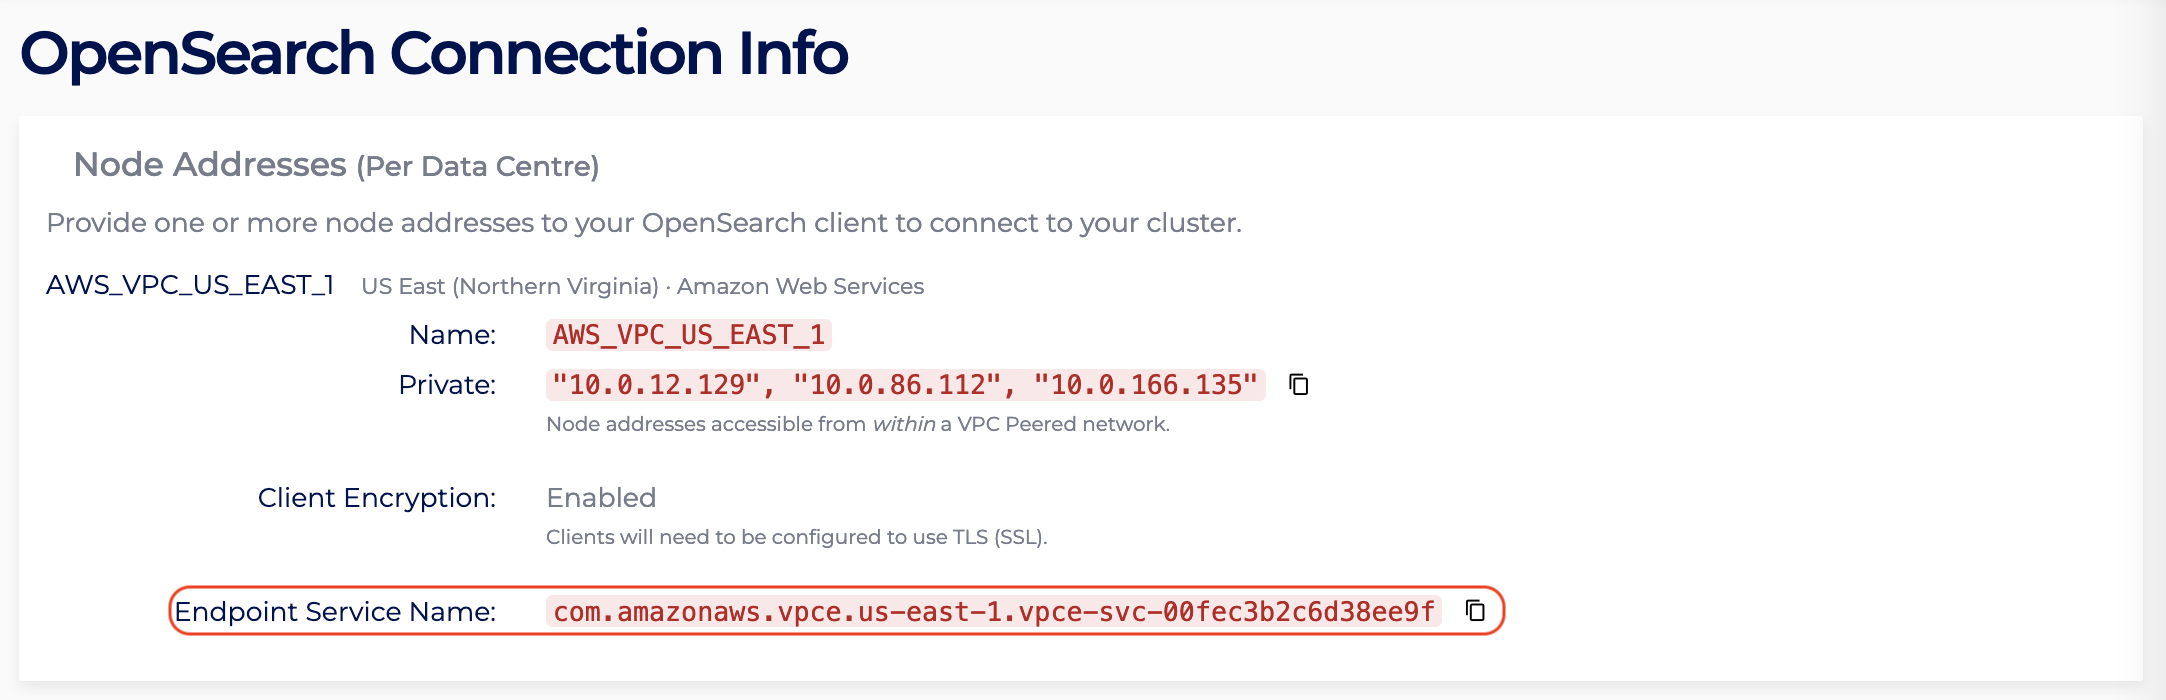

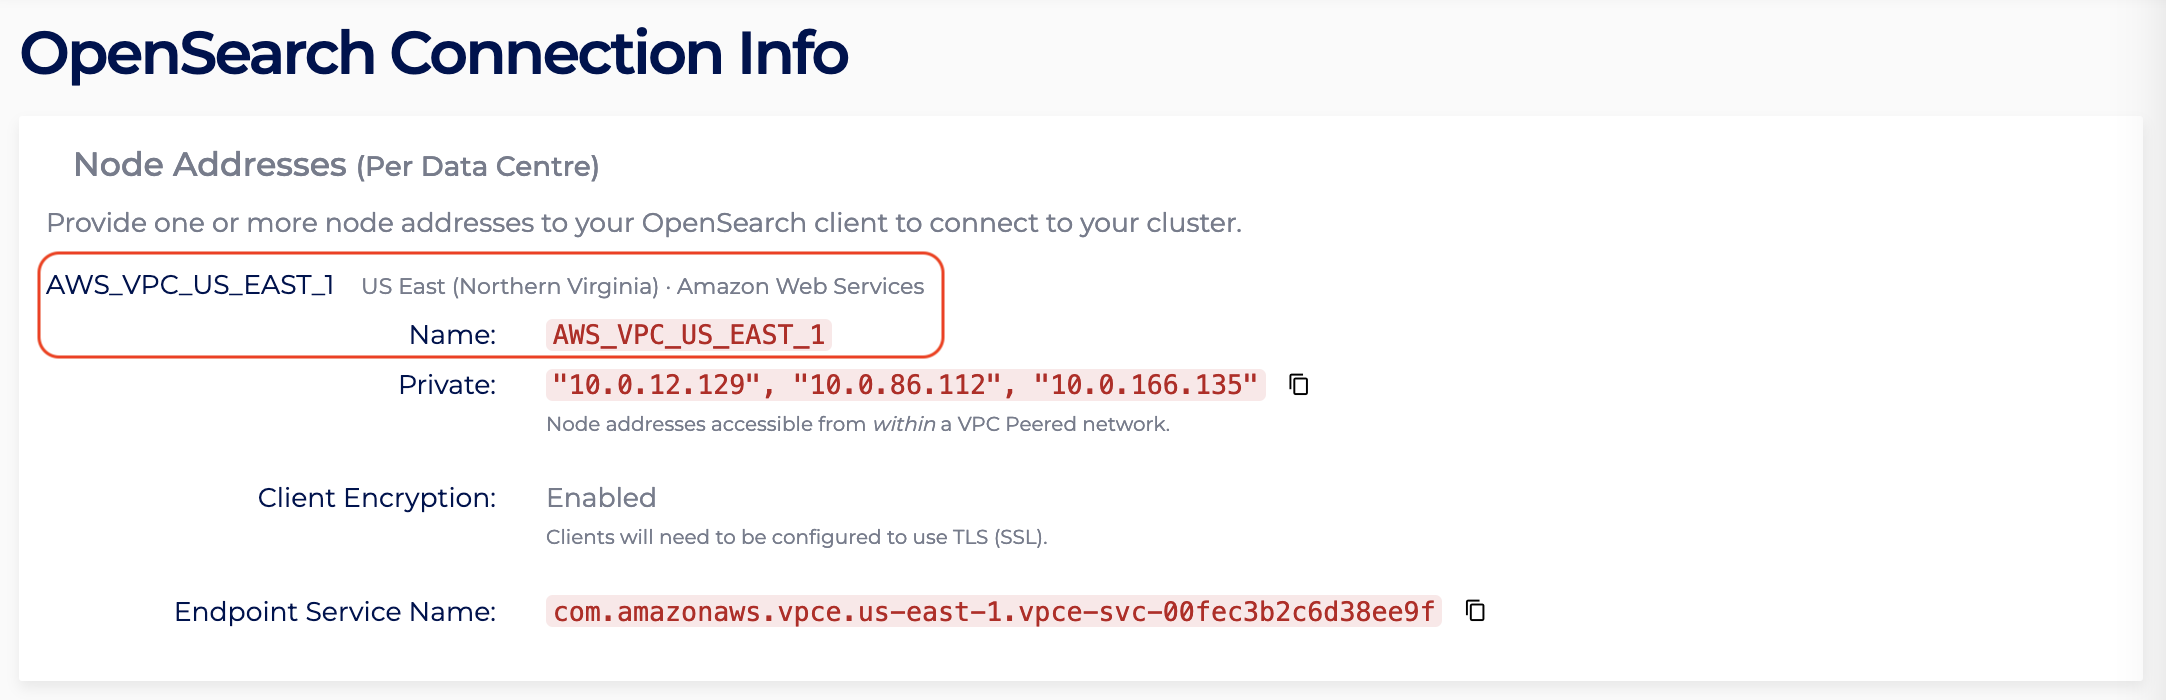
- In the Connection Info page, identify the region of the created OpenSearch PrivateLink cluster. For instance, the page shows the region is US_EAST_1, hence access to the AWS VPC Endpoint console in the US_EAST_1 region: https://us-east-1.console.aws.amazon.com/vpc/home?region=us-east-1#Endpoints:
Create Endpoint Security Group
A security group is required to allow traffic from your VPC to the PrivateLink endpoint. Your Instaclustr provided OpenSearch cluster already has a security group applied to ensure the security of your cluster, but an Endpoint cannot be created without having an associated security group. Therefore the security group being created here can be as permissive or as strict as you require. These steps will outline the recommended security group configuration.
- In the AWS Console, select the appropriate region for your VPC and navigate to the Security Groups page.
- Click “Create security group”.
- Under the heading “Security group name”, enter a name for the security group. For example, “companyName-opensearch-privatelink-group”. The name cannot be edited after creation, thus it is recommended to use a naming convention which allows easy identification of the PrivateLink endpoint and destination cluster it will be associated with.
- Under the heading “Description”, enter a short description of the security group. For example, “Allows access to OpenSearch cluster via PrivateLink”.
- Under the heading “VPC”, search for and select the VPC which will connect to the OpenSearch cluster via PrivateLink.
- Under the Inbound rules heading, click “Add rule”. The rules created here permit traffic outbound from your VPC, inbound to the OpenSearch cluster over PrivateLink.
- Select Custom TCP in the “Type” field. Enter 9200 and 5601 in the “Port range” field (n.b. Port 9200 is the OpenSearch Rest API listener port. When connecting via PrivateLink, this port is load balanced between all non-dedicated master nodes in your cluster. Port 5601 is the OpenSearch Dashboard listener port. These 2 ports will not change, and can be verified on your OpenSearch cluster’s Connection Info page. ) Select Custom in the “Source” field, then enter the CIDR of the subnet you will be connecting to the PrivateLink endpoint from (ie. the CIDR within which your EC2 Instance resides. You can find that by clicking “Subnet ID” under EC2 Instance). Optionally, add a description in the Description field.
- Repeat step 7, using ports 9001-9000+n in the Port range field, where n is the number of nodes in your OpenSearch cluster. For example, if you are using a 7 node OpenSearch cluster, the port range should be 9001-9007. n.b. If the number of nodes in the OpenSearch cluster is increased in the future, this port range will need to be extended to match the new number of nodes in the cluster. The purpose of the ports in this range is to provide a direct connection to a specific node within the OpenSearch cluster.
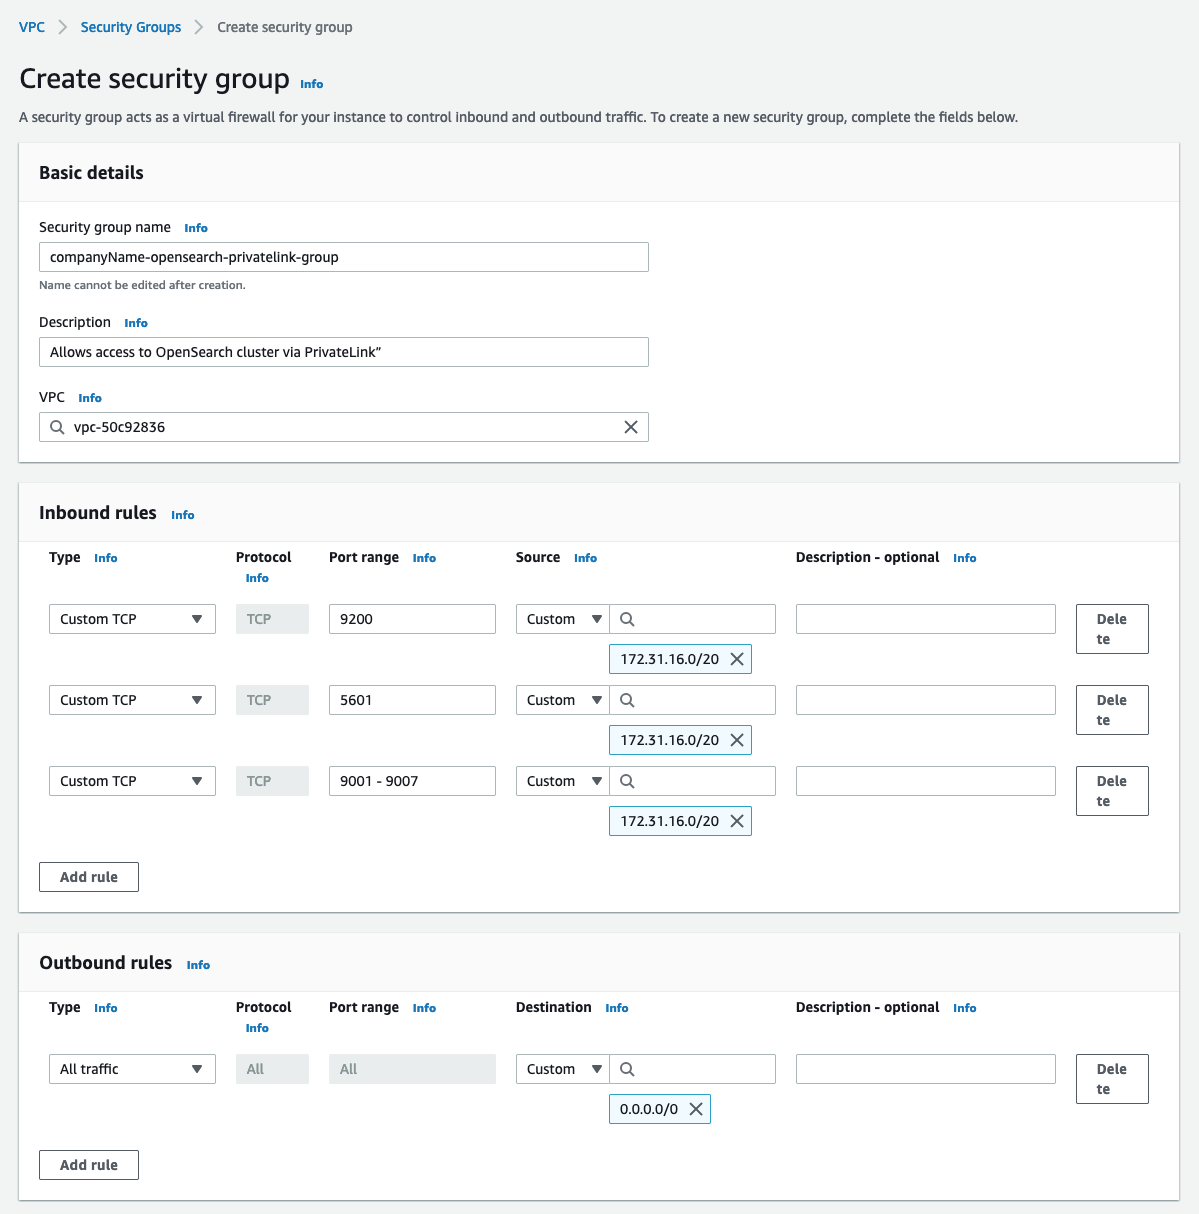

- Click “Create security group”, the security group should be created successfully. Take note of the security group name, as it will be required when creating the Endpoint in the following steps.
Create Endpoint
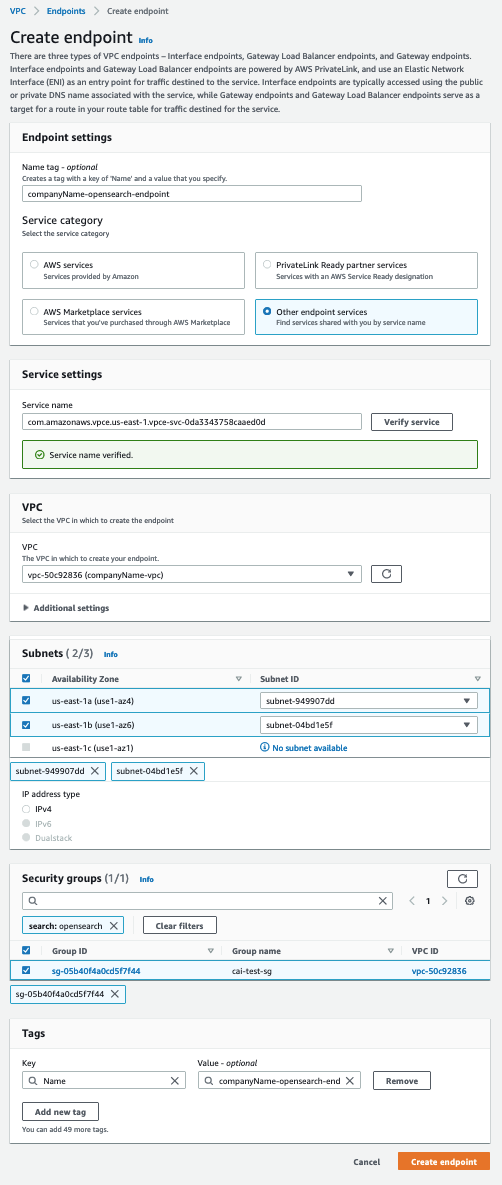
- On the AWS VPC Endpoint Console page, click Create endpoint.
- On the creation page under Service category, select Other endpoint services.
- In Service Settings, paste the endpoint service name from Connection Info page to the Service name field. Click Verify service and a green box will appear.
- For VPC, select the client’s VPC that will connect to the OpenSearch PrivateLink cluster. Note, the VPC of the client and OpenSearch PrivateLink cluster should be in the same region as we do not support inter-region access via PrivateLink.
- For Subnets, please select one Subnet ID for each Availability Zone. Please note that we recommend that your clients be located in separate availability zones to support high availability should any one availability zone be unreachable.
- Select the security group that you created earlier. You will get the following configurations. Once done, click Create endpoint.

- You will be redirected to the main VPC endpoint page which will specifically show the created endpoint. Once the Status of the endpoint reaches Available, copy the first DNS under the DNS names.


- Contact [email protected] to provide the DNS name above to update our public DNS domain.
- Once you are told DNS is updated successfully, you can refresh connection info page in console and find Dashboard, Rest API and individual node urls are updated.


Questions
Please contact [email protected] for any further inquiries.